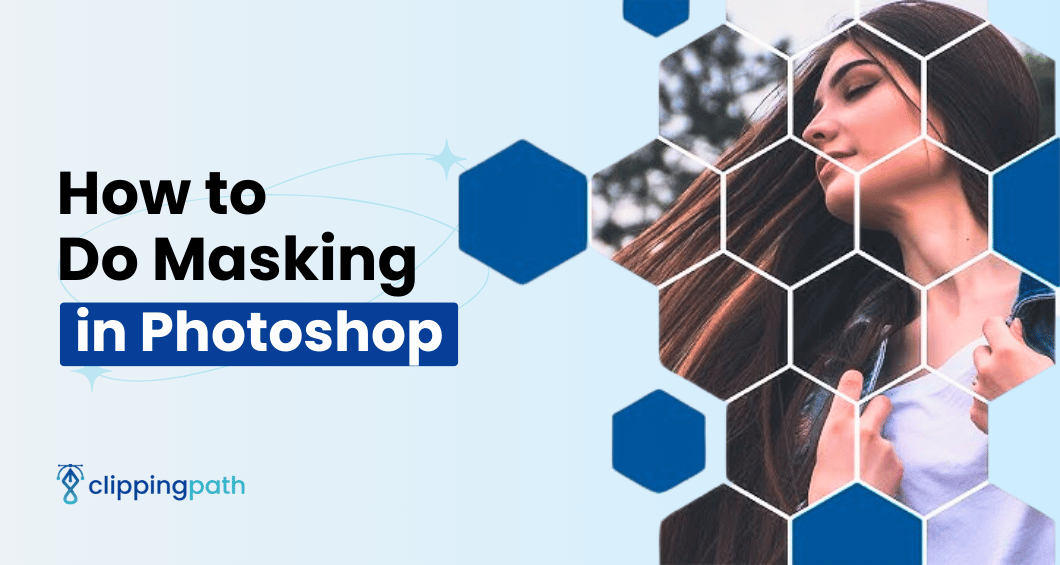
Want to isolate the main subject of your image to change the background? Image masking in Photoshop makes this possible. You can hide unwanted details of your picture and separate the subject in a new mask layer through image masking.
But how to do masking in Photoshop?
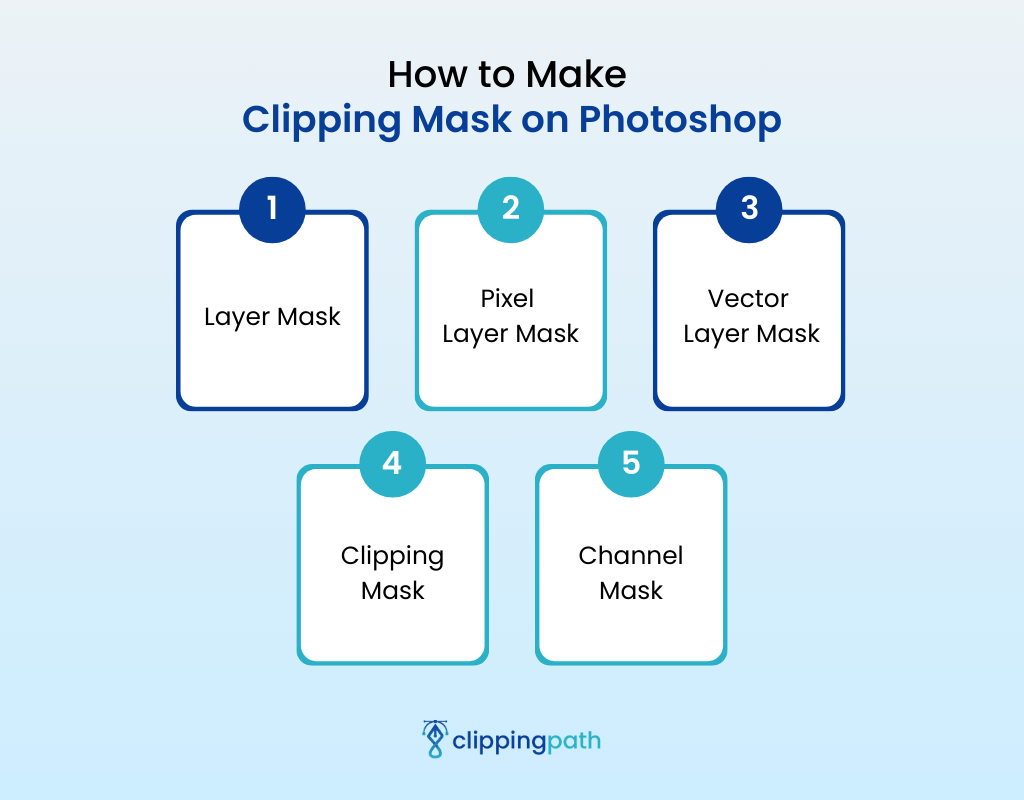
You can use a layer mask, pixel layer mask, vector layer mask, clipping mask, and channel mask for photo masking. These methods let you isolate the subject for several purposes, like merging images, changing the background, and merging shapes and photos.
Curious about the steps of these image masking methods in Photoshop? We’ll unravel a complete step-by-step guide for each method, so keep reading!
Type of Masking Available in Adobe Photoshop
Masking in Photoshop is a technique of merging two or more images into one. But how do you mask in Photoshop? There are different options available for masking photos. For instance:
- Layer Mask
- Pixel Layer Mask
- Vector Layer Mask
- Clipping Mask
- Channel Mask
How to Make Clipping Mask on Photoshop
Now you know the type of masking, and probably the first question that pops into your mind is — how do I create a mask in Photoshop using these methods. Here are step-by-step tutorials for masking quickly:
1. Layer Mask
Follow the below steps accordingly to learn how do you create a layer mask in Photoshop:
[Note for Designer: Please do a step by step process here]
Step 1: Open the Image
First, go to your Photoshop software and click “Create” to create a workplace document. Select the document size and hit OK. Next, go to the “File” in the above menu bar and click “Open” from the dropdown options.
Now open the images you want to merge for masking. If the image size is larger than your document size, zoom out by pressing “Ctrl + 0” and set the size accordingly.
Step 2: Create a Mask
So, how do I add a layer mask in Photoshop? You’ll find an icon at the bottom of the Layer Panel containing square and circle shapes.
That’s the “Layer Mask” icon. Select the background layer where you want to add the mask.
Click on it to add a layer mask on your main picture background layer. A thumbnail will be added beside the selected background layer.
Step 3: Merge the Other Image
Before merging the image in a Layer Mask in Photoshop, you need to edit the original image. Click on the Layer Mask Thumbnail on the background layer.
In the color box located in the toolbar, set the foreground and background color to black and white, respectively.
Select the brush tool and brush over the areas where you want to remove information. The brushed area will appear white.
Open the second image you want to merge and add a Layer Mask to the new layer. Adjust the image position, use the brush tool to remove the information, and blend the two images together.
2. Pixel Layer Mask
This method lets you have more control over the transparency of details. Now the question is — how do I mask in Photoshop using the Pixel Layer Mask? Here are the quick steps:
Step 1: Open the Image
First, open the photo on which you want to create a mask. After opening the document in Adobe Photoshop, go to the “File,” click “Open,” and select the image.
Step 2: Make Selection
Now, you need to select the main subject to isolate it. Photoshop offers multiple ways to make a selection, and “Select Subject” is one of the easiest ways.
Go to the “Select” in the above menu and click “Subject” to open a new selection setting bar.
From the settings bar, click on “Select Subject” to automatically select the main subject.
Now, press the Q key on your keyboard to access the “Quick Mask Selection View.” Through this view, you can see which areas will be visible and which areas will be removed after the Mask. The areas of removal will appear in colors.
Press Q again to return to the selection view. If your automatic subject selection needs some adjustment, use the brush tool to modify it. The white brush will add information to the selection, and the black brush will eliminate details.
Step 3: Create the Mask
The Layer Mask icon is located at the bottom of the Layer Panel. It’s a square icon with a circle in the middle. Clicking on the icon creates the image mask with a thumbnail in the photo layer.
Now, you can use the subject mask to change the background. If your subject is human, you must carefully mask hair to make the mask look professional.
Pro Tips: Turn your mask into a Smart Object to prevent quality drops. A Smart Object will keep the quality of the masked subject intact.
3. Vector Layer Mask
Unlike the Pixel Layer Mask, the Vector Layer Mask is resolution-independent and can be easily modified. Here’s a step-by-step guide:
Step 1: Open the Image and Pick the Pen Tool
First, open the image on which you want to create a vector layer mask. Now, pick the Pen tool to make selections around the main subject! You can access the tool manually from the toolbar on your right side or simply press P on your keyboard.
Besides the pen tool, you can use other selection tools, such as the lasso tool, quick selection tool, or the automatic “Subject Selection” feature from the “Select” menubar.
Step 2: Make Selection (Anchor Path)
Click on the edges of the subject to create an anchor point, then create another anchor point at a little distance. This will create a straight line.
If you need curved lines, you need to click and drag the handle of the anchor point till you find the required curve.
Continue this process around the subject edge till you reach the first anchor point in the edges. Once you reach close to the first anchor point, connect the last anchor point over the first anchor point to make the whole selection.
Step 3: Convert to Vector Mask
While your subject selection is on and the layer is selected, go to the “Layer” in the menu, click “Vector Mask,” and then select “Current Path” from the options. That’s it! Your vector mask is ready to use for masking edit.
What if the subject edges need adjustment after masking? Hit the key A on your keyboard to access the Direct Selection Tool. It’ll make the anchor points and handles of the path visible for adjustment.
4. Clipping Mask
This is the widely used masking technique in Photoshop. You can merge an image into any shape using the clipping mask method. But how do I create a clipping mask in Photoshop? Here’s an easy step-by-step guide:
Step 1: Open the Image and Make Shape Layers
Open the Photoshop software and add the image to the document. Then, add a new layer in the layer panel and add the text or shapes that you want to use for a clipping mask.
But you need to know how masks work in Photoshop when using the clipping mask method! Make sure you keep the image background layer above the shape layer; otherwise, clipping masks won’t work.
Step 2: Make Clipping Mask
Creating a clipping mask is pretty easy and takes only a minute! First, select the image layer > right-click on the mouse > click “Create Clipping Mask.” You should now see that the background image has merged into the shape.
Move the image and position it correctly after masking.
Note: The keyboard shortcut of “Create Clipping Mask” is Ctrl + Alt + G.
5. Channel Mask
This masking method is pretty useful for photo mask editing as well as removing the photo background. Here’s how to make a Channel Mask:
Step 1: Create Channel
First of all, navigate to Photoshop and open the image for channel masking. Click on the “Window” option in the menu bar and select “Channels” from the dropdown options.
Step 2: Select the Color for the Channels
Go to the channel tab and set the channel name using color. For example, set the background tab in B&W color to contrast the subjects and background. However, you can set any color you want; there’s no specific rule for it!
Step 3: Copy the Background and Paint It
Now select the background layer and drag it over the new channel layer to make a copy. Pick the brush tool from the toolbar or press the B key and set the colors of the brush from the toolbar.
Select white as the foreground and black as the background color. Set the brush blend mode to “Overlay” from the brush settings bar.
Now, use the brush to paint over the objects and areas that you want to keep masking from the image using the white foreground color.
Then, switch to black as the foreground ground and white as a background color to paint over the photo background area.
After you’ve painted the background, change the brush blend mode to “Normal” from “Overlay.”
Step 3: Activated the Painting
Press and hold the Ctrl key on your keyboard, then click on the copy of the background layer. You should now see that painting over the background has activated as shown in the following picture.
Step 4: Inverse the Painted Areas
The inverse method basically selects black areas from an image and deselects white areas. Therefore, we painted the background white and kept the main subject and other objects painted in black.
Go to the “Select” option in the menu bar and click “Inverse” from the dropdown options.
Select the main background layer in the Layer Panel and click on the “Add Mask” icon.
You should now see that the masking layer has copied all the inverse selection and removed the background from the image. Now use this masked layer to edit the image according to your liking!
Conclusion
So, how to do masking in Photoshop? You now know the step-by-step guide of the most used methods for image masking. Among all these methods, clipping mask is the most popular one for merging an image with shapes and texts.
The layer mask is ideal if you’re trying to merge two images together using the masking method. And the other three methods help change the background and mask the image.
If you have any queries, leave a comment below. We’ll get back to you! Besides, you can also contact us for professional image masking service at Meta Clipping Path!
Meta Clipping Path – A well-known one-stop photo editing service provider company with 5+ years of experience and 25+ highly skilled professionals.
Working with 20 reputed worldwide e-commerce companies and 200+ satisfied customers.
![Read more about the article How to Invert a Clipping Mask for Beginners and Pros [Illustrator and Photoshop]](https://metaclippingpath.com/wp-content/uploads/2024/06/How-to-Invert-a-Clipping-Mask-300x160.png)