![You are currently viewing Clipping Mask Not Working Photoshop [The Causes And Solutions]](https://metaclippingpath.com/wp-content/uploads/2024/06/Clipping-Mask-Not-Working-Photoshop.png)
Having a hard time making a simple clipping in Photoshop? Is the clipping mask effect not working correctly? Well, this is common among the new graphic users. There are several reasons why clipping mask not working Photoshop.
The causes behind the error in the clipping mask process can be because —
- Using the wrong tool for clipping
- Not setting up the layers in order
- Editing the image with layer effects before clipping
- The shape layer is invisible
- Your image layer is locked
Not only these, you may have other causes too. But is there any way to fix clipping mask problems in Photoshop? Yes, you can fix these problems quickly, and you don’t even need a professional to help you with it.
So, what are the steps for fixing it? We’ll explain all the possible reasons in detail and provide easy solutions for each cause. So, let’s dive in!
A Quick Overview of Clipping Mask Not Working Photoshop with All Possible Causes and Solutions
Before we get into the detailed discussion, here is a table of possible reasons with their easy solutions:
| Causes | Solutions |
| Using Layer Mask instead of Clipping Mask | Select “Clipping Mask” tool for clipping |
| Layer order issues | Keep the shape layer below the image layer |
| Not suitable color of mask contents | Edit the image first, then work on clipping task |
| Using layer styles | Remove all additional layer styles |
| Transparency in the clipping layer | Ensure 100% opacity of layers |
| Locked layers | Unlock it from the layer panel |
| Hidden clipping shape layer | Turn on the eye icon |
| Mask editing mistakes | Complete editing before clipping or undo clipping mask for editing |
What are The Reasons Behind Clipping Mask Not Working in Photoshop?
One of the common issues that editors often encounter is clipping mask not working in Photoshop. The reasons behind this problem are pretty similar for both Adobe Photoshop and Illustrator.
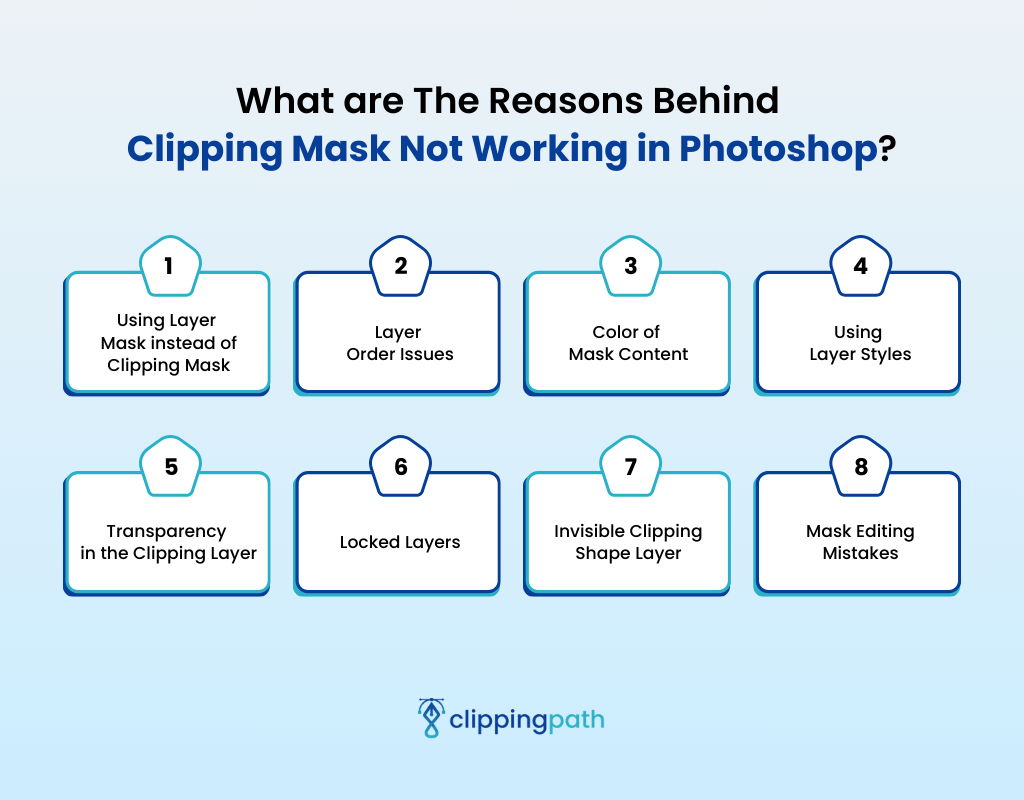
But what are the reasons why the clipping mask photoshop isn’t working? Here are they:
1. Using Layer Mask instead of Clipping Mask
In Photoshop, there are two different tools containing the word “mask.” So, beginner Photoshop users may get confused easily between these two tools.
However, a layer masking tool is generally used for hiding/revealing and merging layer contents.
In contrast, a clipping mask in Photoshop uses another layer entirely to define the transparency and masking a photo into shapes. You must use the “Clipping Mask” tool for the clipping mask task.
Easy Solution
The simple solution to this issue is to use the right tool for clipping masks.
To select the tool, click on the down arrow at the top right corner of the Layers panel. This reveals the Layers panel menu, where you can find the clipping mask options.
2. Layer Order Issues
If you google clipping mask not working Photoshop Reddit, you’ll notice that most editors are making a small mistake of keeping the clipping shape layer above the photo. But this is wrong in Photoshop!
The rule of clipping masks is to keep the image layer above and the shape layer below for both general and inverted clipping masks. If another layer gets between these two layers, it will break the clipping relationship.
Easy Solution
Simply hold the cursor over the clipping image layer and drag it over all the others. Then, drag the clipping shape layer below the first (image layer) layer.
3. Color of Mask Content
The color of the mask image or shape should have defined colors. Sometimes, an image contains solid black areas, which get the content layer hidden in the mask.
Again, the mask may create light transparency for gray areas, and white areas remain defined even after masking.
Easy Solution
Examine your masking photo and layers before applying the clipping mask in Photoshop. If the image has dark or gray areas, you should work on editing those areas first or use another image for masking.
4. Using Layer Styles
Some layer styles, such as Drop Shadow, create a blended and semi-transparent copy of the layer below it.
As a result, when you apply a clipping mask effect on the image layer containing secondary layer data, it can confuse the masking process.
Thus, you may see that the clipping mask disappears in Photoshop after masking the image in the shapes. Outer glows similarly preserve pixel consistency that may not look good within clipping limitations.
Easy Solution
If you’ve edited the picture with layer styles before the clipping mask, then undo these new changes and use the unedited layer for the task. Another solution is to save your edited image first and reopen it for a clipping mask.
5. Transparency in the Clipping Layer
The layer you’re using as the clipping mask shouldn’t be transparent. If you use a Photoshop clipping mask with a transparent background, you won’t see anything in the shape, as there is no pixel data to clip.
Easy Solution
No matter where this issue appeared, whether the clipping mask not working Photoshop Mac or Windows, the solution steps are the same. Here’s how to solve the transparency issues in layers:
- First, you need to release the existing clipping mask from the “Layers Panel Menu” and then click “Release Clipping Mask.”
- Select all the layers required for the clipping mask.
- Right-click on your mouse and select “Reset Layer Style” to reset any opacity or blend mode adjustments.
- Once the opacity level is 100%, reorder the layer and create a clipping mask again.
6. Locked Layers
You can lock layers in Photoshop to preserve a layer from being changed while working. So, if you have a locked layer that you’re intended to use for clipping, the clipping mask effect won’t work.
Easy Solution
Check if the image or shape layer is locked in the Layer Panel. If it’s locked, then you’ll see a lock icon beside the eye icon in the layer. Click on the lock icon, and you can use the content layer to clip.
7. Invisible Clipping Shape Layer
Like the locked layer, invisible layers will hinder the clipping mask process in Photoshop.
Generally, Photoshop create clipping mask from shape; therefore, the clipping shape layer must be visible on your screen. Otherwise, Photoshop will not understand where to clip the image.
Easy Solution
If your clipping shapes are invisible on your screen, follow these steps —
- Go to the layer panels in Photoshop.
- Click on your clipping shape layer and check the eye icon.
- If the eye icon is off, click on it to make the shapes visible over the image.
8. Mask Editing Mistakes
Once you are done with clipping the photo into the shape, you’re not supposed to modify any layers.
Adjusting the clipping container layer, such as transformations, blending modes, or adding layer styles, can disrupt the clipping effect and ruin the final work.
Easy Solution
If you need to make adjustments to the image or shape after clipping, you first have to undo the clipping effect and then proceed with your edits. This practice can help you avoid post-editing issues and ensure a smooth workflow.
Conclusion
To sum up, the key problems behind clipping masks not working in Photoshop are using layer styles, layer order issues, not using the right tool, locked layers, etc. Fixing the causes is also quite straightforward.
Make sure you release the clipping mask while working to fix the issue; otherwise, you’ll end up requiring more fixes than solving the problem. If you can’t fix the issue, you can rely on the best clipping path services for professional editing.
Meta Clipping Path – A well-known one-stop photo editing service provider company with 5+ years of experience and 25+ highly skilled professionals.
Working with 20 reputed worldwide e-commerce companies and 200+ satisfied customers.
![Read more about the article How Do Clipping Masks Work? [Step-by-Step Guide]](https://metaclippingpath.com/wp-content/uploads/2024/05/How-Do-Clipping-Masks-Work-300x160.png)
![Read more about the article What is a Clipping Mask in Illustrator? [Type, How to Create, and More]](https://metaclippingpath.com/wp-content/uploads/2024/06/What-is-a-Clipping-Mask-in-Illustrator-300x160.png)
![Read more about the article How to Convert Clipping Mask to Shape Illustrator [Expert Photo-editing Tips for You]](https://metaclippingpath.com/wp-content/uploads/2024/06/How-to-Convert-Clipping-Mask-to-Shape-Illustrator-300x160.png)