![You are currently viewing How to Convert Clipping Mask to Shape Illustrator [Expert Photo-editing Tips for You]](https://metaclippingpath.com/wp-content/uploads/2024/06/How-to-Convert-Clipping-Mask-to-Shape-Illustrator.png)
Do you want to define the visible area of an object in a photo? Clipping masks are a powerful tool in Adobe Illustrator for this! But what if you need to turn it into a shape?
You can convert the clipping mask to shape Illustrator using Pathfinder or by duplicating and expanding. Clipping masks can help you to create a clean and versatile workflow by defining the underlying work.
Want to use clipping masks effectively and convert them into editable shapes? We’ll share the best tips for efficient masking in Illustrator.
What is Masking in Illustrator?
You can control the visibility of an object by using another object as a “mask.” The mask defines the area that remains visible on the underlying object. Here are two masking types in Illustrator:
- Clipping Mask: This is the most common type. Here., the mask object completely hides the underlying artwork except for the areas that overlap with its shape.
- Opacity Mask: You can control the transparency of the underlying object based on the grayscale values of the mask object. In opacity masking, the white areas are fully visible, and the black areas are completely hidden. The grayscales create different degrees of transparency.
How to Create Clipping Masks in Illustrator
Before using a clipping mask, you need to know how to create one –
- Prepare Your Artwork: Have two objects ready: the object you want to mask (underlying object) and the mask object (defines the visible area).

- Select Both Objects: Ensure both the underlying object and the mask object are selected.
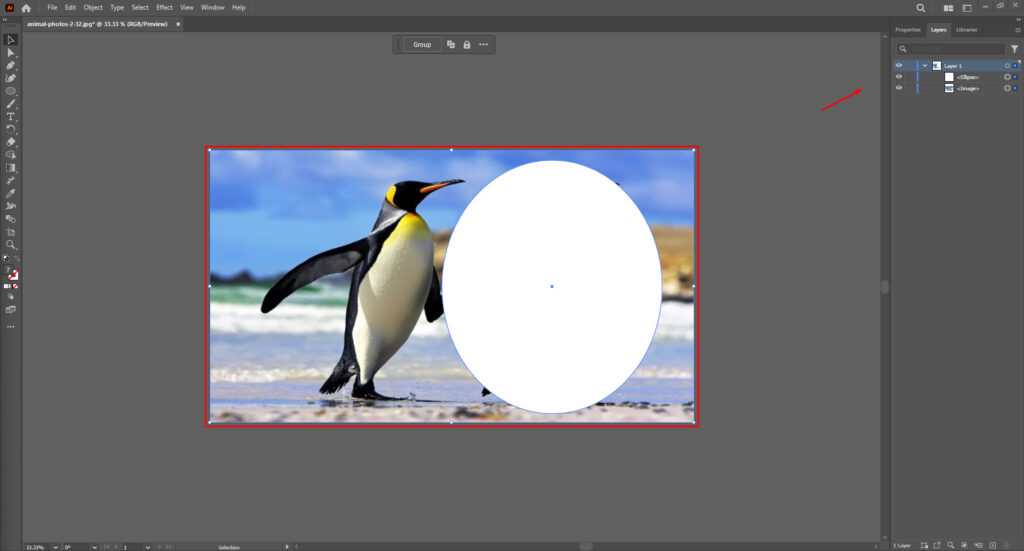
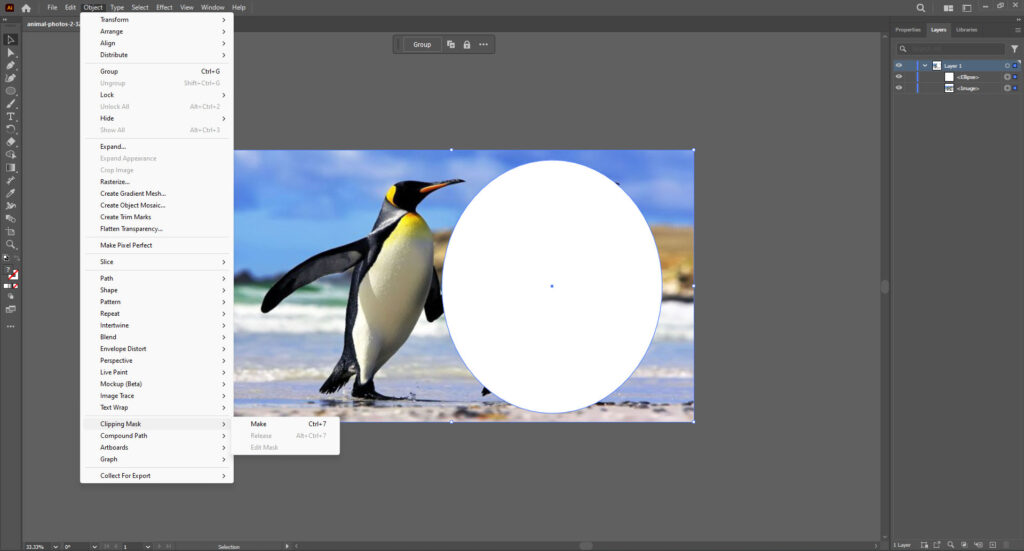
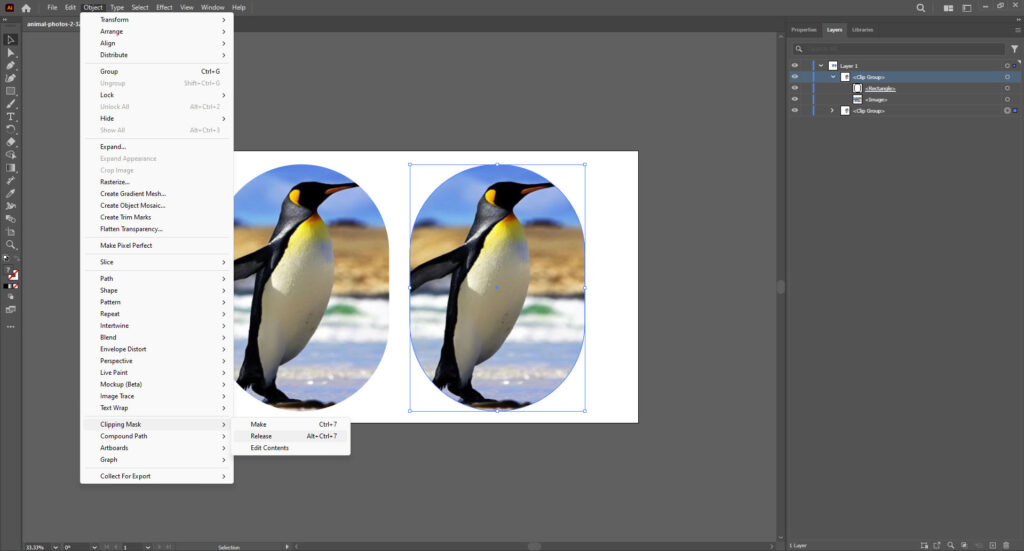
- Create the Clipping Mask: Go to the Object menu in the top bar and choose Clipping Mask > Make.
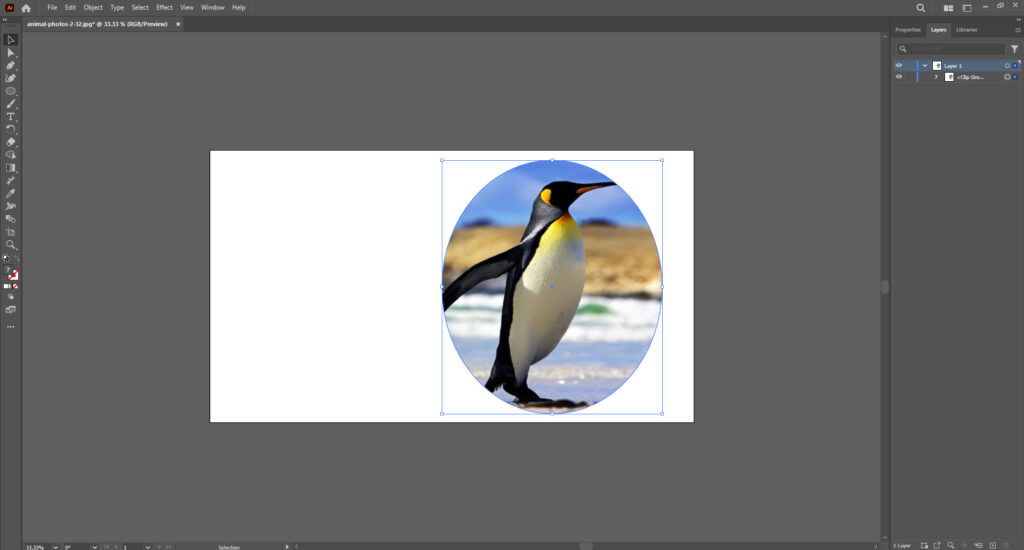
Now, the underlying object will only be visible where it overlaps with the mask object. You can edit the mask object to refine the visible area further.
How to Convert Clipping Mask to Shape Illustrator
Wondering how to use a clipping mask in Illustrator? We’ve got you covered! Here are two effective methods for converting a clipping mask to a shape:
Using the Pathfinder Panel
Here’s how the Pathfinder panel can help the Illustrator apply clipping mask –
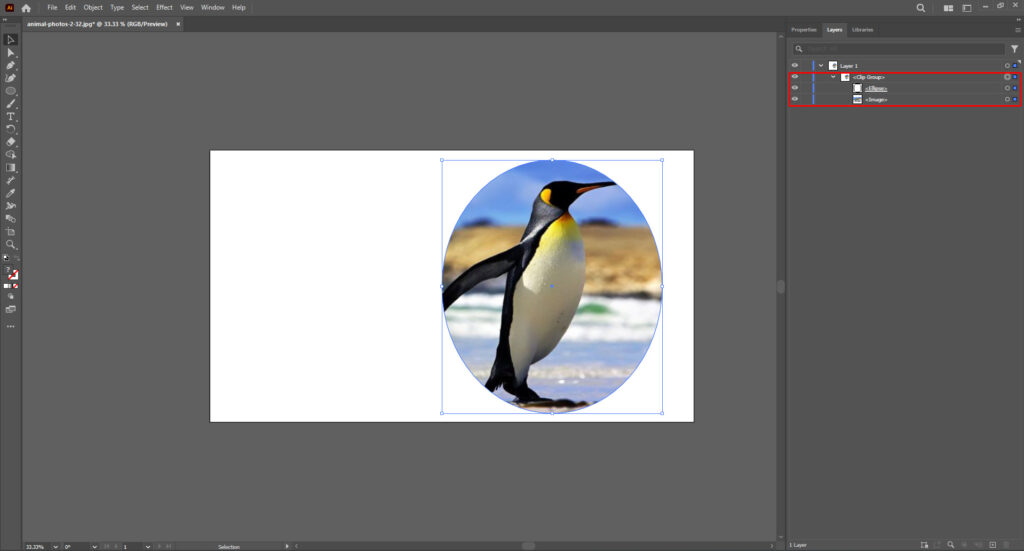
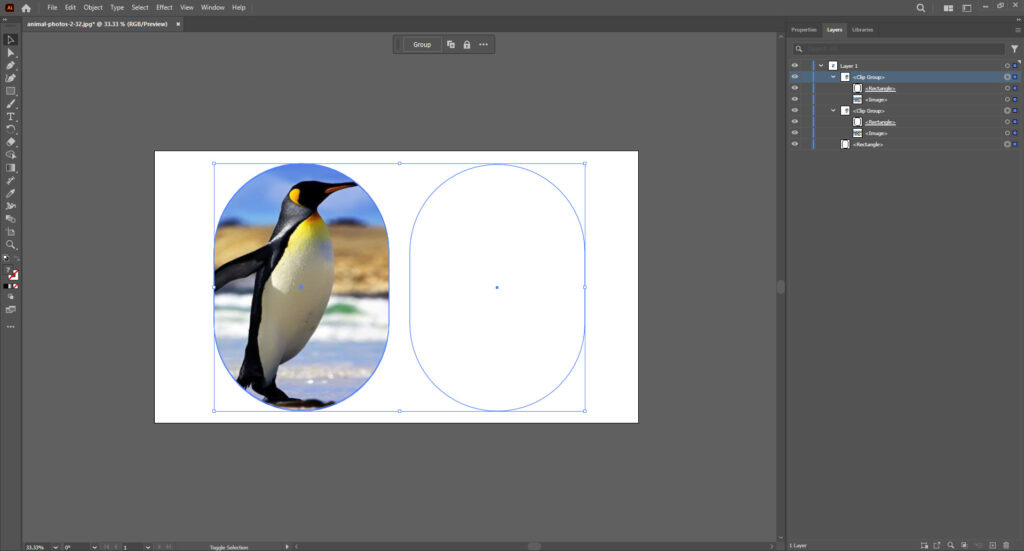
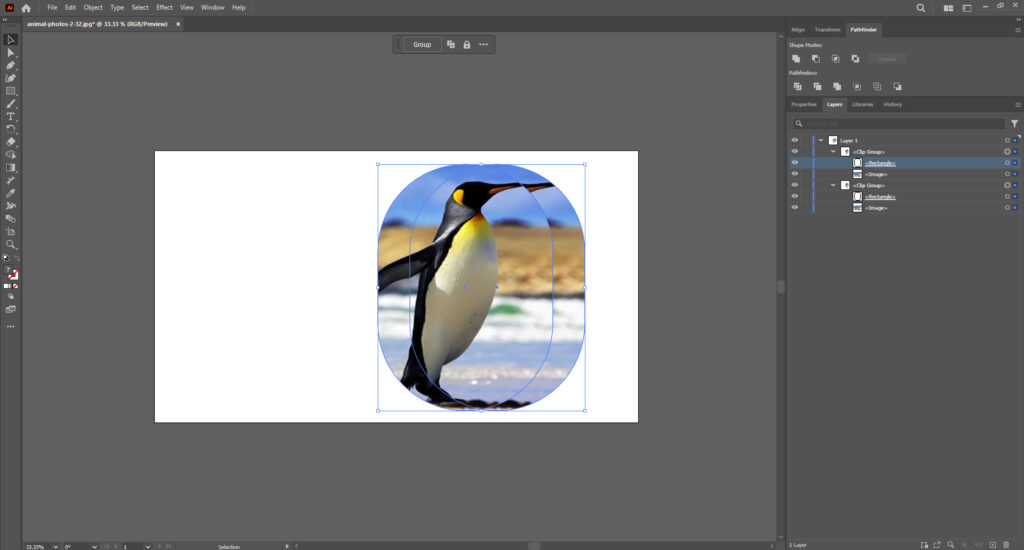
- Identify the Clipping Mask Group: You can find the clipping mask group in the Layers panel. It’s usually named “Clipping Mask” or similar.
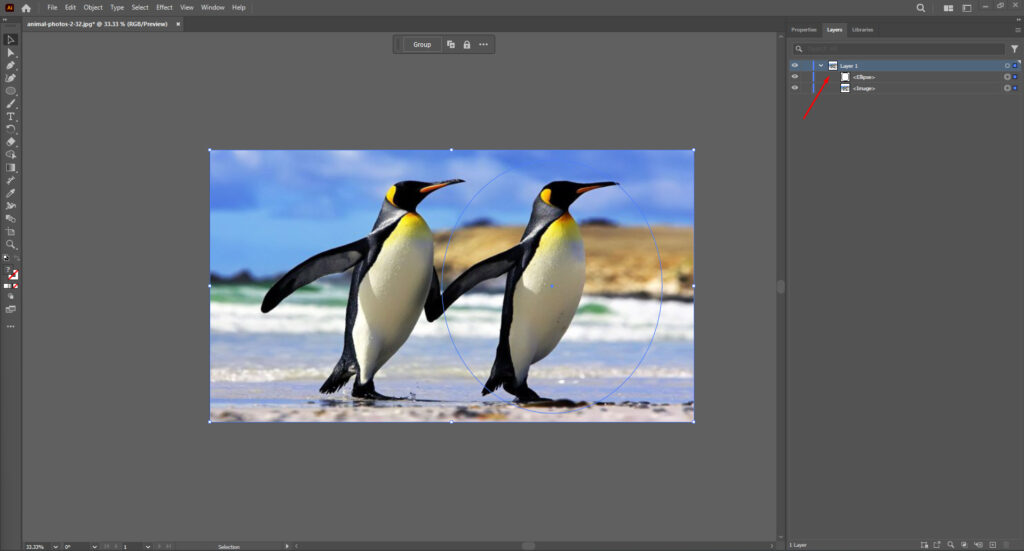
- Release the Clipping Mask: Want to edit the revealed area more? Select the group to release the mask. Now, choose Object > Clipping Mask > Release. This separates the mask and the underlying object.
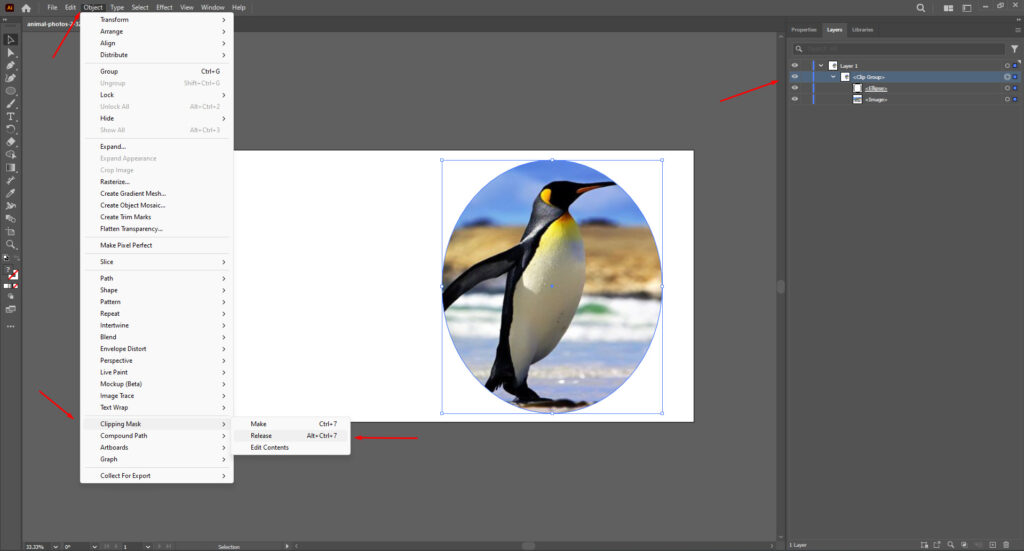
- Select the Clipping Mask Group: Make sure that only the clipping mask group is selected. You don’t need the individual objects within it.
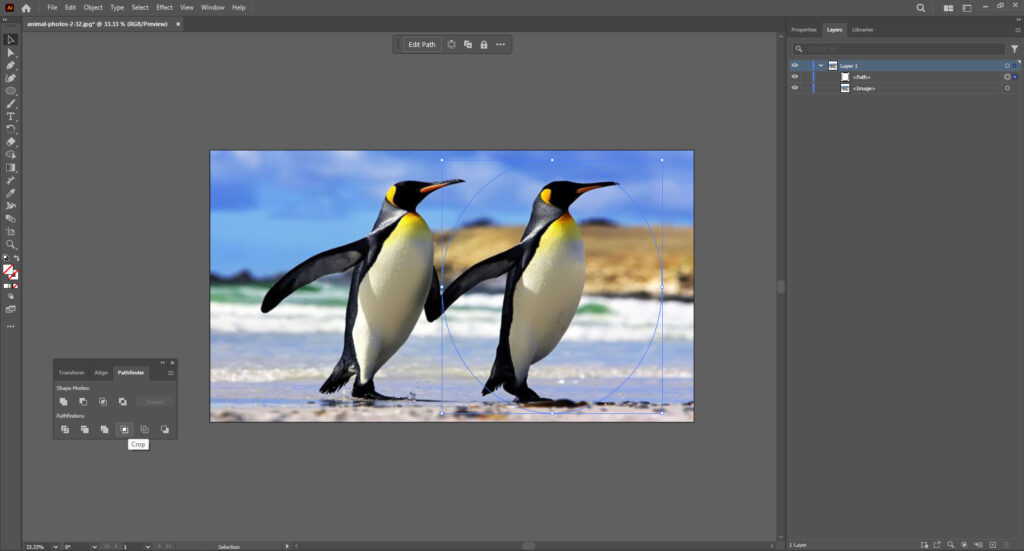
- Open the Pathfinder Panel: Go to Window > Pathfinder.

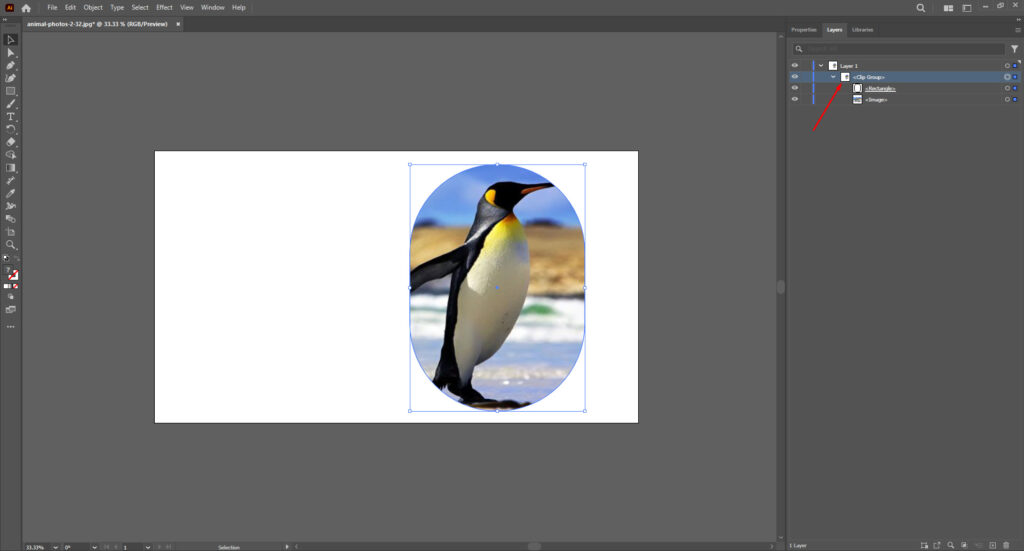
- Apply the Crop Function: How to flatten clipping mask Illustrator? Click the Crop button in the Pathfinder panel. This can “flatten” the clipping mask and create a new shape based on the intersection of the mask object and the underlying artwork.
Duplicating and Expanding
If you don’t want to use the Pathfinder panel, here’s another way –
- Identify the Clipping Mask Group: Find the clipping mask group in the Layers panel.
- Duplicate the Clipping Path: If the mask is part of a larger design, you can duplicate the clipping path within the group for safety. Do this by selecting the path and using Edit > Copy>Edit > Paste in Front.
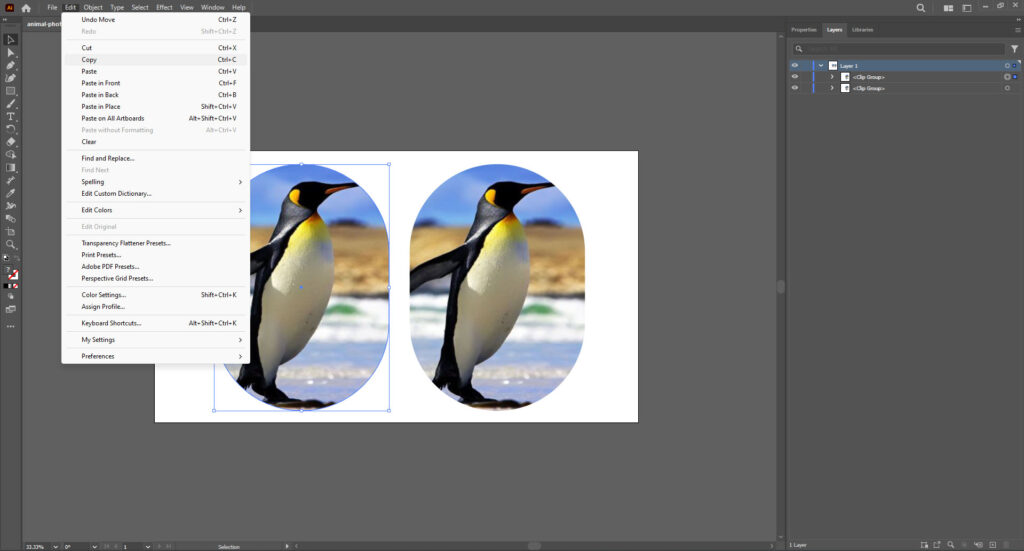
- Isolate the Clipping Path: If you release the clipping mask, you can skip this step. Otherwise, select the clipping mask group and choose Object > Clipping Mask > Release. This will reveal the separate mask object and underlying artwork. Drag the underlying artwork away from the mask path for better visibility.
- Isolate the Mask Path: Select only the mask path (the object defining the visible area).
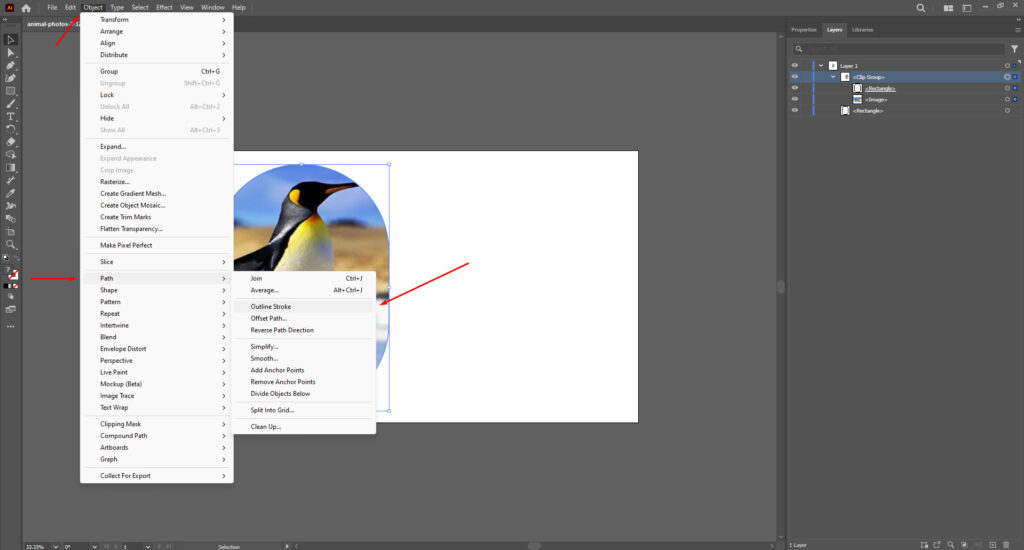
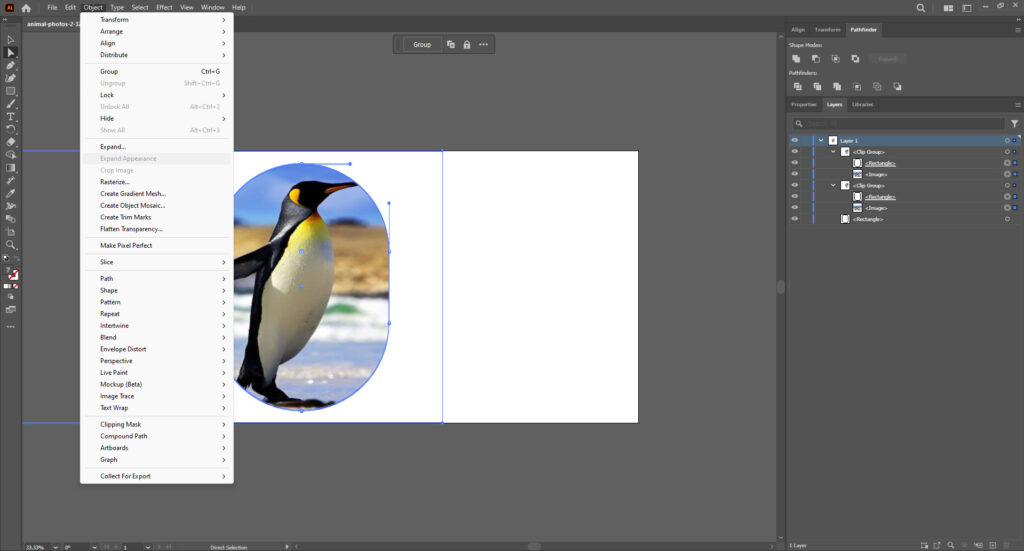
- Outline the Stroke: If the mask path is a stroke, convert it to a filled shape for easier manipulation. Select the path and choose Object > Path > Outline Stroke.
- Duplicate the Underlying Artwork: Select the underlying artwork (the object previously masked) and duplicate it using Edit > Copy > Edit > Paste in Front.

- Bring the Duplicate to the Front: Ensure the duplicated artwork is positioned above the original and the mask path.

- Select Both Paths: Use the Selection tool to choose both the duplicated underlying artwork and the mask path (previously outlined if necessary).
- Expanding Appearance: If you used a stroke for the mask path, you might need to expand its appearance before using the Pathfinder panel. How to expand clipping mask Illustrator? Select the path and choose Object > Expand Appearance.
This converts stroke attributes like weight and profile into actual shapes.
- Apply the Intersect Function: Click the Intersect button in the Pathfinder panel. This creates a new shape based on the overlap between the duplicated artwork and the mask path. Thus, it cuts out the masked area from the duplicate, leaving you with the desired shape.
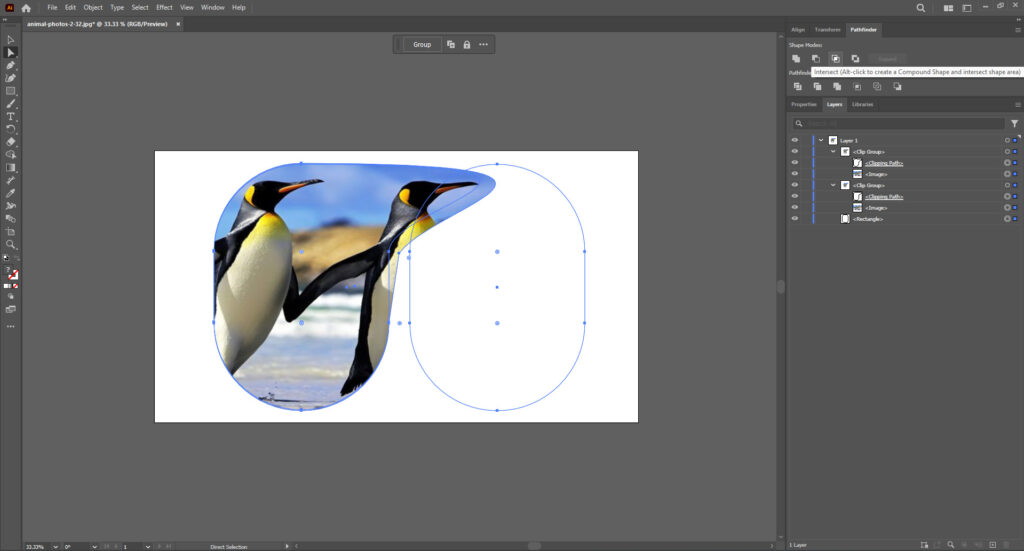
- Clean Up: You might have unnecessary anchor points on the newly created shape if your design is too complex. Use the Direct Selection Tool (A) to select and delete any unwanted points.
How to Use Reverse Clipping Mask Illustrator for Shapes
What if you want to reveal the area outside the clipping mask shape instead? Here’s how to achieve a reverse clipping mask effect:
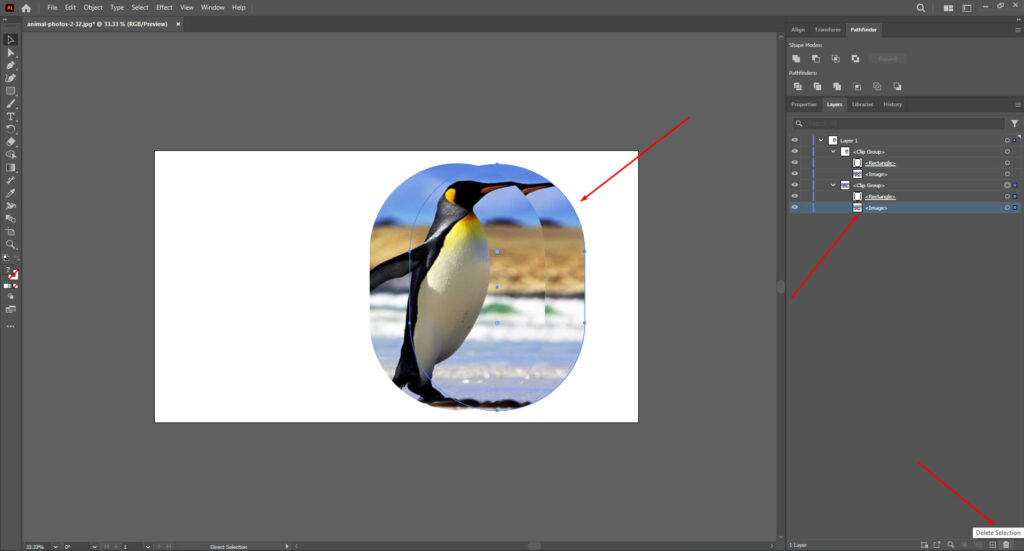
- Duplicate the Clipping Mask Group: Select the clipping mask group and duplicate it using Edit > Copy > Edit > Paste in Front.
- Isolate the Underlying Artwork: In the newly created group, select the mask path and hit Delete. This reveals the underlying artwork entirely.
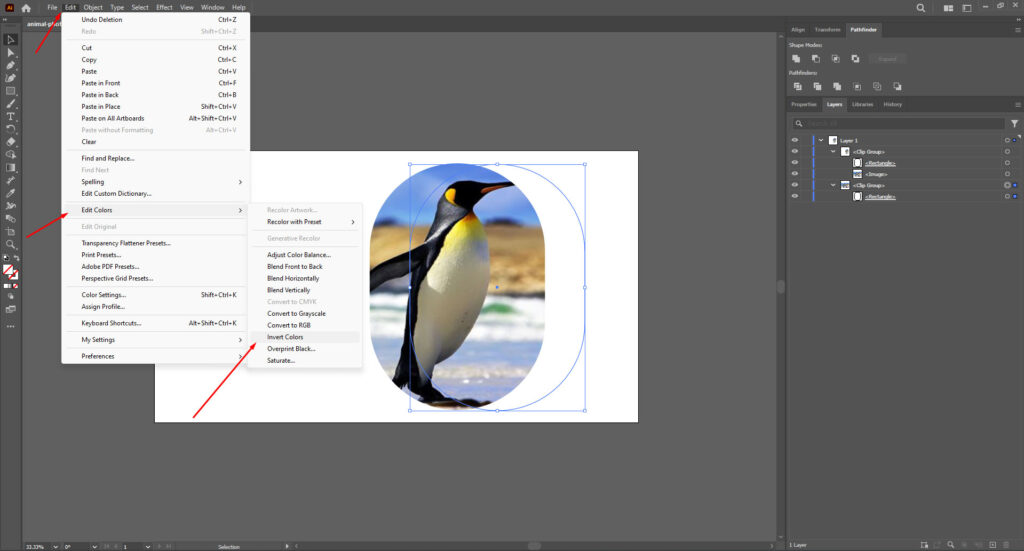
- Invert the Fill Color: If the underlying artwork has a fill color, consider inverting it for a true “reverse” effect. Select the underlying artwork and choose Edit > Edit Colors > Invert Colors.
- Optional Cleanup: Depending on your design, you might need to remove any unwanted objects from the newly revealed area.
Final Words
Clipping masks are great for getting those perfect, crisp edges on what you want to show in your artwork, especially for tricky shapes.
To make a clipping mask work best, you can use the Pathfinder panel or create a copy of your object and turn it into a solid shape. Just follow the steps carefully and clean up any stray lines afterward. If you’re having trouble getting your clipping mask to work in Illustrator, don’t fret – there are experts at Meta Clipping Path who can help
Meta Clipping Path – A well-known one-stop photo editing service provider company with 5+ years of experience and 25+ highly skilled professionals.
Working with 20 reputed worldwide e-commerce companies and 200+ satisfied customers.

![Read more about the article What is Masking in Photoshop? [A Comprehensive Guide]](https://metaclippingpath.com/wp-content/uploads/2024/08/What-is-Masking-in-Photoshop-300x160.png)