Ever taken a perfect photo, only to be foiled by an unwanted element in the background? Power lines ruining a scenic landscape shot? No worries! Photoshop’s “Fill Background” feature is your secret weapon.
We know how annoying it is when you try to take a nice picture of something beautiful. Hence, you should know how to fill background in Photoshop. This guide will show you three easy ways to use Fill Background:
- Content-Aware Fill: Say goodbye to pesky objects with this powerful tool.
- Solid Color Fill: Make your background disappear with a splash of color.
- Background Extension: Extend the background of your vertical photos for a more balanced composition.
We’ll break down the process of how to fill the background in Adobe Photoshop in detail for your convenience. So, keep on reading!
How to Fill Background in Photoshop to Change Color
If you want to add a colorful background to your photo, you can use Photoshop background fill. The process of filling the background with colors is quite straightforward. Here’s a step-by-step process:
Step 1: Prepare Your Workspace
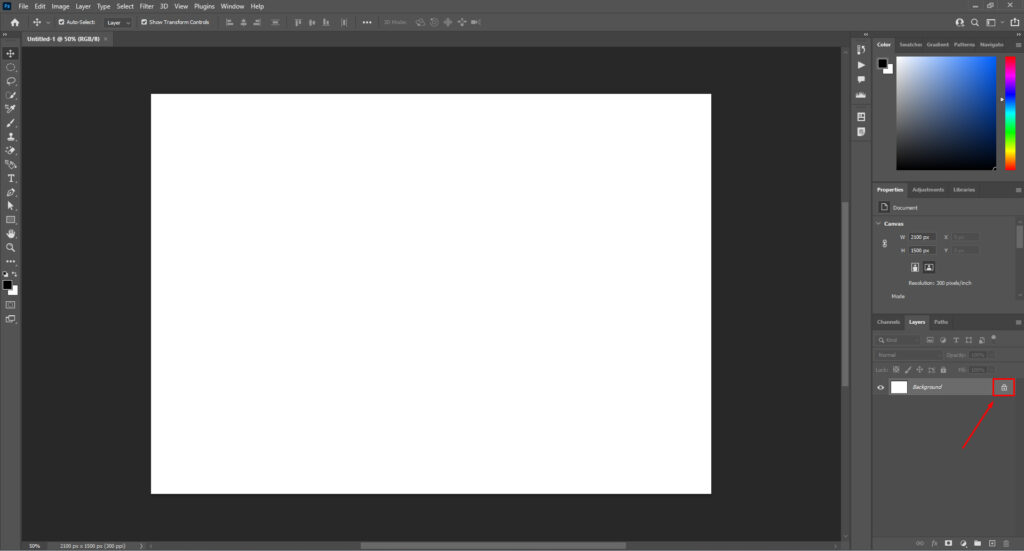
First, open a blank canvas in Photoshop according to your required height and length. Now, on your right-side panel, there is a background layer. Unlock the background layer to access advanced layer settings.
Step 2: Go to Fill
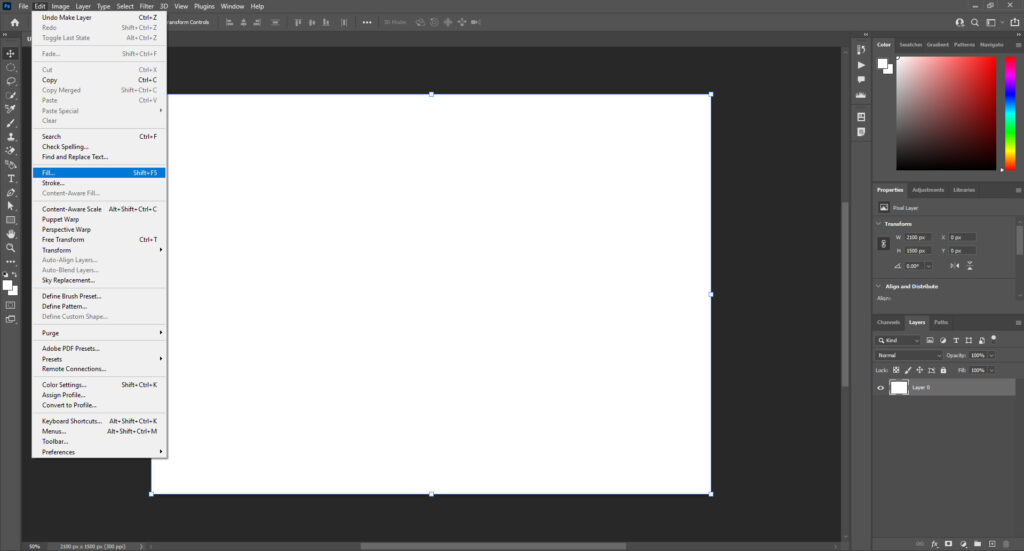
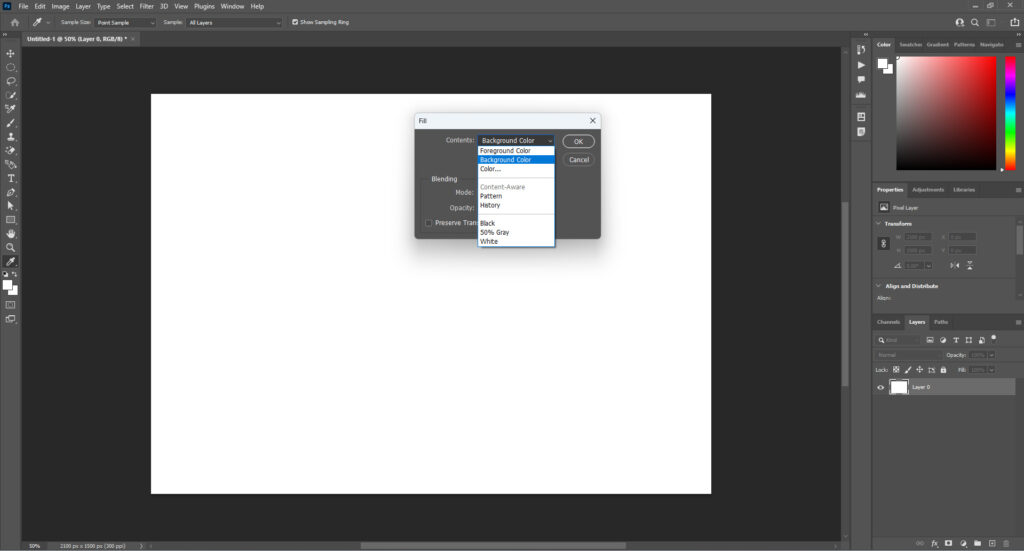
On the above top bar, you will see an “Edit” option; click on it and go to “Fill.” A new floating tab will pop up for Fill settings. From the “Content” option, you can choose from “Foreground Color,” “Background Color,” or any solid “Color.”
Step 3: Fill the Background with Colors through Shapes
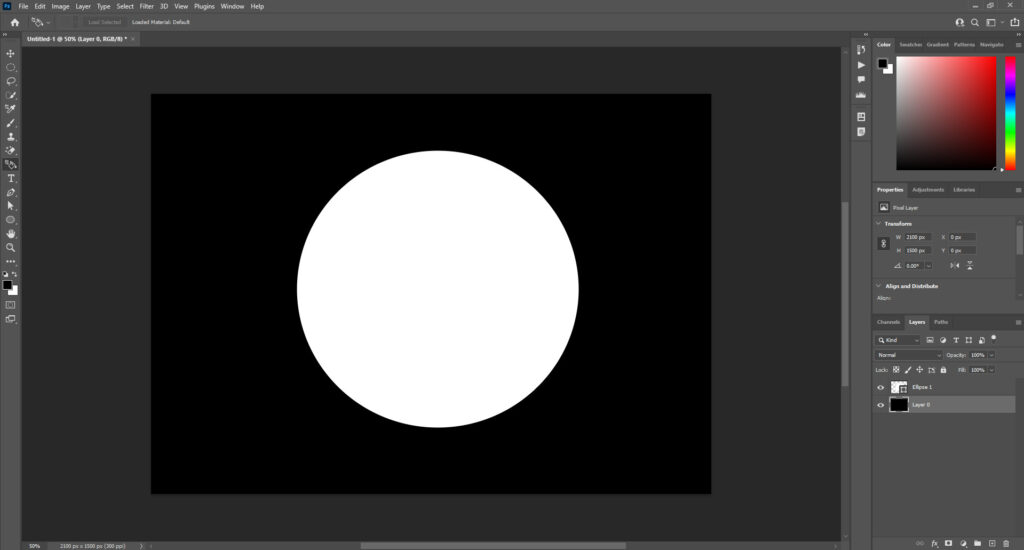
One of the easy ways to fill the background in Photoshop is by adding colors with shapes. It lets you change the background color whenever you want.
First, you need to select a shape, choose the shape color from the top bar “Fill,” and add the shape to the canvas.
In the layer panel, you will see a new layer is added under the name of the shape. If you double-click on the thumbnail of the layer, a new tab will appear on your screen from where you can change the color.
YouTube Tutorial of Fill Background in Photoshop to Change Color
Check out the following YouTube video tutorial to learn how to add a background in Photoshop using shapes and colors.
How to Fill a Background in Photoshop Using Content-Aware Fill
You can easily remove a distracting object or unwanted person from your photo with the content-aware fill photoshop. Here’s a step-by-step guide on how to use content aware fill:
Step 1: Duplicate the Layer
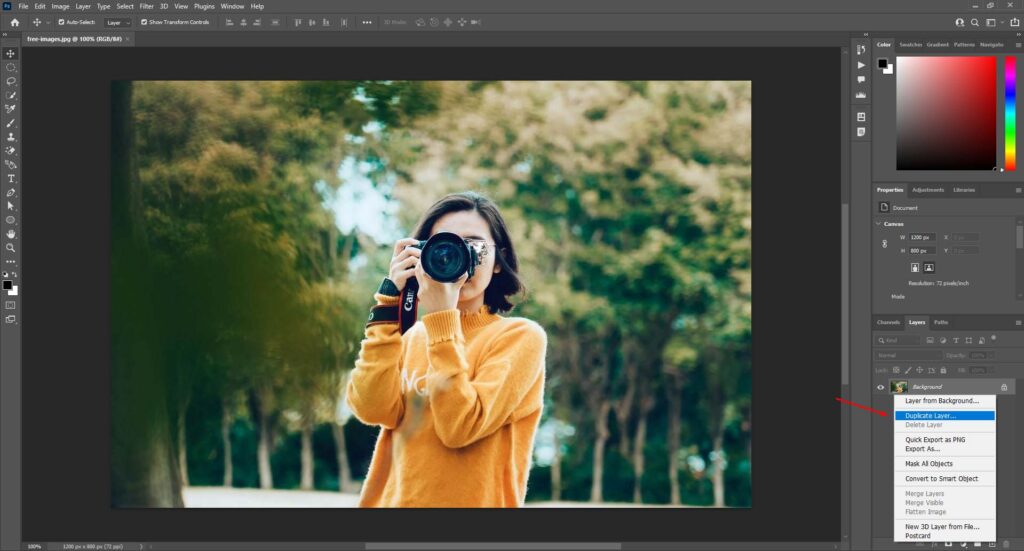
First, open the photo in Photoshop that you want to edit with content-aware fill. Then, duplicate the main layer by pressing Ctrl + J on your keyboard.
Step 2: Cut the Unwanted Object
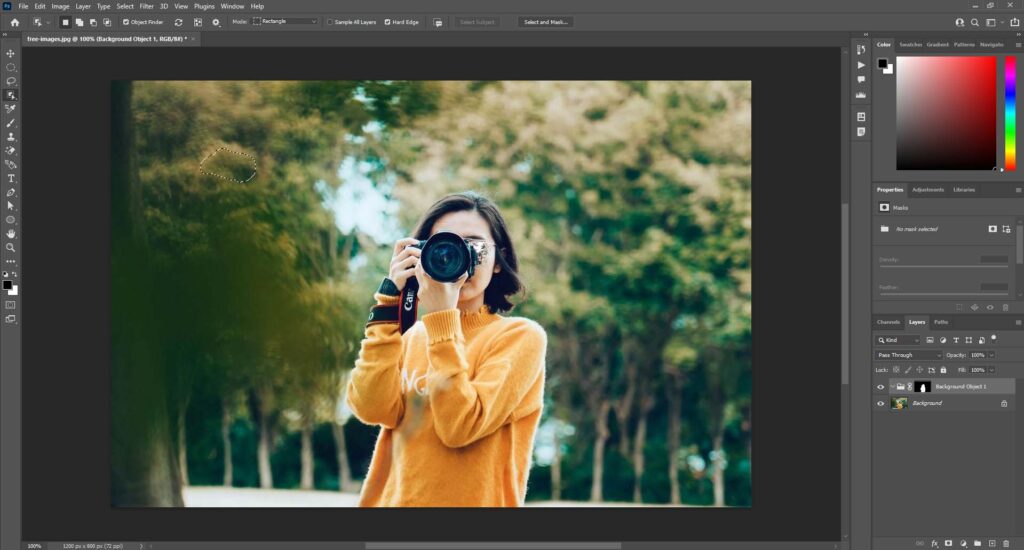
Now, you need to cut the distracting object or unwanted person. You have a few options for cut-out, such as a lasso tool, pen tool, magic wand, or quick selection. Go through the edges of the object and make a selection.
Step 3: Remove the Selection
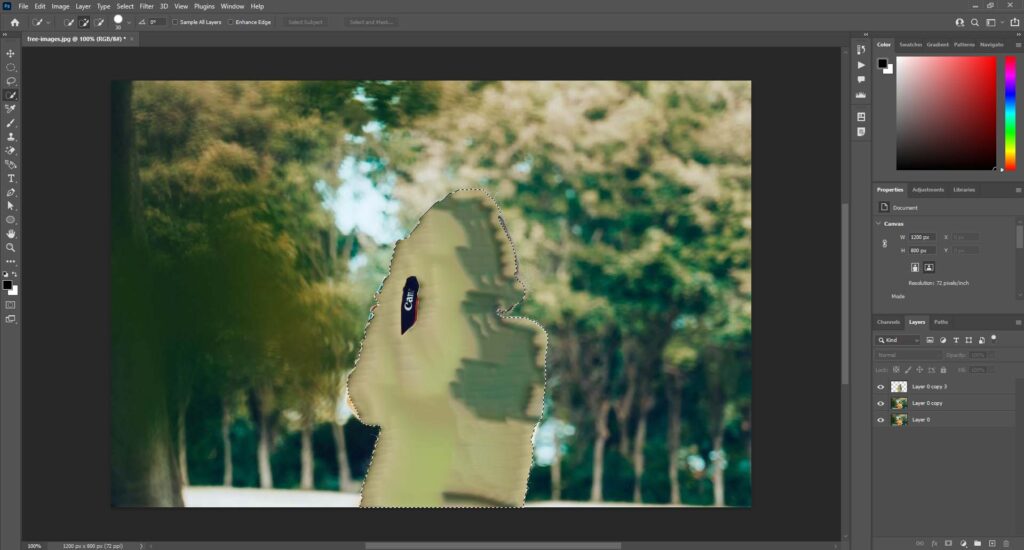
Once you select the area for the cut-out, go to the top bar above and click on “Edit.” If you scroll down the Edit options, you will find the “Fill” option. Click on it, and a new tab will pop up on your screen.
From the new tab, click on “Contents” and select “Content-Aware,” then click ok. It should remove the selected object and replace the area with surrounding pixels to fill the background.
However, the result won’t be too perfect and accurate as the pixels will be drawn from other places. If the photo is too complicated with background elements, you may need to spend hours setting the background close to perfection.
YouTube Tutorial of Fill a Background Using Content-Aware Fill
The following YouTube tutorial will show you how to use Photoshop content aware fill easily.
How to Use Content Aware Fill Scale to Fill Background through Extending Background Method
If you want to create a vertical portrait from a square-shaped or horizontal photo, you can use the background extended method with content-aware fill.
However, this process isn’t versatile, as a busy background can’t be extended with even minimal perfection. Your photo needs to have a simple background with objects that will look natural even when extended.
Here’s a step-by-step guide for extending the background of your existing photo:
Step 1: Set the Photoshop Canvas

First, open the photo you want to work on in Adobe Photoshop.
Then, you have to increase the canvas size depending on your required width. Press C on your keyboard to enable the crop option and extend the width holding the “alt” key on your keyboard.
It will evenly extend both sides vertically simultaneously. The added width will appear transparent.
Step 2: Extend the Background
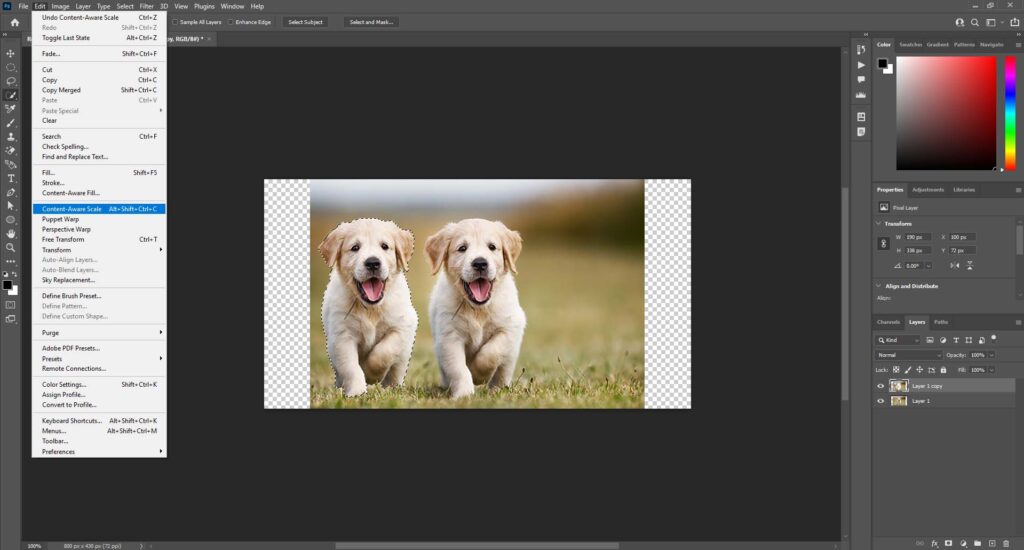
Once the background area is ready for extension, go to “Edit” and “Content Aware Scale” from the bar. The main photo will now enable the options for extending.
Hold “Alt” on your keyboard and drag one side of your photo to extend vertically on both sides.
Due to the content-aware scale, Photoshop can spot the subject of the photo. So, it will keep the subject intact and only extend the background to fill the transparent area.
Step 3: Protect the Subject while Extending
If your photo doesn’t include a clear subject, Photoshop may fail to detect it. Hence, you have to point out the subject to Photoshop manually.
First, extend the photo slightly until your subject remains intact in the photo. Once the subject starts to lose its shape, stop and click “✓” in the top bar. Open the lasso tool and select the subject through its edges.
Now, go to “Channels,” located beside the layers in the right panel. Create a new layer mask channel, then deselect the subject selection. It’ll help Photoshop understand which one is your main subject.
Select the content-aware scale again and insert the channel name in the top bar. You need to insert the channel name in place of “None,” which is located beside the “Amount” in the top bar. Extend the photo to fill the background and finish the process.
YouTube Tutorial of Extending Background Method
Here is a YouTube step-by-step tutorial on how to fill the background by extending using the content-aware scale.
Tips to Fill Background in Photoshop Professionally
To fill the background in Photoshop with perfection, you can follow the tips below :
- Use content-aware fill for simple repairs. It’s great for removing small objects but may cause issues with complex areas.
- Create seamless textures in a new document and use it as a patch on the area from where you have removed an object creatively.
- Experiment with layer styles and blending modes to blend different fills together smoothly.
- Check frequently between before and after views and zoom in or out to catch issues easily.
- Consider refining the selection border first if it needs fixes or softening.
- You can add artificial lighting effects like shadows or glows if the fill texture results in flat.
Conclusion
So, you now know how to fill the background in Photoshop in three different methods. When working on filling the background, you should pay proper attention to the details to make the final product appear perfect.
Take your time in selecting, blending, and refining the background. If you can follow all the steps accurately, you should be able to complete the background fill process without much hassle.
Remember to point out the subject to Photoshop when using the background-extending technique.
Meta Clipping Path – A well-known one-stop photo editing service provider company with 5+ years of experience and 25+ highly skilled professionals.
Working with 20 reputed worldwide e-commerce companies and 200+ satisfied customers.
![Read more about the article What is Clipping in Photography? [Everything You Need to Know]](https://metaclippingpath.com/wp-content/uploads/2024/06/Clipping-in-Photography-300x160.png)