Do you admire how logos appear seamlessly on different colored backgrounds? Forget about managing a massive pile of logos with various backgrounds. It’s done through logos with transparent backgrounds.
We know how frustrating it is for a brand to struggle to match the logo background with the packaging and product color. That’s why mastering how to remove a logo’s background in Photoshop is essential.
You can remove the background in Adobe Photoshop easily and accurately in a few steps:
- First, you need to create channels and combine them.
- Then, you need to create a mask layer of a channel and select the logo.
- Now, you can remove the background from the logo.
It might sound complex, but don’t worry! We’ll provide a detailed guide that explains each step and the benefits of a transparent logo background. Keep reading to learn more!
Why Should Your Logo Need to Be Transparent?
A logo is the identity of a brand that goes everywhere, from packaging to products. Now imagine if the logo has a solid color background; it may not suit the color of the surface where you want to use it.
As a result, your logo may become intact with limited usage. This can even make your brand seem unprofessional. Therefore, you need to make the background of your logo transparent so that it goes well with any surface and highlights the logo.
You can easily use a transparent background logo anywhere, for instance, on your social media posts, website, product label, promotional material, packaging, etc. It also becomes handy to match the logo with your brand color guideline.
Top Methods to Remove Background from Logo
You have two options as a logo background remover — remove.bg and Adobe Photoshop.
Remove.bg
If you have a simple logo design for your brand, you can use the remove bg logo background remover. Remove.bg can quickly remove the background and it works pretty fast compared to other online background-removing tools.
Adobe Photoshop
One of the popular tools for the most precise and clean logo background removal is Adobe Photoshop. Whether your logo design is simple or intricate, Photoshop can remove the background with perfection as it has more advanced features.
How to Remove Background from Logo in Photoshop
Now, you know why it is necessary to remove the background from a logo and how you can remove it. Here is a step-by-step process to remove the logo background:
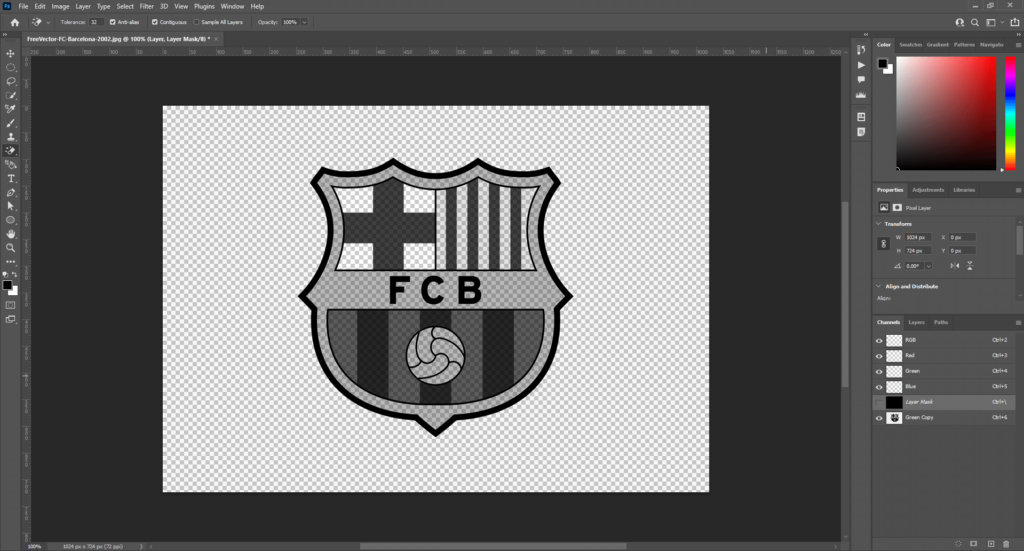
Step 1: Go to the Channels

First, open the logo in Photoshop, then go to “Channels” from your right side panel. It’s located next to the “Layers” of the panel and each channel name is listed under the color name in your logo.
Step 2: Combine Channels
To make the selection process easier, you can combine the channels based on the colors that make the colors stand out. Click on the eye icon on each channel to see which color makes the logo details sharper.
One color may not be able to make the logo design details stand out sharply. If a color highlights the logo lines, another color may highlight the text. Therefore, you need to find those two or three colors that can make all the details contrast against the background.
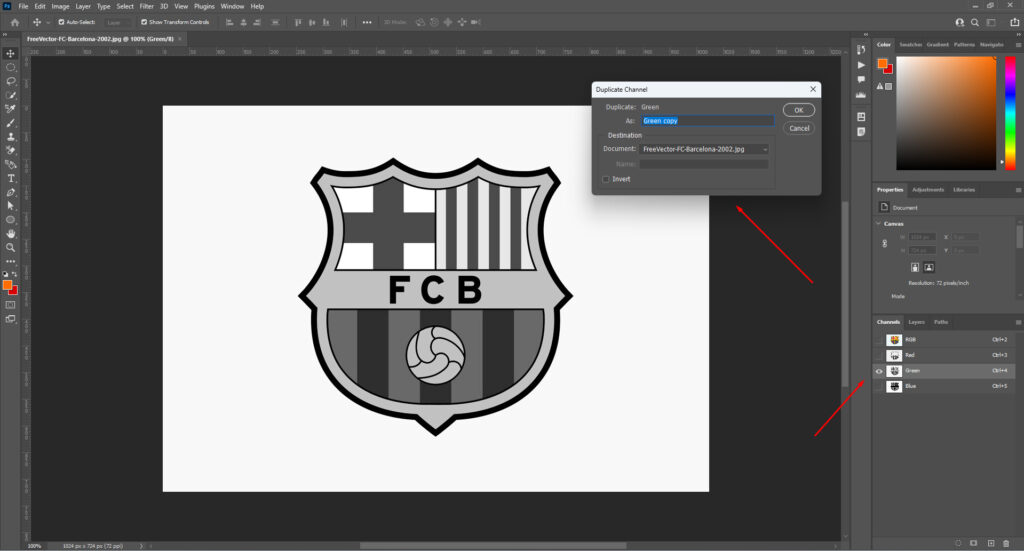
You can also skip this step if one color is enough to highlight the details. Just duplicate the color channel that you found to be perfect for this step.
Okay, you found the colors, but how to combine them? Here’s how:
- Duplicate one of the color channels.

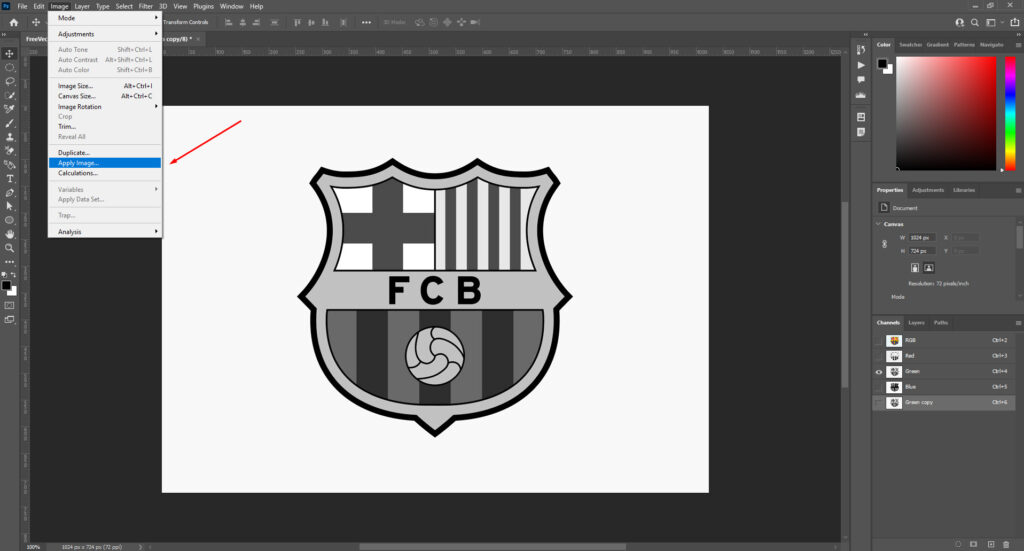
2. Click on the “Image” from the above top bar.
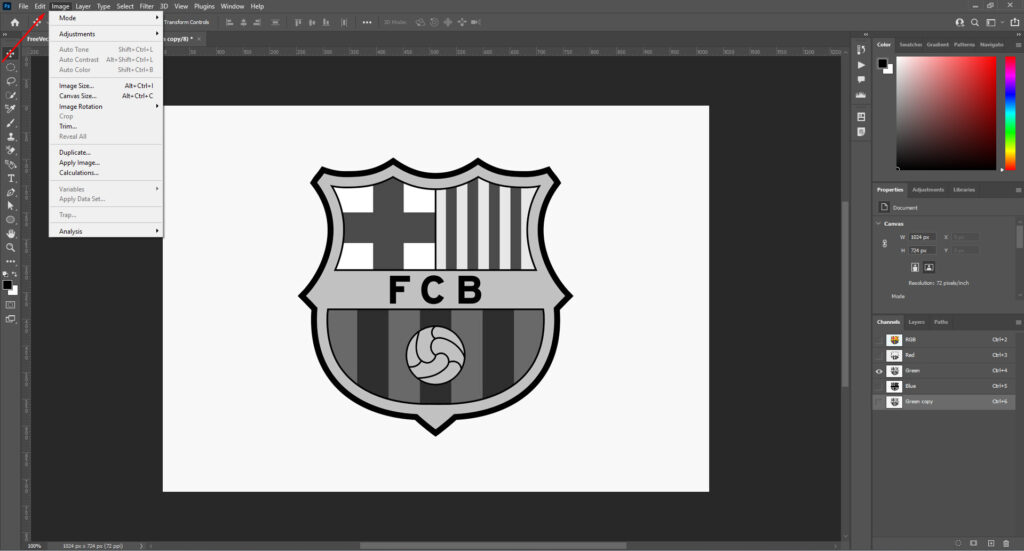
3. Find “Apply Image” and click on it.
4. A new tab will appear where you have to mark the “Blending” option.
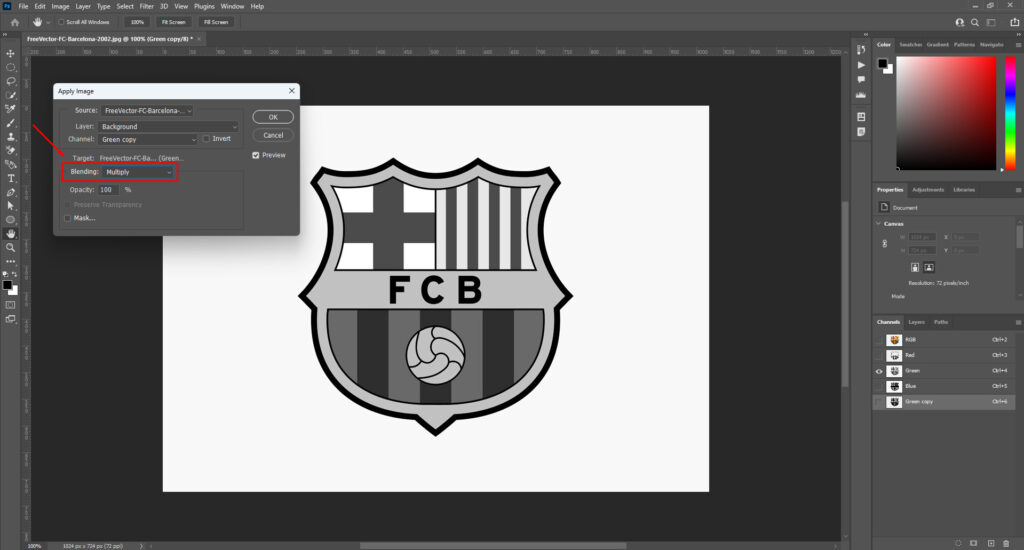
5. Choose “Multiply” from the blending options.
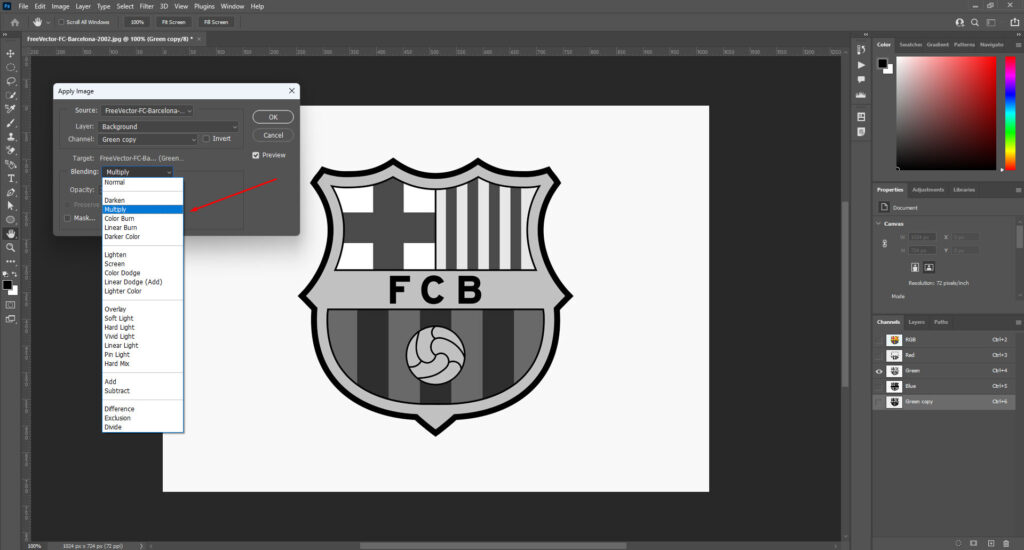
6. Now click on “Channels” in the same tab and choose another color that you want to combine with the duplicate of a colored channel.
7. Press “OK” to complete combining.
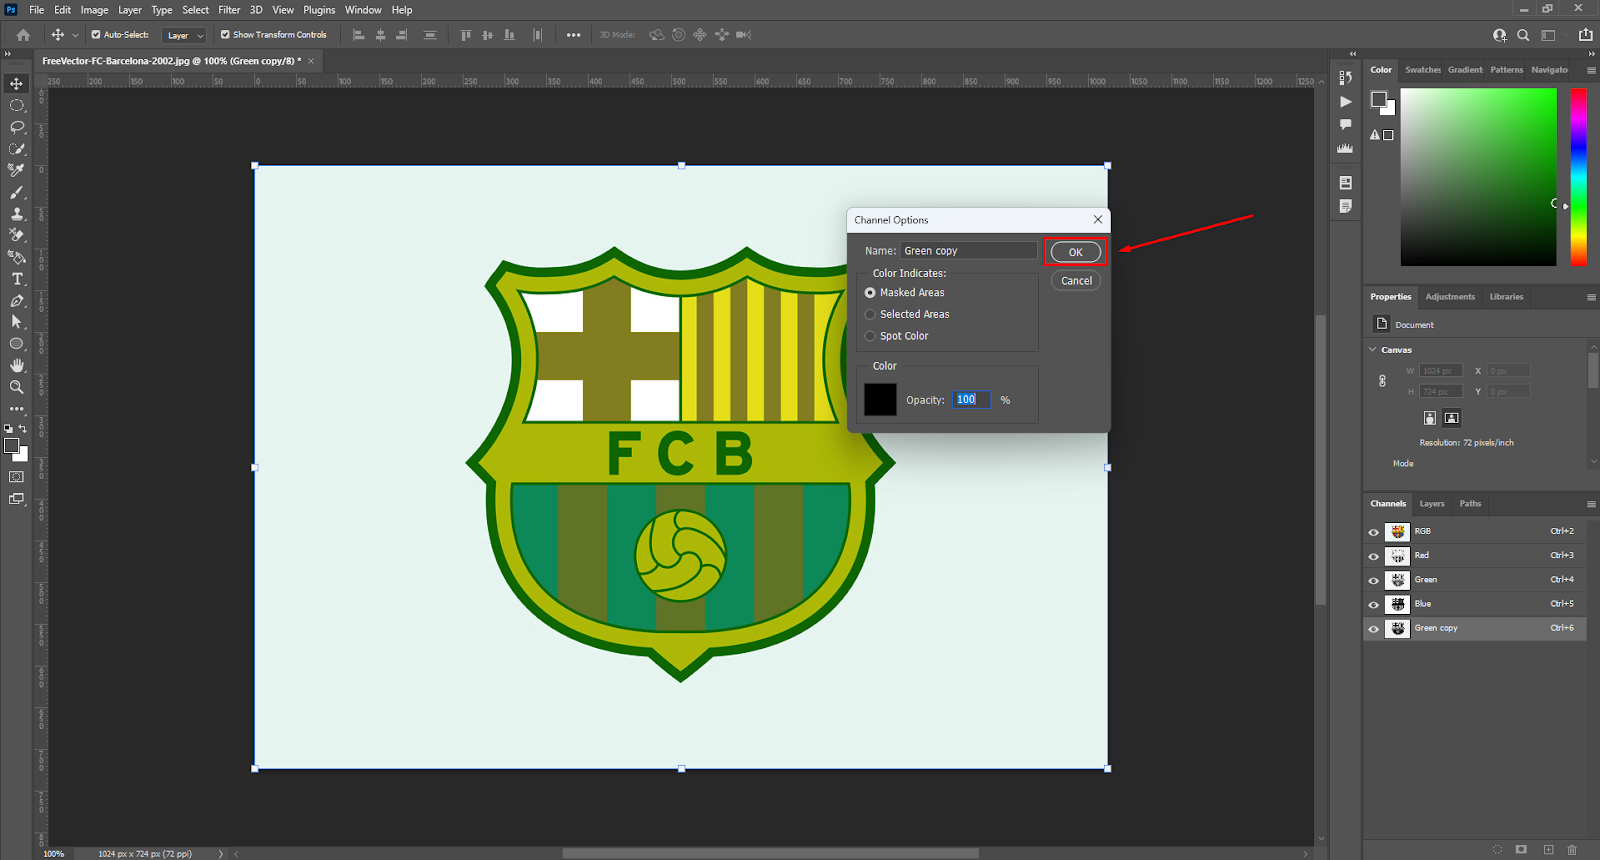
Step 3: Convert the New Channel into a Layer Mask
After you successfully create the new combined channel, convert it into a layer mask. The purpose of this step is to make the selection process easier, as layer masks help in revealing white details and concealing black details.
Step 4: Select the Logo
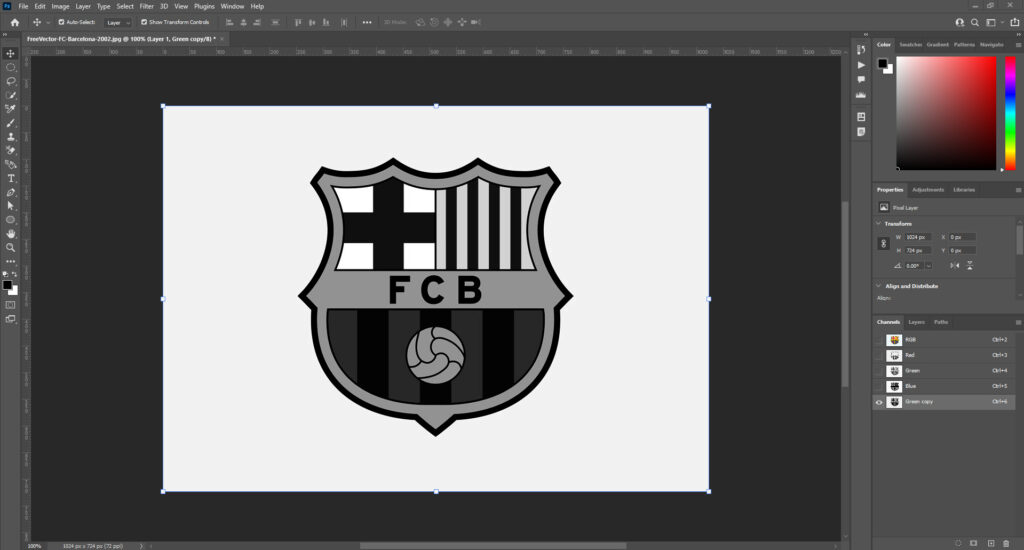
As you have used multiply for blending, the entire logo will appear in black color. You need to convert the black logo into white for selection.
To do this, select the new channel and press “Ctrl + J” on your keyboard to change the background to black and the logo to white. Now, you can turn the white logo into a selection by pressing Ctrl and the new duplicate channel thumbnail. You should see the logo selected now.
Step 5: Remove the Background
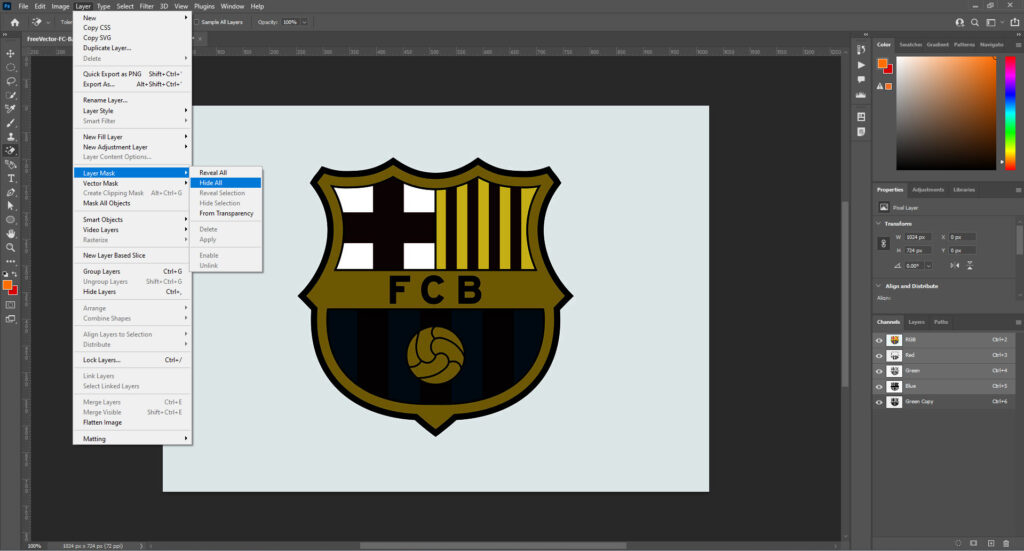
After the selection is complete, go back to the top RGB channel, then click on the “Layers.” Now, create a new layer mask on the layer panel again. The logo should still be selected when clicking on the layer mask.
Once you create the layer mask, it will remove the white background from the logo and make the background transparent.
YouTube Tutorial on How to Remove the Background from a Logo
If you find the step-by-step guide a bit complicated, you can check out the following YouTube tutorial too. Remember, the more work you put in, the better the outcome is. This tutorial will also teach you how to fix fringing on your logo.
Which File Format is Best for Saving the Logo with a Transparent Background?
Done with editing the background? Now it’s time to learn how you can save the logo with a transparent background.
Generally, after you remove the background from the logo Photoshop, the best and most commonly used format to save the logo is PNG.
It’s because PNG photos can be used for various purposes, like social media posts, and digital branding, and to use it as website logos. Additionally, this format can save graphics in a compact file size.
Here’s how you can save your work in a transparent PNG image:
- Navigate to “File” from the above top bar

- Click “Export” from the extended options for more advanced options for exporting
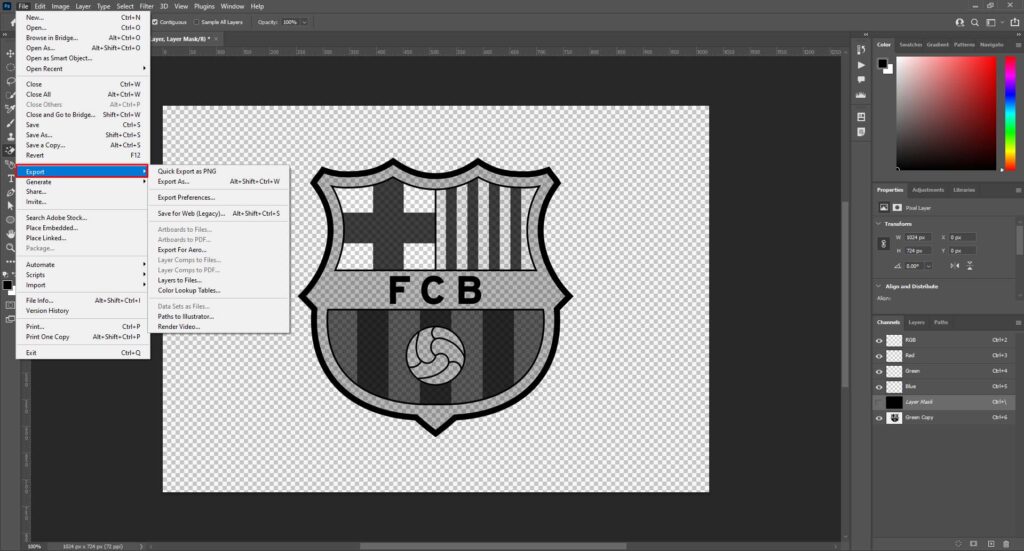
- Select “Export as,” and it will take you to a new window.
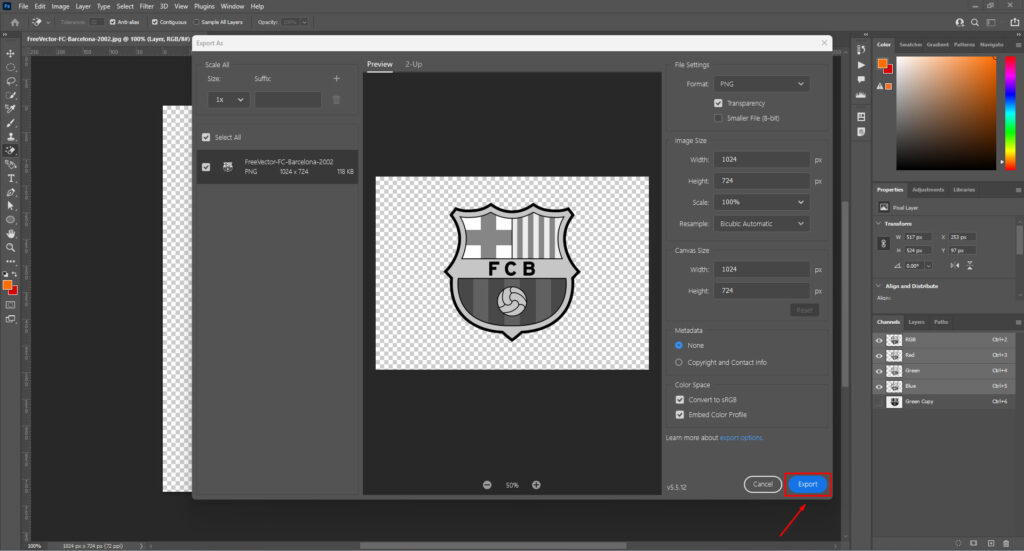
- Set PNG as the saving format and check the transparency of the image.
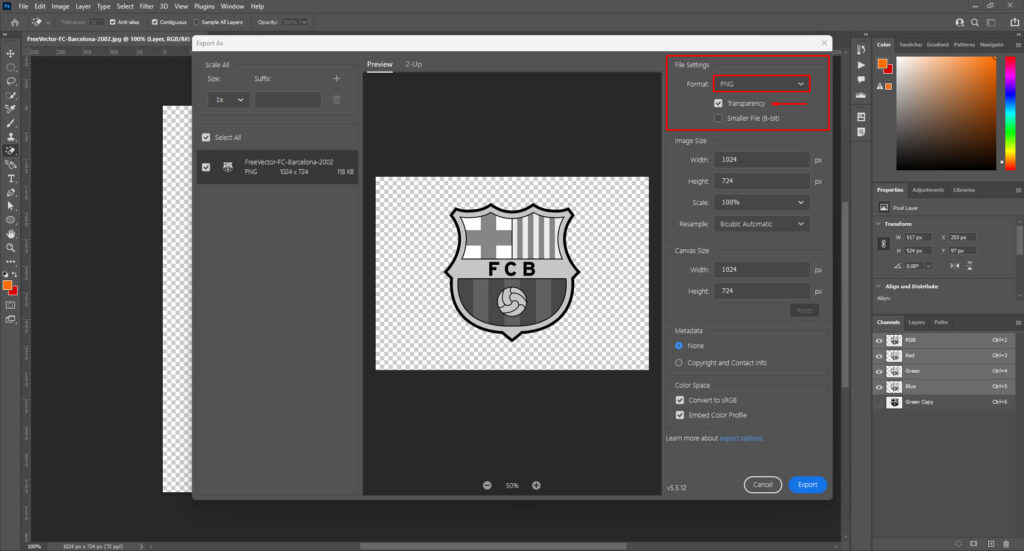
- Now, click export and save the file in your preferred location.

Conclusion
To sum up, how do you remove the background from a logo in Photoshop? The simplest answer is to select the logo and remove the background. However, the overall process needs lots of attention, as the detailed process is a bit lengthy.
You must invest your time in the process for a better result. Besides PNG format, you can save your work in SVG or EPS format, depending on your required file format.
During this process, you can also save your logo in some other background color for future use!
Meta Clipping Path – A well-known one-stop photo editing service provider company with 5+ years of experience and 25+ highly skilled professionals.
Working with 20 reputed worldwide e-commerce companies and 200+ satisfied customers.
![Read more about the article How to Create a Transparent Background in Photoshop [Step-by-Step]](https://metaclippingpath.com/wp-content/uploads/2024/05/How-to-Create-a-Transparent-Background-in-Photoshop--300x160.png)

![Read more about the article 11 Creative Background for Jewelry Photography [2025 Updated]](https://metaclippingpath.com/wp-content/uploads/2024/06/Background-for-Jewelry-Photography-300x160.png)