![You are currently viewing How to Create a Transparent Background in Photoshop [Step-by-Step]](https://metaclippingpath.com/wp-content/uploads/2024/05/How-to-Create-a-Transparent-Background-in-Photoshop-.png)
Transparent background is a very effective way to place your image over a different background. Photoshop is the most popular tool for it. With just a few clicks, you can do it yourself.
But first of all, you need to know how to create a transparent background in Photoshop.
To create a transparent image background in Photoshop, go to the properties panel and click on quick action. Next, select Remove Background. Now, save the image as a PNG or PSD file.
Though it seems very easy, but not for everyone, especially beginners. That’s why this guide will discuss each and every step with an image so that anyone can understand. So, keep reading.
What is a Transparent Background in Photoshop?
A transparent background refers to the absence of a solid color or image behind the main subject. Instead of a filled background, transparency allows whatever is behind the image to show through.
This is ideal for logos, cutouts, and placing objects on different backgrounds. Not all image formats support transparency. Common file formats that allow transparent backgrounds include PNG, GIF, and GIF.
How to Create a Transparent Background in Photoshop
There are four methods for creating a transparent background. The result will be the same regardless of which method you follow. We’ll use Adobe Photoshop CC 2024 to show you how we did it. .
Method 1: Using Photoshop AI Generative Fill
Step 1: Isolate Your Subject
Select the part of your image you want to focus on.
Step 2: Find Generative Fill
Look in the menu bar at the top of your workspace. Then go to the Windows Menu. Next, click on Contextual Taskbar and select Generative Fill.
Step 3: Step 3: Write a Clear Cut Prompt
Instead of asking for transparency directly, use descriptive words to tell Generative AI what you want in the background.
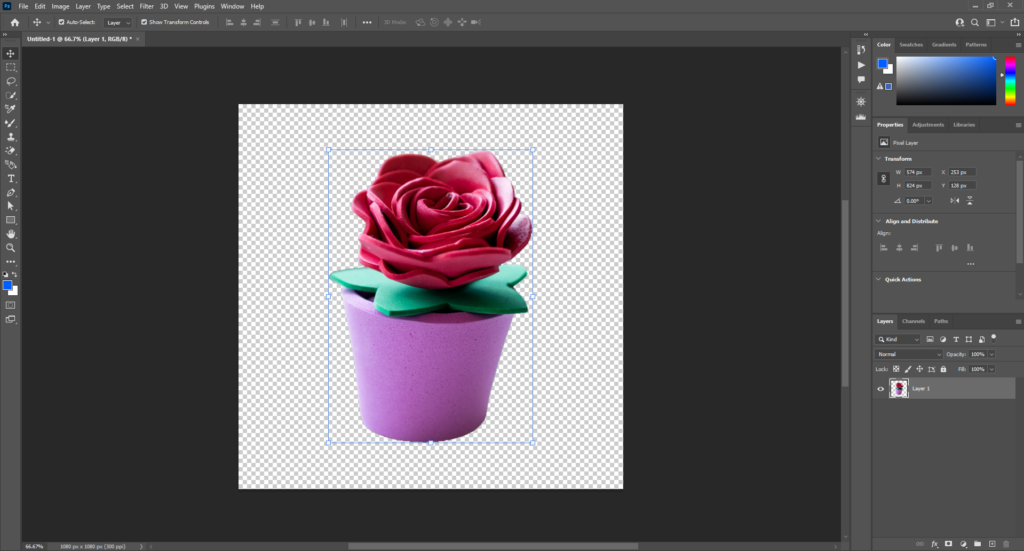
For example, if you have a picture of a flower and want a transparent background, instead of typing “make background transparent,” try something like “replace background with a clear, transparent space.”
Here is the result:
Method 2: Pen Tool for Transparent Backgrounds
This a very special feature of latest version of Photoshop 2024. Let’s check out the steps:
Step 1: From the left menu bar of Photoshop, select Pen Tool or press the P button on your keyboard.

Step 2: Before you start creating your selection, make sure the “Rubberband” option is enabled. This ensures you see a preview of your path as you move your cursor with the selection tool.

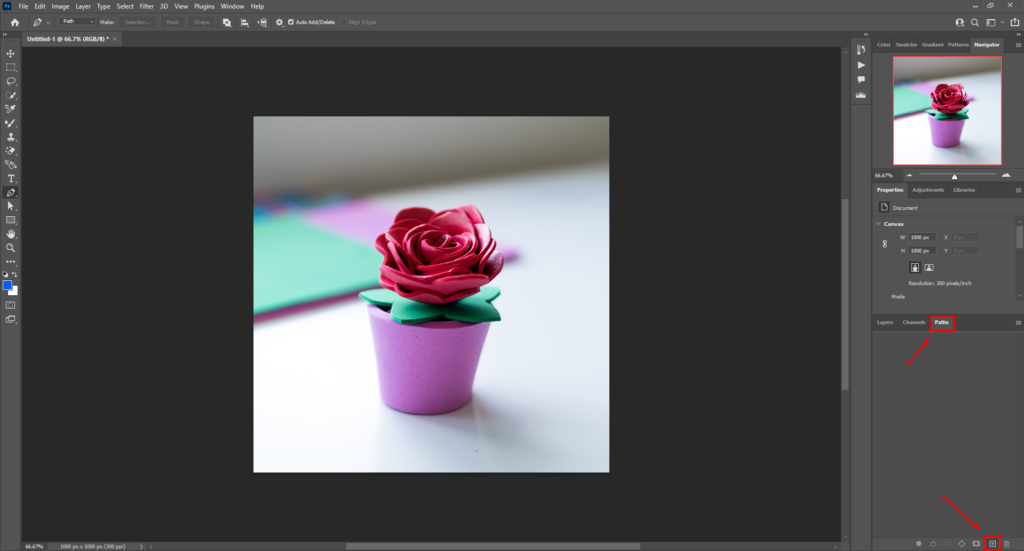
Step 3: Draw a new path to define your selection. You can do this by clicking the “Create New Path” button in the Paths panel.
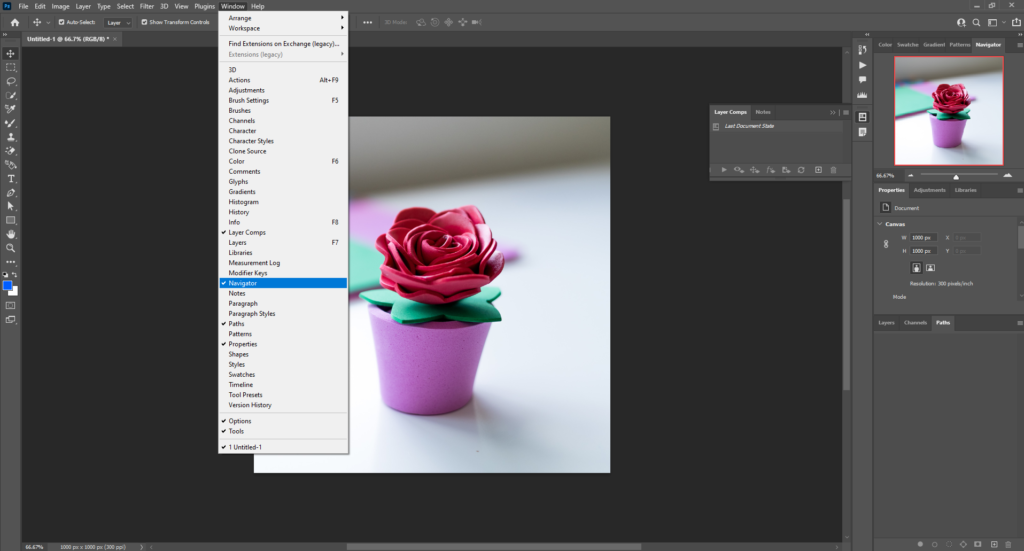
Step 4: Turn on the Navigator Panel. To do this click on the Windows menu then Select Navigator.
Step 5: For a flawless selection, zooming in to 300% is recommended. There are three ways to do it:
- Hold Ctrl + Spacebar, then Right-Click
- Using the Navigator Panel
- Hold Ctrl and the plus sign (+) together
Step 6: Create a path around your subject. This path will act as a cutting guide for removing the background.
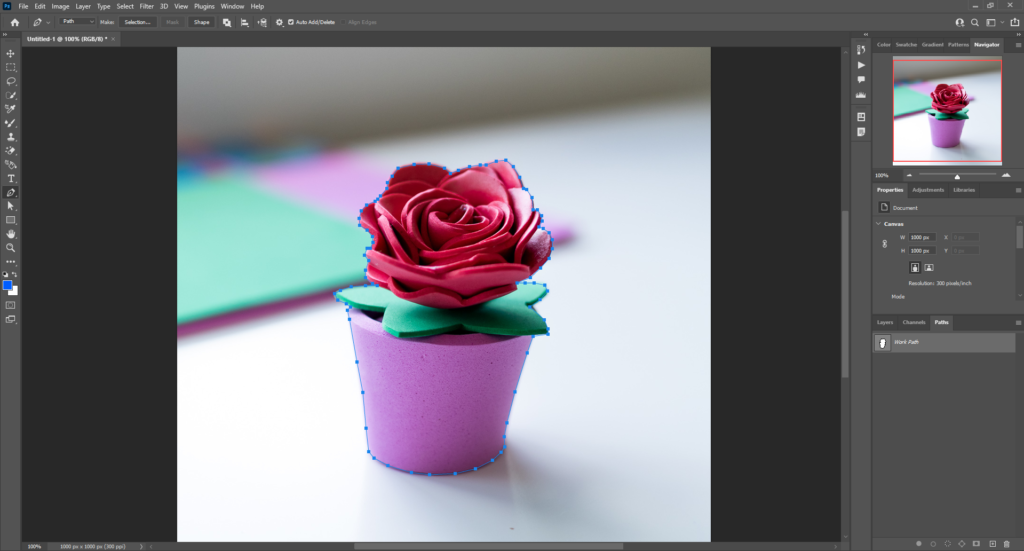
Step 7: Close the path to create a complete loop.
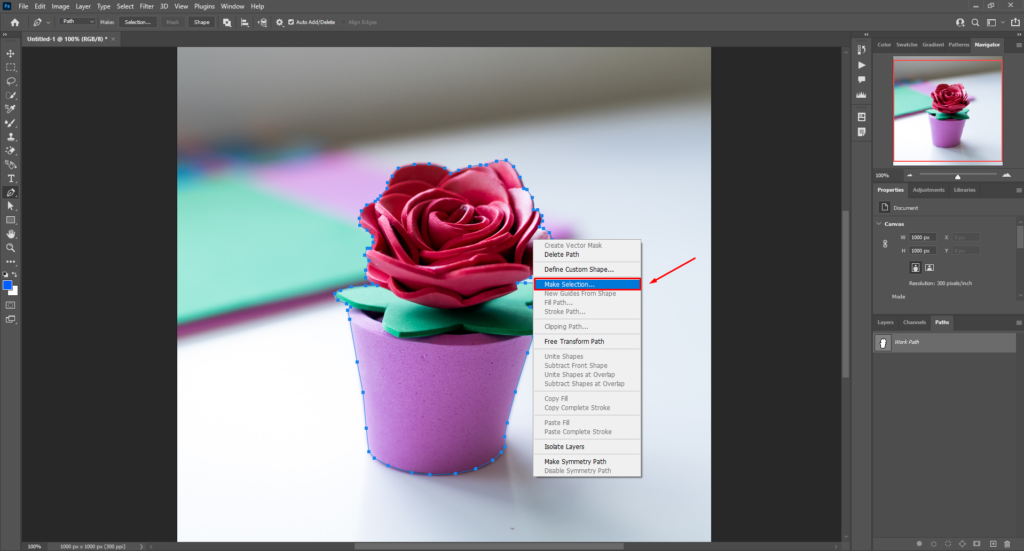
Step 8: Click on the path then right-click on it. From the pop-up menu, choose the option “Make Selection.”
Step 9: Press Shift + F6 on your keyboard (or go to Select > Modify > Feather from the top menu). And keep the radius value between 0.4 and 0.5.
Step 10: Click on the Layers Panel and select “Add Layer Mask”. Finally, save
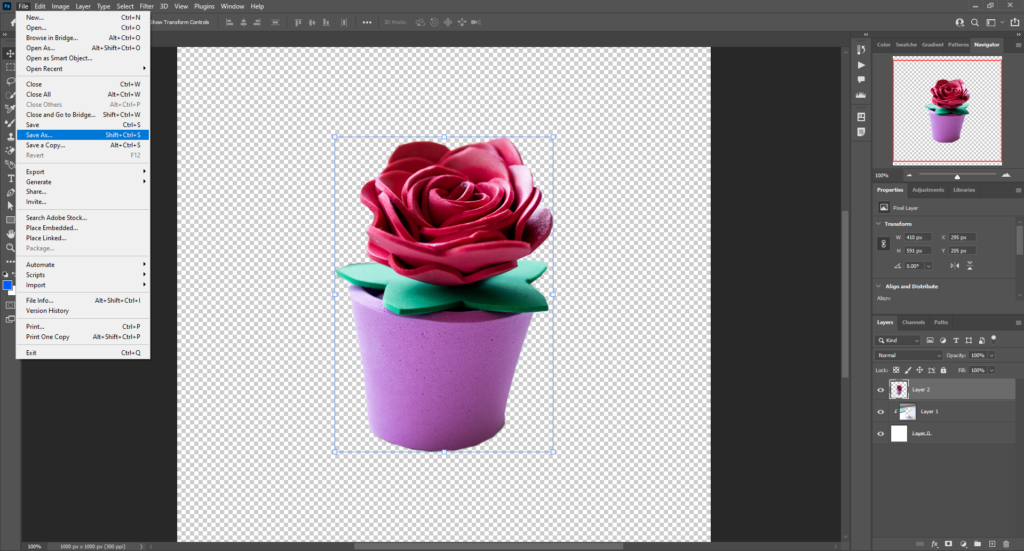
- Go to the File menu at the top of your screen.
- Choose “Save As” from the dropdown menu.
- Select PNG/PSD
- Click “Save”.
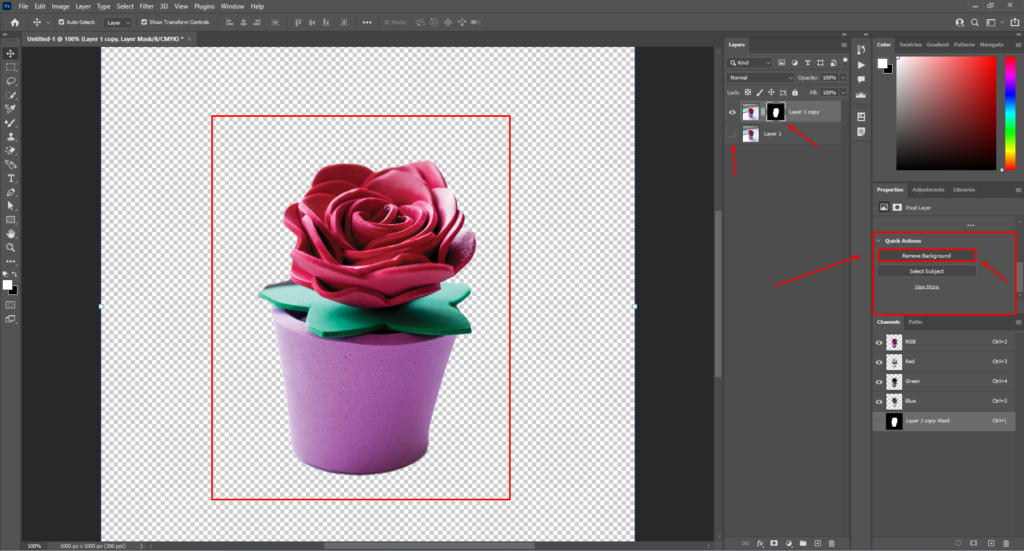
Method 3: Using Select Subject Tool
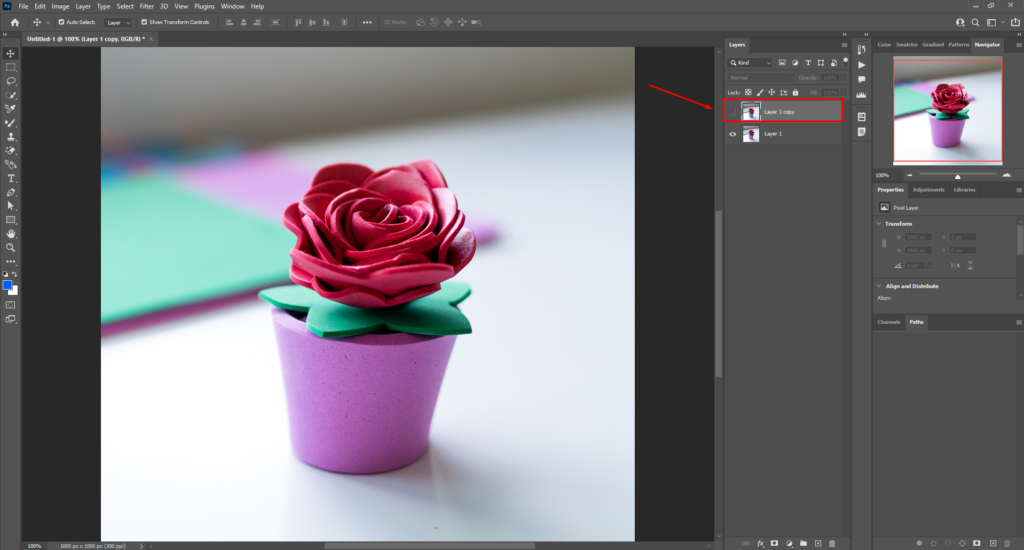
Step 1: Copy paste the background image and layer. Then click on the eye icon to hide the background.
Step 2: Find the Properties Menu and click on the Quick Actions.
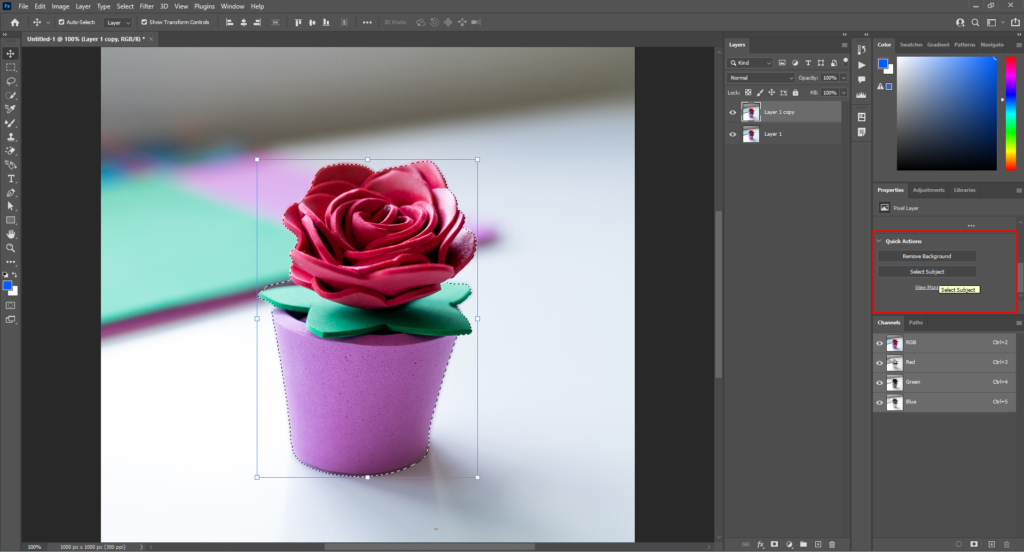
Step 3: In the Quick Actions menu, you’ll see the option Remove Background click on it.
Method 4: Manual Selection
This method is ideal for complicated photos. This technique starts after step 3 of method 3.
Step 1: Select the black and white photo
Step 2: To remove the background, choose a white paintbrush and paint over the area you want to remove.
Step 3: If you’re happy with the result, export and save the image file as PSD/PNG.
Which Tools Are Used in Photoshop to Remove Background?
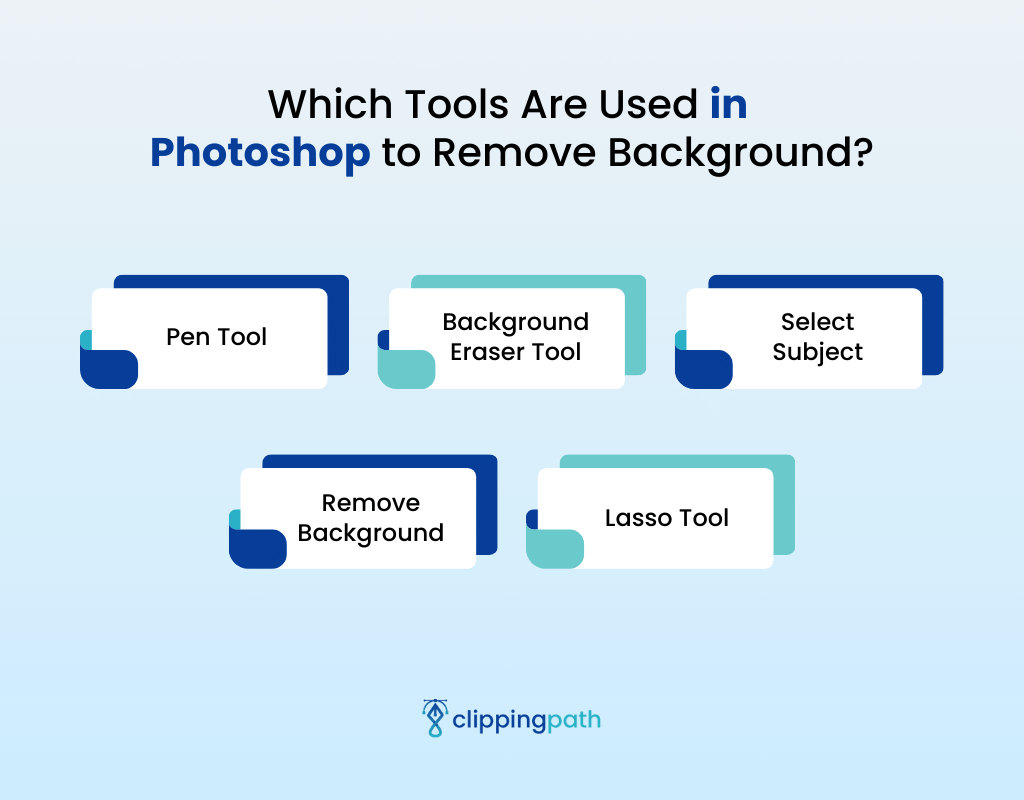
Photoshop offers a variety of tools to remove backgrounds. Whether you remove logo backgrounds or want to fill the background with solid color you can use these tools:
Pen Tool
This tool allows you to create precise paths around your subject, giving you the most control over the selection. It’s great for isolating objects with intricate details like hair or fur.
Background Eraser Tool
This tool samples a color and erases similar pixels. It’s useful for cleaning up fringes or removing large areas of a solid-colored background. However, it’s not ideal for complex details.
Select Subject
This tool uses advanced algorithms to automatically detect the foreground object. It works well with well-defined subjects but might require refinement for complex images. You’ll find it under the Selection menu.
Remove Background
This AI-powered one-click tool is a great starting point, especially for images with high contrast between the subject and background. You can find it under the Properties panel.
Lasso Tool
There are three Lasso variations (Regular, Elliptical, and Polygonal) that let you create rough selections around your subject. They can be helpful for simple backgrounds or initial selections to be refined with other tools.
Why Do You Need A Transparent Background?
Transparent backgrounds are useful for images and design elements for a few reasons:
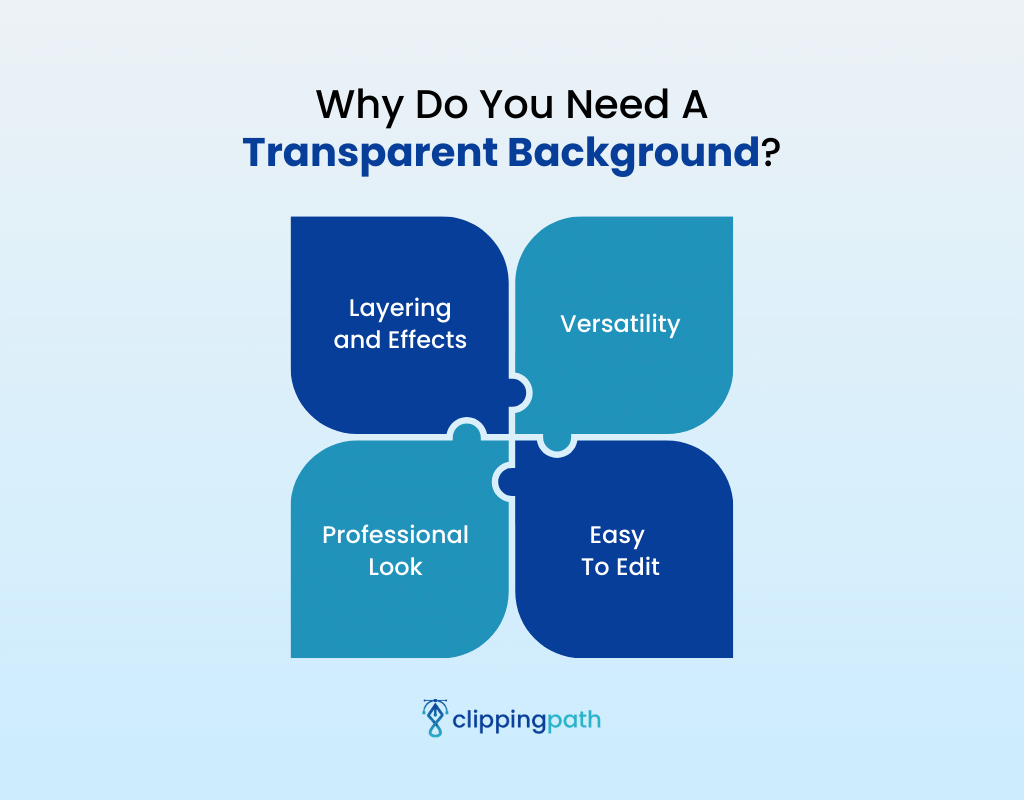
Layering and Effects
A transparent background allows the image to be layered on top of other images or backgrounds. This can be used to create collages, add logos to photos, or create other interesting visual effects.
Versatility
A transparent image can be placed on any colored background without clashing. This makes it much more versatile and easier to use in different design projects.
Professional Look
Transparent backgrounds often have a clean and professional aesthetic. This is important for e-commerce businesses where high-quality product presentation is crucial for building trust and credibility.
Easy To Edit
Photos with transparent backgrounds are easier to edit. You can jump right into editing the subject itself. This is a big advantage for both beginners and experienced photographers who want to streamline their workflow.
Conclusion
The background of your product image can change its impact. It can enhance your brand image and guide the viewer’s eye towards your subject. So, always choose the right tool when editing the image background.
Always create a layer mask before deleting the background. This allows you to go back and let you edit the selection if needed.
However, if you’re short on time or need a guaranteed perfect result, Meta Cipping Path is always ready to help you. Our experts know how to create a transparent background in photoshop perfectly.
FAQs – Creating Transparent Background in Photoshop
How to save a transparent background in Photoshop?
After you’ve created the transparent background, go to the File menu. Next, click on the Save as/Save option. Then select the file format PNG/PSD and hit save.
Can you remove a white background?
Yes, Photoshop offers several ways to remove a white background. The one-click “Remove Background” function in the Quick Actions panel is the easiest. Use selection tools like the Magic Wand or Pen Tool to isolate your subject for more control.
How to save a Photoshop File as a PNG with a transparent background?
To save your Photoshop project with a transparent background, choose “File” then “Save As.” Pick PNG from the “Format” menu. Finally, hit “Save”
Meta Clipping Path – A well-known one-stop photo editing service provider company with 5+ years of experience and 25+ highly skilled professionals.
Working with 20 reputed worldwide e-commerce companies and 200+ satisfied customers.
![Read more about the article Top 10 Photoshop Background Effects for Your Photography [Easy Photo-editing Tips]](https://metaclippingpath.com/wp-content/uploads/2024/06/Photoshop-Background-Effects-300x160.png)