![You are currently viewing How to Retouch Skin in Photoshop [A Comprehensive Guide]](https://metaclippingpath.com/wp-content/uploads/2024/07/How-to-Retouch-Skin-in-Photoshop.png)
Have you ever been stunned by the flawless skin of models in magazines and social media?
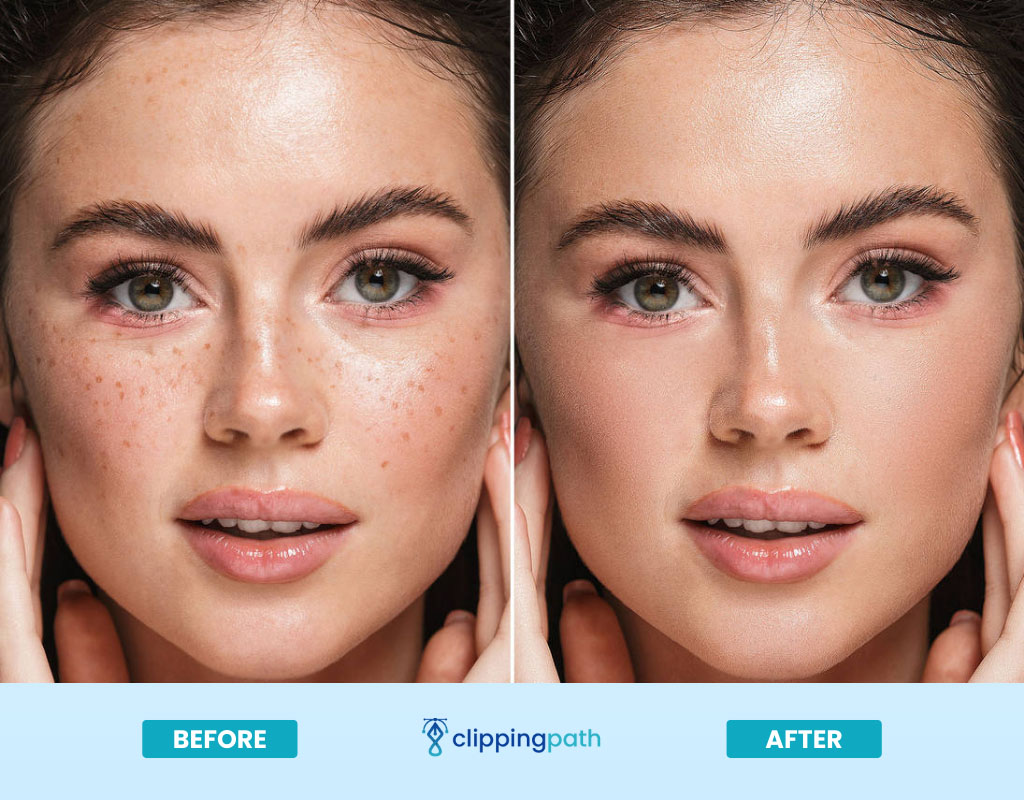
Well, no one has such perfect skin, but it’s possible to improve it through Photoshop skin retouching. Retouching can remove any skin imperfection from the photo.
But how do you retouch skin in Photoshop? First, decide what flaws you want to remove from the photo. Then, use the Spot Healing Brush to remove them and add a blurring effect. Add a layer mask to the airbrushed layers, then use the brush tool to make the skin look soft.
This is just a tiny summary of the entire process. The whole retouching steps can be time-consuming but will make you satisfied with the final result.
We’ll break down the process into two parts to simplify the retouching steps. So, keep reading!
Benefits of Photoshop Skin Retouching
There are many benefits of having professional skin retouching in Photoshop. For example:

Removes Imperfections
Using skin retouching methods, you can easily remove skin imperfections, like dark spots, blemishes, redness, and other flaws, from a photo. It helps you balance clean and even skin tone to enhance photo perfection.
Smoothen Skin Texture
Want to eliminate bumps and texture from the face skin? With Photoshop retouch, you can make the skin texture look smoother and softer. Effects and tools like surface blurring and liquify can soften and refine skin texture for a light, polished look.
Improves Facial Feature
You can thin the jawline, enlarge the eyes, make the lips more prominent, sharpen the nose, and improve other features for facial harmony and aesthetics. Photoshop includes tools like liquefy, dodge, and burn to allow reshaping of features.
Make Skin Glow
When you opt for retouching the skin, you can reduce blemishes and dark areas around your face, which increases the warm tone and brings a healthy glow.
Intensify the Confidence
Remember that we all are unique and beautiful in our own way, and skin retouching only fixes a few minor flaws. However, if you feel uneasy about these flaws in your photos, fixing them will increase your confidence.
Saves Time and Money
Wondering how Photoshop skin retouching saves time and money? Suppose you hired a model or want to photograph a professional photo of yourself. But to hide the skin flaws, you need to apply heavy makeup or use expensive creams.
Working on hiding the imperfection will consume time, and the products will cost you money. But if you go for skin retouching, it’ll save you makeup time and money.
When to Use Skin Retouching Photoshop
You can use skin retouching Photoshop whenever you want. However, here are some specific events when skin and hair retouching in Photoshop can be helpful:
- Professional portrait photography
- Wedding photos
- Model photos for e-commerce products
- Product packaging photos with a model’s picture
- Social media photos
- Influencers photos
- Model photos for stock images
- Self-portraits
How to Retouch Skin in Photoshop to Remove Blemishes
Before you learn how to skin retouch in photoshop for smooth skin, you should remove blemishes. We have divided the retouching process into two segments to simplify the process.
Here’s how to edit skin on Photoshop to eliminate blemishes like pimples, dark spots, scratches, and dark circles:
Step 1: Open the Image and Duplicate It
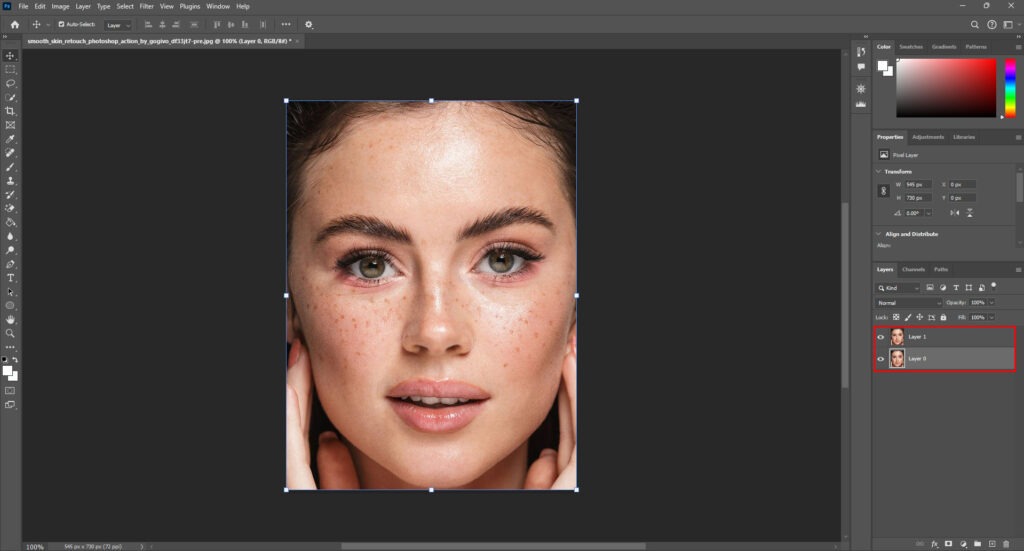
Import the high-resolution portrait photo into Photoshop. It’s best to work on RAW files for quality editing. Now, hit “Ctrl/Cmd + J” to duplicate the layer to preserve the main image. We’ll work on the copy layer to remove blemishes.
Step 2: Pick the Spot Healing Brush Tool
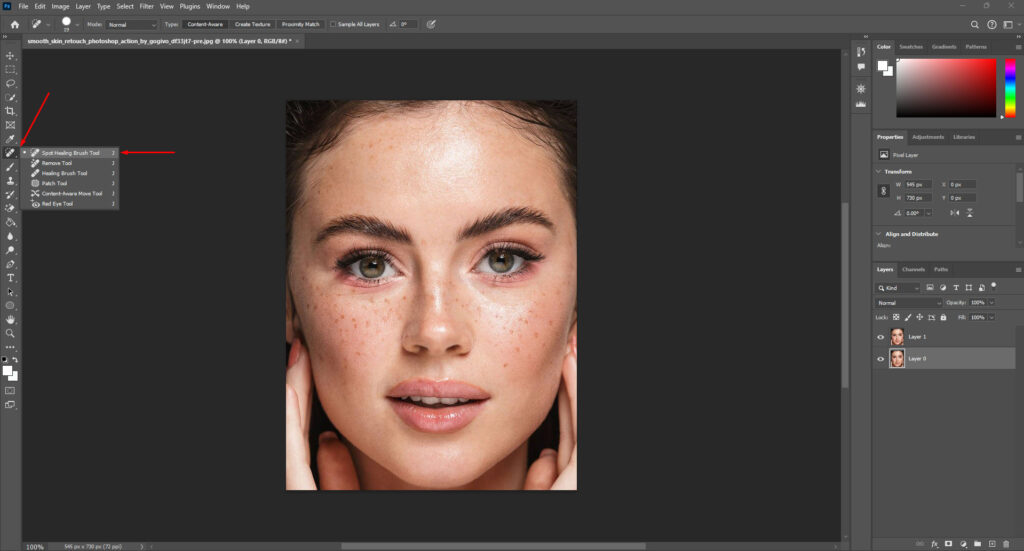
The next step is to pick the Spot Healing Brush tool from the toolbar. This tool’s icon looks like an adhesive medical bandage with a middle bump. Now, set the tool’s settings to remove blemishes.
Step 3: Set the Tool settings
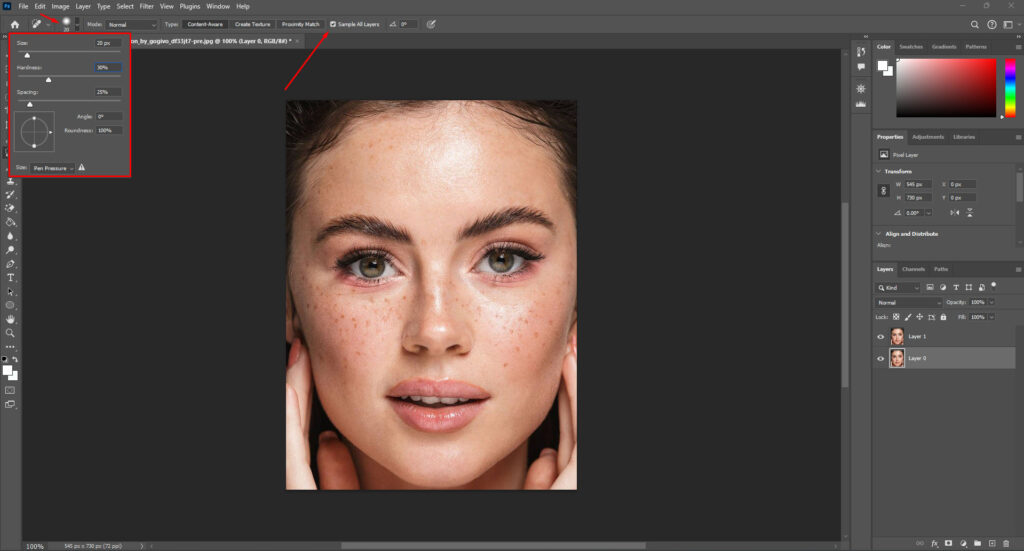
Set the brush size larger than the blemish area with a 30% hardness from the option bar. You can adjust the brush size according to the requirement by pressing the bracket keys. The tool now will work like the Content-Aware Fill.
If you want to remove dark circles, set the tool to “Sample All Layers.” With sample settings, you can also retouch visible veins on the face.
Step 4: Remove the Blemishes
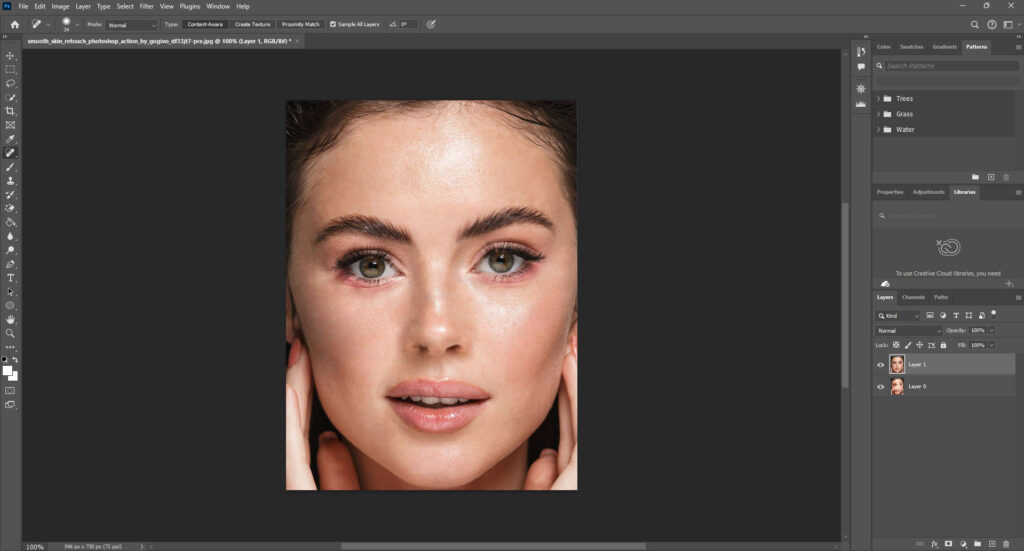
Once you’ve set the tool, click on the blemish area with the brush. Photoshop uses surrounding pixels to cover the area and make blemishes invisible. Continue clicking the areas you want to work on until all flaws disappear.
Step 5: Use Healing Brush Tool Alternatively
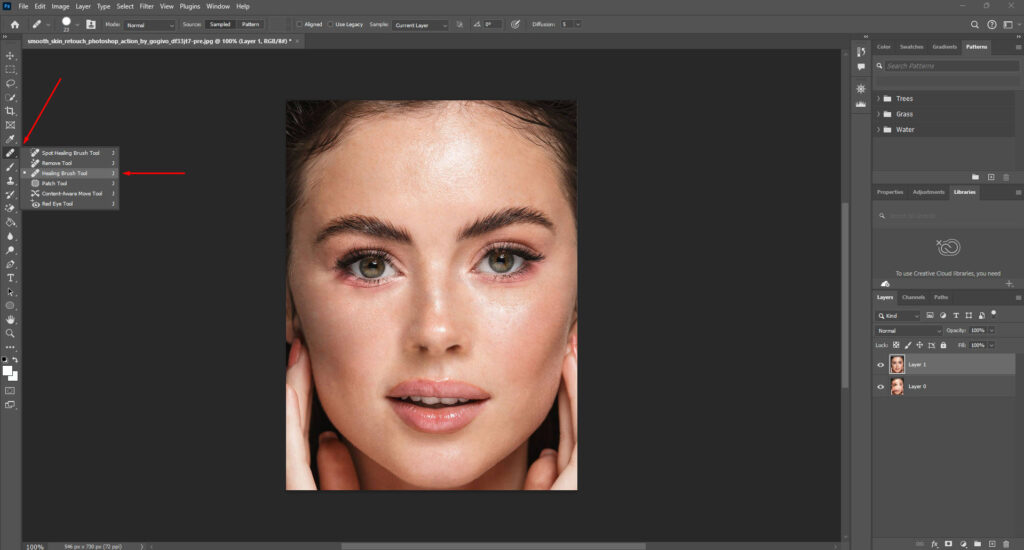
In case the Spot Healing Brush is not enough for retouching blemishes, then you can also use the Healing Brush tool. This tool gives you more control over the sampling source and repair area and is suitable for blending out larger imperfections.
The Healing Brush tool also keeps the color of the skin similar in the working area. So you can pick one of these tools according to your requirements.
How to Soften Skin in Photoshop After Retouching Blemishes
Among the two segments, the last segment is retouching the skin to make the texture appear more smooth and soft. Here’re the steps on how to touch up skin in Photoshop:
Step 1: Open the Image and Convert It to Smart Object
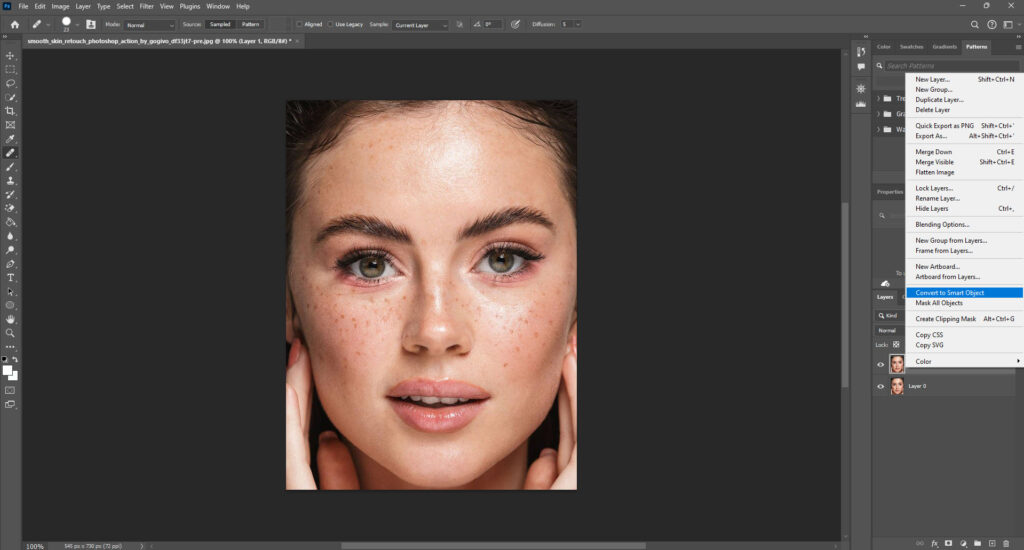
If you’re retouching the skin after removing imperfections, the image is already opened in Photoshop. You skip to the next step for the further process.
And in case you want to work on a different picture for softening, you need to open your Photoshop and load the high-quality image. Now, duplicate the image by pressing “Ctrl/Cmd + J.”
Right-click on the duplicate layer you just made and choose “Convert to Smart Object” from the options. This will enable the smart filters to be used. Follow the same duplicating method and duplicate the Smart Object layer.

The purpose of using two smart layers is —
- Use the first smart object layer to blur the skin.
- The copy of the smart object layer will keep the real skin texture intact.
Step 2: Add Blur and Set It
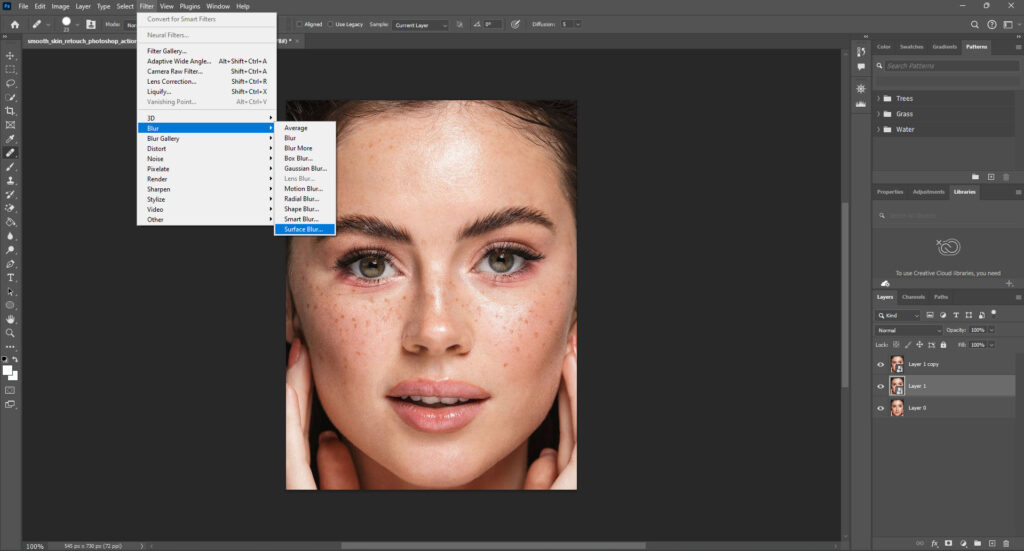
Select the first smart object layer and go to “Filter.” From the drop-down options for Filter, click “Blur” and then “Surface Blur” or “Gaussian Blur.” The Surface Blur will create a smooth surface with a natural look.
And if you prefer a classic diffusion effect to the photo, add the Gaussian Blur. Since we’re focusing on a natural look, we’ll pick the Surface Blur.
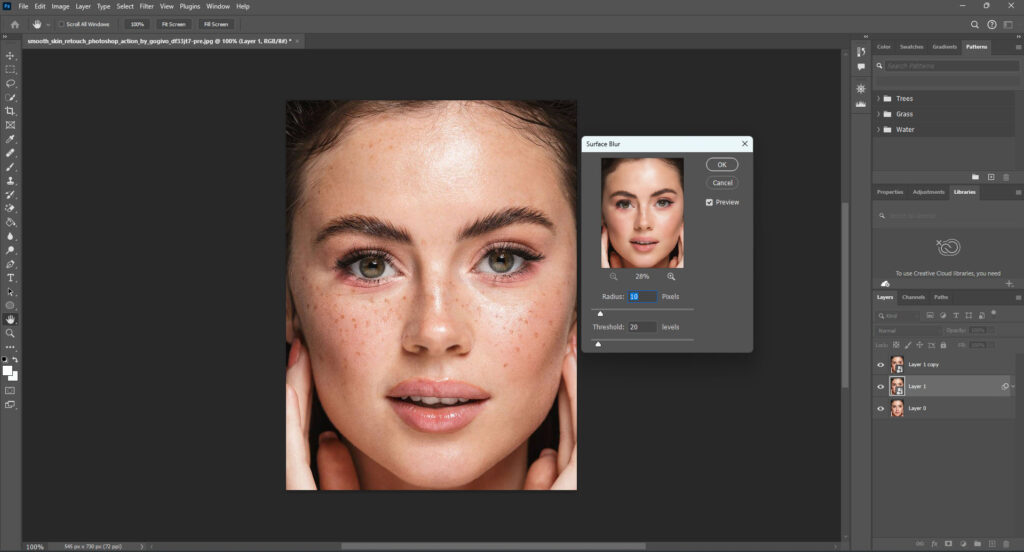
Set the threshold level to 15 to 25 and adjust the radius from the option bar. You need to adjust these settings until the person’s face looks soft and smooth while maintaining the face contour. It’s alright if the effect makes the skin too soft; we’ll fix it eventually.
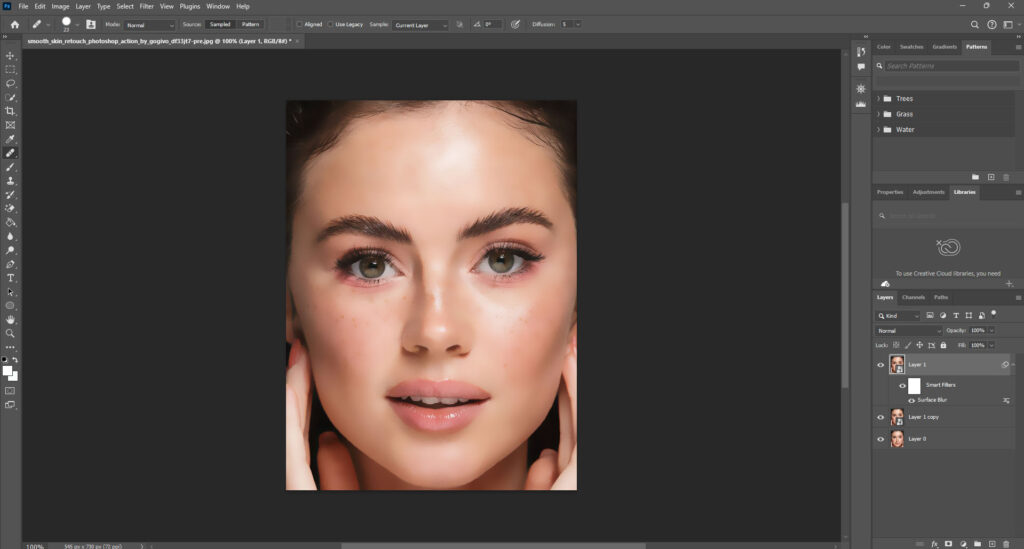
Step 3: Edit the Real Skin Texture
Now, select the copy of the smart object layer, go to “Filter,” select “Other,” and pick “High Pass.” This is a useful layer style for sharpening skin details and contours without harming the original photo.
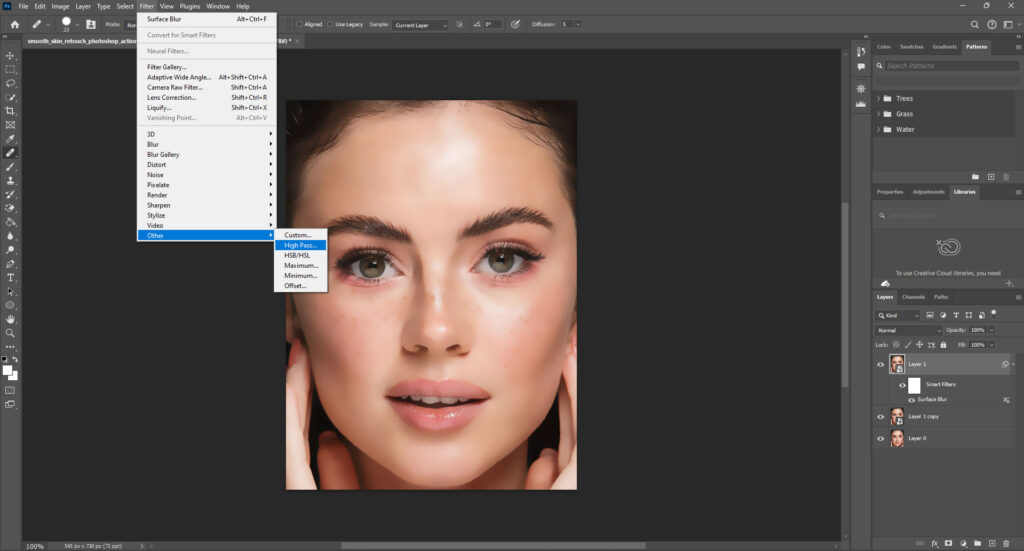
It’ll restore the real skin texture and let you edit it. Adjust the radius setting from the High Pass dialog box to determine how much of the surrounding pixels will be analyzed while softening.
Step 4: Convert the Smart Object Layer Copy to Linear Light
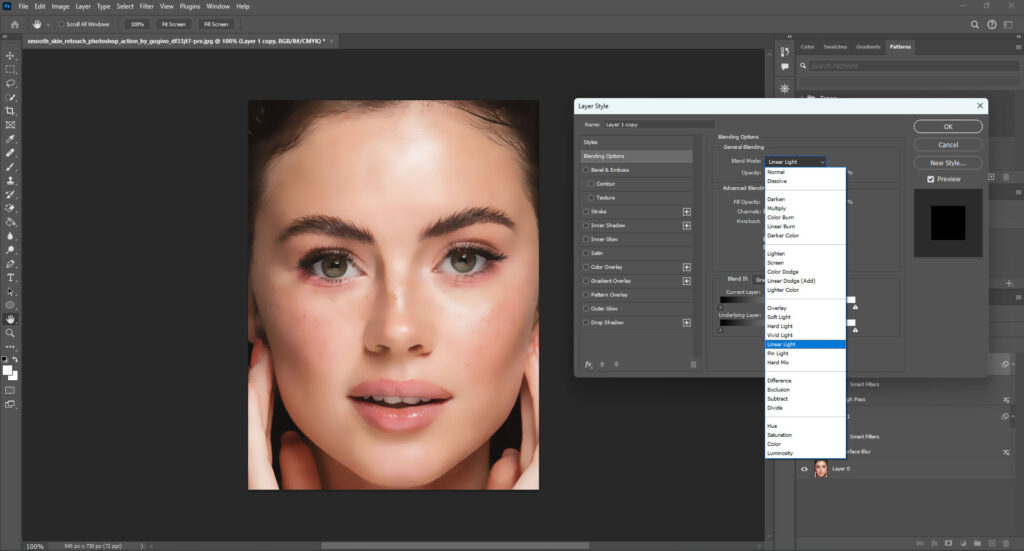
Go to “Layers” to access the Layers Panel. Click on Blending More and change the copy of the smart object layer to “Linear Light.” The skin texture should look too smooth now.
Press the Ctrl or Cmd key and select both Smart Object layers. Now, hit “Ctrl/Cmd + G” to make these two layers a group.
Step 5: Add Layer Mask to the Smart Object Group
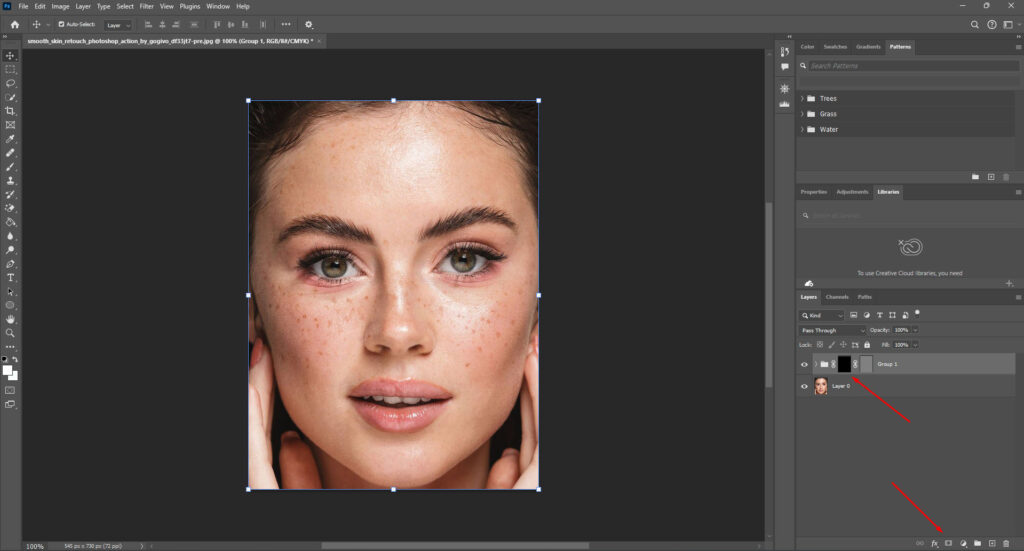
In this step, you need to create a black layer mask for the Smart Object layers group. Select the group layer, press Alt, and click “Add Layer Mask” at the bottom of the layer panel .
What if the layer mask is white instead of black? Press “Ctrl + I,” and Photoshop will automatically invert the color.
Step 6: Paint over Skin
To reveal the airbrushing effect, you need to paint the skin area. Make the foreground color of the layer mask white. Pick the “Brush Tool” by pressing ‘B.’
Set the Brush tool to Normal Mode, with hardness at 50% and opacity between 20% and 25%. The brush should not be too large; set it to a midsize size.
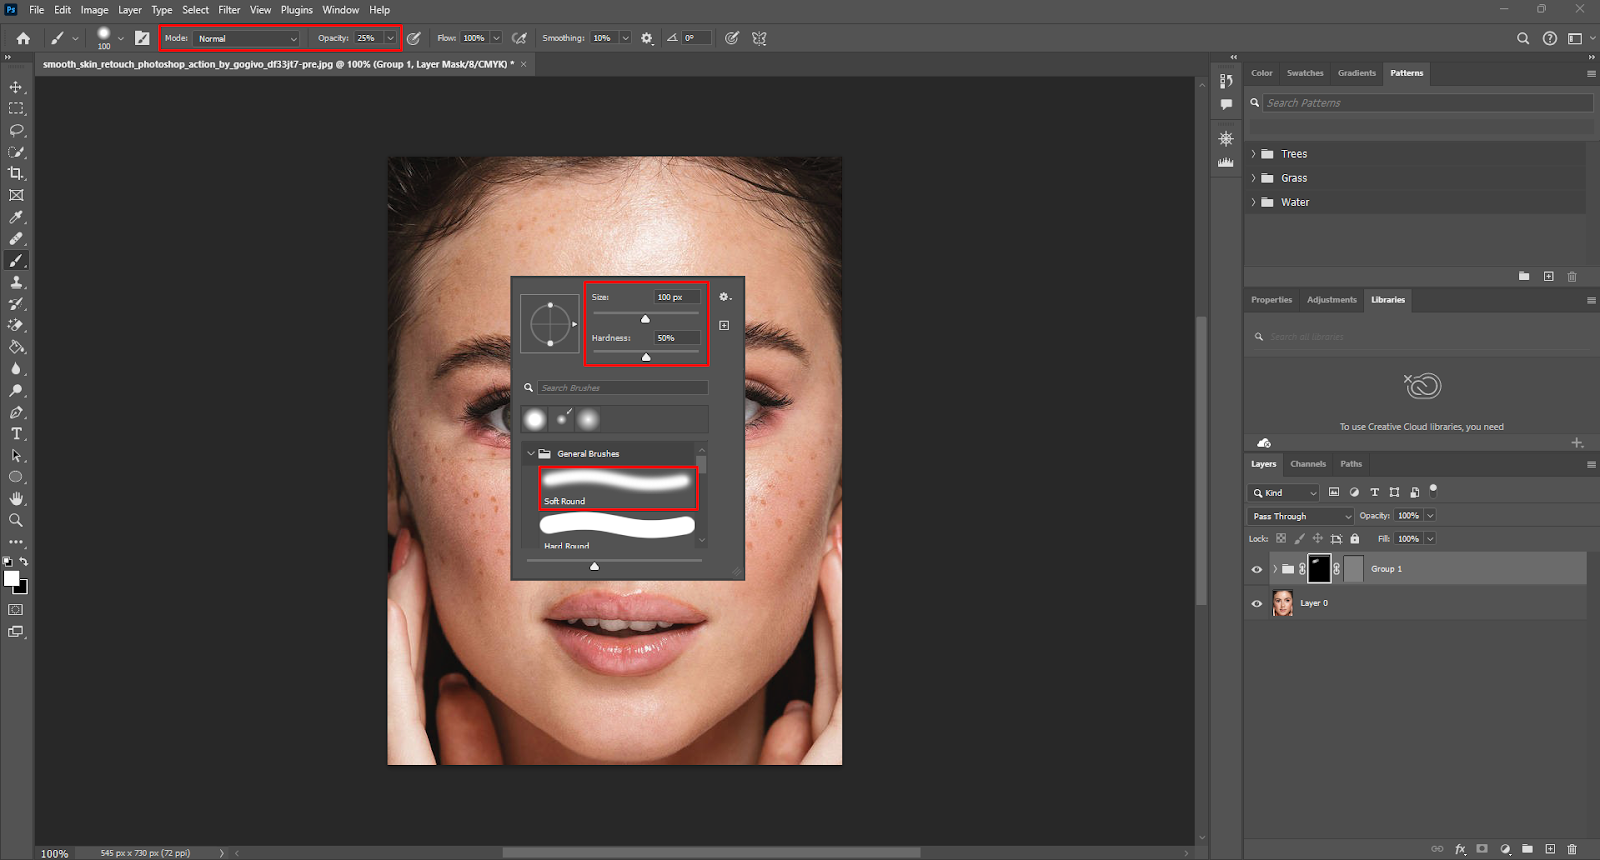
Start painting over the skin and cover all exposed skin, like the neck, ears, hands, etc., in the image to make the soft and smooth effect natural.
Professional Tips for Perfect Skin Retouch
Here are some professional Photoshop retouching tips that you can follow to make the process of retouching skin on Photoshop easier:
- Always retouch a high-resolution, RAW, and natural image for the best quality and flexibility.
- Maintain details of pore, hair, and skin texture for realistic results.
- Use the Spot Healing Brush tool for small blemishes and the Healing Brush for large blemishes.
- Don’t overdo the smoothing step.
- Spend extra time around the eyes, nose, and mouth area not to lose the contour in these areas.
- Keep checking the before and after while working to achieve a better result.
Conclusion
You now know how to retouch skin in Photoshop to remove pimples, dark spots, and discoloration and make it smooth. The entire retouching process can be tricky, but dividing the task makes it easier.
Therefore, you either work on the skin imperfection first, then the smoothening process, or vice versa. Remember to follow the professional tips to get the natural and perfect result of skin retouching.
Meta Clipping Path – A well-known one-stop photo editing service provider company with 5+ years of experience and 25+ highly skilled professionals.
Working with 20 reputed worldwide e-commerce companies and 200+ satisfied customers.
![Read more about the article Top 5 Retouch Photo Apps for Beginners and Pros [Everything You Need to Know]](https://metaclippingpath.com/wp-content/uploads/2024/07/Retouch-Photo-Apps-300x160.png)