![You are currently viewing How to Add a Shadow in Photoshop in 5 Easy Steps [Create Realistic Photos like a Pro]](https://metaclippingpath.com/wp-content/uploads/2024/07/Add-a-Shadow-in-Photoshop.png)
Shadows are a fundamental visual element in photography and design. They add depth, dimension, and realism to your images. But, do you know how to add a shadow in Photoshop?
You can add a shadow in Photoshop in five easy steps. First, determine the source of light and the highlights. Then, add the shadows and highlights. You can customize them however you want! Finally, refine and apply the shadow if necessary.
If you want to create a natural and realistic shadow, we’ve got you covered. Keep reading to find out our expert tips!
Why Do You Need to Add Shadows Under Objects?
Shadows can transform your images and give them life. They turn flat objects into believable elements within a scene!
The impacts of adding shadows in Photoshop are –
Depth and Dimension

Without shadows and highlights, your image appears flat and one-dimensional. Think of a character with a solid color for their body and hair. How can you add more depth?
You can add shadows to define the curves and contours of the body. The highlights can create a sense of volume and roundness!
Realistic Images
You can use shadows to show where the light source is coming from and how it interacts with the object. This creates a sense of space and perspective.
Clarity and Readability

A subtle drop shadow behind the text can separate it from the background. You can add shadows to your texts to make them more readable!
If your image has a complex shape, highlights can define the edges. Thus, you can grab the viewers’ attention.
What Are the Common Shadow Types in Photoshop?
Sometimes, you may need to create a natural shadow in Photoshop to make your image more realistic. Shadows work amazingly, whether you’re improving a product photo or adding a touch of realism to a portrait!
Here, we’ve made a list of some of the most popular shadow types used in Photoshop –
Drop Shadow

This is the most basic and widely used shadow type. It creates a simple, offset shadow directly beneath your object. You can mimic a natural light source by adding a drop shadow to an image.
If you want, you can also add a drop shadow to texts in Photoshop!
Inner Shadow

Do you want to add depth and dimension to your image? This shadow seems like it’s coming out of the object itself! You can also add this shadow to texts in Photoshop.
Bevel and Emboss
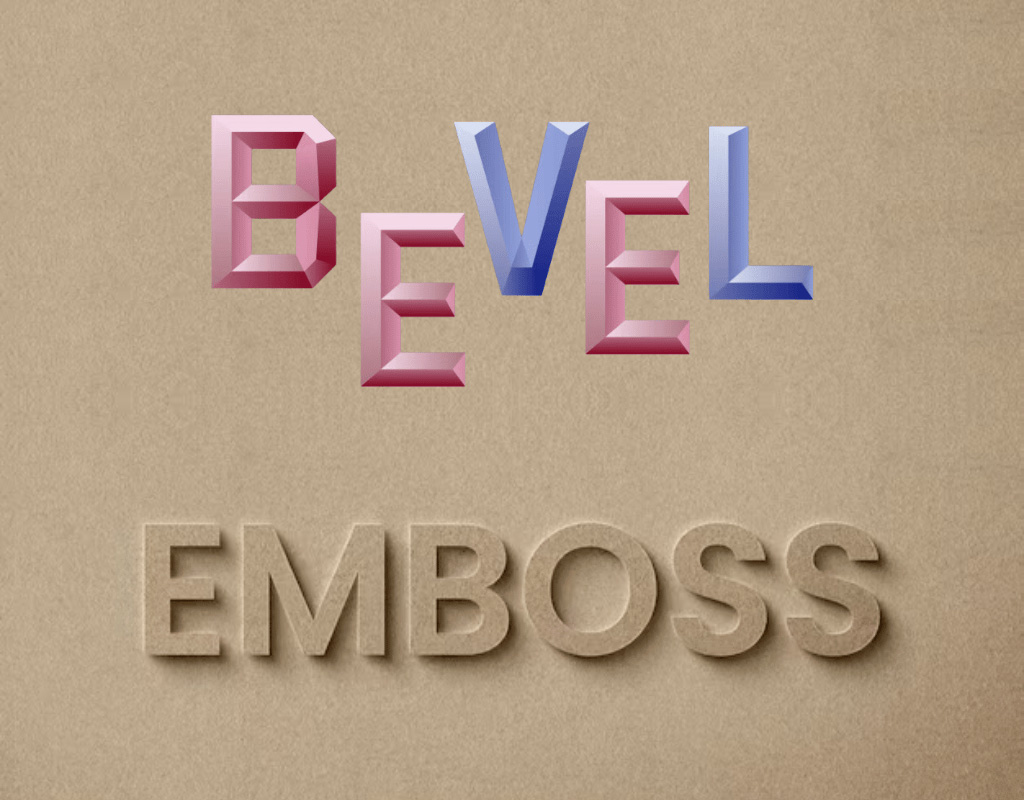
This technique creates a more complex shadow effect. You can simulate a chiseled or beveled edge on your object with this.
Outer Glow

The outer glow isn’t strictly a shadow, but you can use it creatively. It can create a subtle halo or lighting effect around your object!
How to Add a Shadow in Photoshop
Want to make your product images seem more alive and realistic? Here’s how to make a shadow in Photoshop

- Figure Out the Source of Light
The first step is to understand where the light is coming from. Shadows point away from the light source. So, set your shadows and highlights accordingly!
- Add the Shadow and Highlights
Start by opening your illustration in Photoshop. Then, click on “Window” and then select “Layers” from the dropdown menu. In the Layers panel, you’ll see options to create new layers. Click the “Create a new layer” icon. Do this twice to create two new layers. These will work as your shadow and highlight!
- Repeat the Process
Shadows aren’t always neat outlines. Think about how objects naturally block light. This creates darker areas, how can you achieve it? Visualize things realistically and keep adding shadows or highlights.
If you’re not satisfied, you can also remove the shadow in Photoshop. Repeat the process until you reach perfection!
- Fix the Opacity for Both Layers
Consider starting around 15% opacity for shadows. Adjust the opacity to determine how strong or subtle you want the shadow to be.
A good starting point for highlight opacity is around 10%. You can adjust this lower (like 8%) if your illustration uses mostly light colors. This makes the highlights more subtle.
- Refine and Apply
You can customize the shadow as you want. Set the angle, spread, distance, and size depending on the vision. Once you’re happy with the shadow’s appearance, click “OK” to apply the effect to your object.
Expert Tips for Adding Shadows Accurately
You’ve learned the basics of creating a shadow in Photoshop, now it’s time for some advanced techniques!
Find out how you can improve your shadows and highlights –
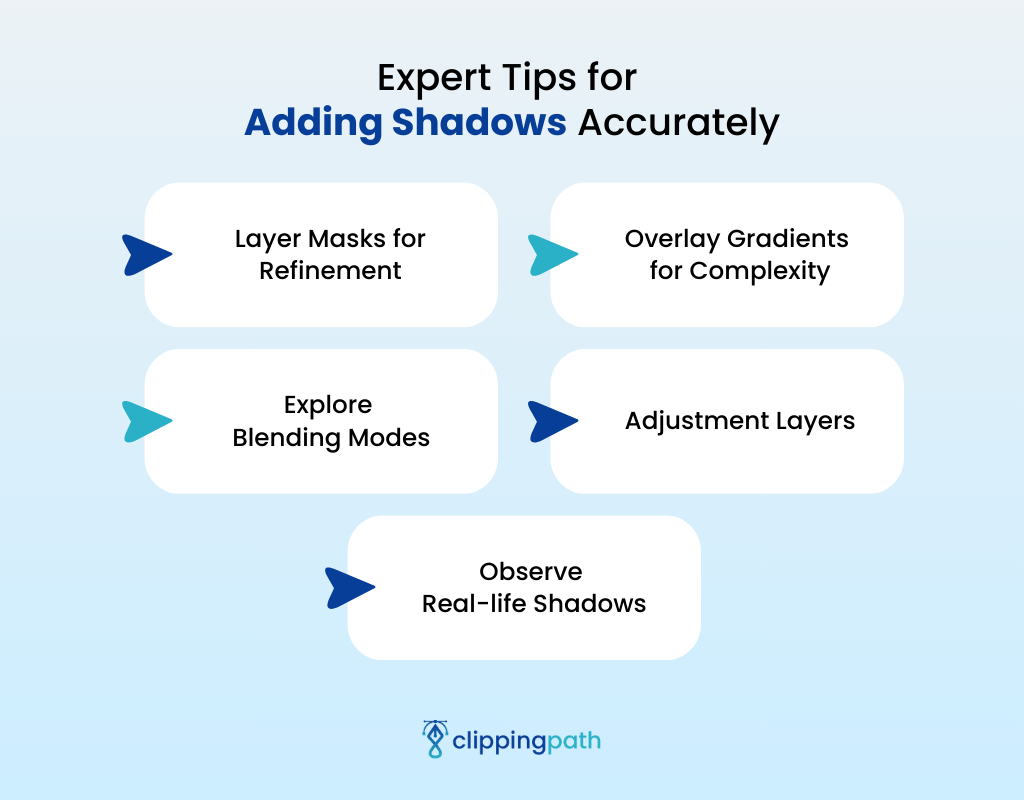
Layer Masks for Refinement
Refine the edges of your shadows or create specific shadow shapes using layer masks. Paint black on the mask to hide parts of the shadow. Thus, you can reveal the underlying image.
This allows for precise control over the shadow’s placement and shape.
Overlay Gradients for Complexity
Want a more natural shadow fall-off? Time to explore using gradient overlays! Create a custom black-to-transparent gradient and apply it as a layer with a “Multiply” blend mode. Adjust the opacity and manipulate the layer to position the gradient. This will give you a more realistic shadow effect!
Explore Blending Modes
What if you want to achieve unique and creative shadow effects? Experiment with different blending modes within the Layer Styles panel. “Multiply” creates a darker, more realistic shadow, while “Overlay” can introduce a more subtle and colored effect.
Adjustment Layers
You can use adjustment layers like “Curves” or “Levels” to subtly adjust the overall darkness or lightness of your shadows. This gives a more nuanced control compared to simply adjusting layer opacity.
Observe Real-life Shadows
Pay attention to how shadows behave in the real world. Notice how light interacts with objects. This creates variations in darkness, softness, and direction. A real-world observation can significantly improve your understanding of creating realistic shadows in Photoshop!
Final Words
Shadows and highlights can turn your ordinary images into extraordinary creations. How to add a shadow in Photoshop? Just follow the five easy steps we’ve mentioned!
You have to understand the source of light to keep the shadow natural. Add the shadows and highlights from the Layers Panel in Photoshop. Customize however you want until you get the desired result.
Remember, the key is to experiment.
Meta Clipping Path – A well-known one-stop photo editing service provider company with 5+ years of experience and 25+ highly skilled professionals.
Working with 20 reputed worldwide e-commerce companies and 200+ satisfied customers.
![Read more about the article How to Create Natural Shadow in Photoshop [10 Easy Steps]](https://metaclippingpath.com/wp-content/uploads/2024/08/Create-Natural-Shadow-in-Photoshop-300x160.png)
![Read more about the article Drop Shadow Definition and How It Works [Everything You Need to Know]](https://metaclippingpath.com/wp-content/uploads/2024/08/Drop-Shadow-Definition-300x160.png)