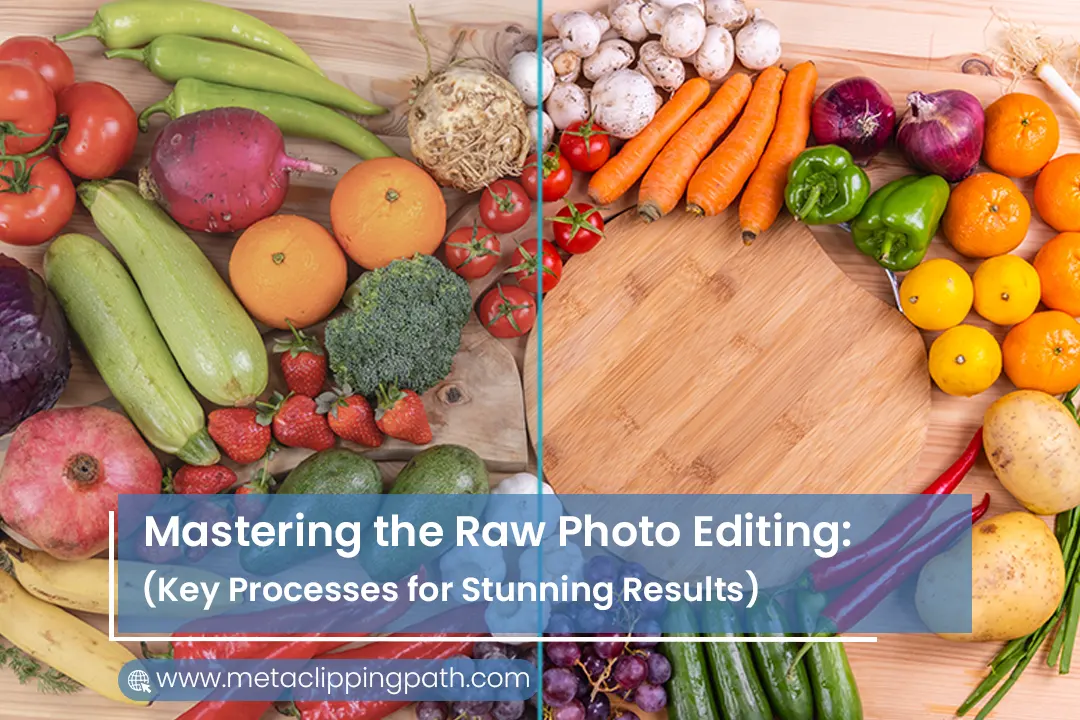
The photo editing process, especially with RAW images, is like unlocking a hidden potential in your photography. It’s where you take control, turning good shots into great ones. This journey through the raw image editing process is more than just tweaking settings. It’s where your creativity meets technology.
As we explore these processes together, you’ll see how each step, from adjusting light to enhancing colors, is crucial. But don’t worry if this sounds daunting. Only some people have the time or skills for detailed editing, and that’s where an image editing service steps in. These services, often used by professionals, take your RAW photos and polish them to perfection.
And if you’re aiming for top-notch quality, a professional photo editing service can be your go-to. They bring expertise and an artistic touch to your photos, ensuring every image stands out.
Now, in this guide, we will explore more about the raw image editing process. So, keep going!
Understanding RAW Files in Raw Photo Editing
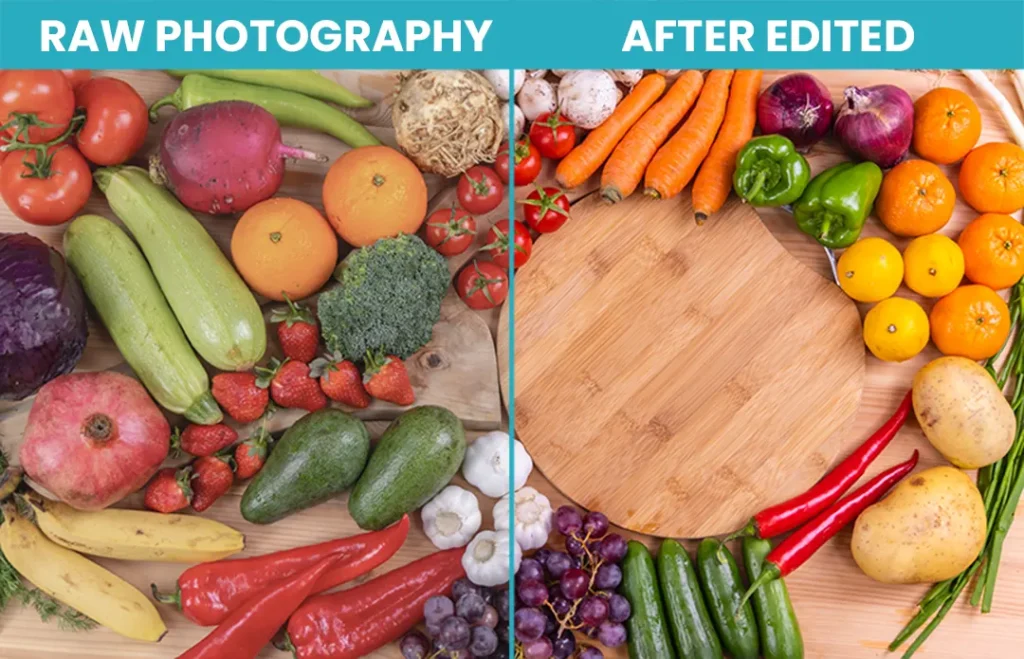
Taking a picture with your camera set to RAW mode captures all the raw information. The sensor captures the full details of light, shadows, colors, and more. Unlike JPEGs, which compress and process this information, RAW files leave it untouched. It’s like having the entire scene’s raw data at your fingertips.
RAW files are unique because they store all the image data captured by your camera. Unlike JPEGs, which lose some information during compression, RAW files retain everything.
Advantages of RAW Files over Other Formats
When you take professional photo editing services, understanding the advantages of RAW files is crucial. The basic benefits of raw files over other formats are:
Unmatched Quality and Detail
RAW files are like uncut diamonds. They hold all the image data your camera sensor captures, providing the highest quality for editing. When you edit a RAW file, you’re working with the most authentic version of your picture. It allows you to adjust and refine without losing any detail.
Higher Dynamic Range
The dynamic range in RAW files is a game-changer. They capture a wider range of light, allowing you to balance the extremes of shadows and highlights more effectively. This is particularly important in challenging lighting conditions, where every bit of detail counts.
Importance of Shooting in RAW for Professional Editing
For professional photographers and editors, shooting in RAW is almost non-negotiable. It’s the key to achieving the highest quality in photo editing.
Foundation for Professional Editing
RAW files provide the perfect starting point for professional editing. Whether you’re adjusting exposure, correcting colors, or retrieving shadow details, RAW files offer the depth and flexibility needed for fine adjustments. This is especially important when working with a bulk or outsource photo editing service.
Consistency in Bulk Editing
In the bulk photo editing process, consistency is king. RAW files ensure that every image in a series meets the same high standard. This uniformity is crucial for maintaining a professional look across all your photos, whether for a wedding album, fashion shoot, or product catalog.
Essential Tools and Software for Raw Photo Editing
Having the right tools is crucial for anyone venturing into photography, especially when dealing with RAW files.
Whether you’re working solo or with a bulk photo editing service, outsourcing photo editing, or being an independent image editing service provider, these tools are essential in your arsenal.
1. Adobe Lightroom Classic
Adobe Lightroom Classic is a photographer’s favorite for its intuitive design and powerful editing capabilities. It excels in organizing and bulk editing photos, making it ideal for managing large collections.
However, Lightroom offers advanced color grading, exposure correction, and batch processing features, restructuring your workflow.
2. Capture One Pro
Capture One Pro is popular for its exceptional RAW processing capabilities. It offers detailed color correction, image quality enhancement, and tethered shooting features. All these features make it a top choice for professional photographers.
3. Adobe Photoshop
Adobe Photoshop goes beyond basic editing. It’s perfect for intricate edits, composites, and retouching. Moreover, its vast array of tools and features makes it indispensable for detailed image manipulation.
4. Corel PaintShop Pro
Corel PaintShop Pro is a versatile software blending photo editing and graphic design. Its user-friendly interface makes it perfect and suitable for beginners. Also, it’s powerful enough for advanced edits.
5. Affinity Photo
Affinity Photo is a cost-effective alternative to Photoshop, offering a range of editing tools. It’s known for its speed, power, and precision, suitable for raw photo editing and creative compositions.
6. DxO PhotoLab
DxO PhotoLab shines with its automatic lens and camera correction features. It’s excellent for enhancing image quality and correcting optical flaws. Moreover, it offers an edge in producing high-quality images.
8. Skylum Luminar Neo
Skylum Luminar Neo is known for its AI-driven editing tools. It simplifies complex editing tasks like sky replacement and portrait enhancements. Thus it become a favorite for those who value efficiency.
9. Serif Affinity Designer
While Serif Affinity Designer is primarily a graphic design tool but offers robust photo editing features. It’s ideal for those who want to combine design with photo editing in one platform.
10. Canva
Canva isn’t just for design; it also offers basic photo editing features. It is ideal for social media content creators. Furthermore, Canva combines ease of use with various templates and design elements.
The RAW Editing Workflow: Step-by-Step Guide: From Importing to Exporting
The RAW editing workflow is your roadmap to transforming RAW files into stunning images. Before getting into the raw photo editing process, you must know its detailed steps.
However, we will describe the step-by-step guide to raw photo editing workflow from importing to exporting. Let’s explore!
Importing RAW Files
Your journey of raw photo editing begins the moment you import your RAW files. This initial step is like laying out your tools before crafting a masterpiece.
However, make sure your editing software supports RAW formats for the best quality. Importing is simple – just connect your camera or insert your memory card and let the software do the rest.
You can directly import or download raw photo files using Windows Explorer. Using this software, you can directly download raw photos from a camera via a USB cable. The Windows Explorer file system is simple to use.
Organizing and Selecting Images for Editing
After importing, it’s time to get organized. Sort your images into folders or use tags to categorize them. This step is crucial for finding files quickly later on.
When selecting images for editing, choose those that spark your interest or have great potential. Maybe it’s the way the light hits a subject or an interesting composition that catches your eye.
Basic Adjustments
In raw editing workflow, the basic adjustments are balance correction, exposure, and contrast adjustments, and highlight and shadow recovery. Now go through these in detail below:
1. White Balance Correction
Correcting the white balance ensures the colors in your photos look as they did in real life. Adjust the temperature slider to add warmth or coolness. Tweak the tint to remove any unwanted green or magenta hues. This step is vital for achieving a natural-looking image.
2. Exposure and Contrast Adjustments
Next, adjust the exposure to brighten or darken your image. Play with the contrast to add depth and make your image pop. But remember, subtlety is key – too much contrast can make your image look harsh, and overexposure can wash out details.
3. Highlight and Shadow Recovery
Recovering highlights and shadows can bring back details lost in overly bright or dark areas. Use the highlight slider to tone down bright spots and the shadow slider to brighten dark areas. This balancing act can dramatically improve the overall look of your photo.
4. Clarity and Sharpness Enhancements
Adding clarity brings out your raw photo’s textures and details. And sharpening enhances the edges in your image. A little goes a long way with these adjustments. Overdoing it can make your image look gritty or overly digital.
Advanced Editing Techniques
Once the basic adjustment is done, the next step is to learn about the advanced editing techniques. Those are:
1. Color Grading and Saturation Adjustments
Color grading sets the mood of your photo. Adjust the saturation to make the colors in your photo more vivid or subdued. It depends on the look you’re going for. Here you can get creative and give your photo a signature style.
2. Noise Reduction and Detail Enhancement
High ISO settings can introduce noise. Use noise reduction tools and techniques to smooth out the grain. Detail enhancement can bring back some of the sharpness lost during noise reduction. It’s all about finding the right balance.
3. Lens Correction and Perspective Adjustments
Correct lens distortions are essential to fix any bending or warping in your image. Adjusting the perspective can help straighten buildings or horizons that appear tilted.
4. Advanced Retouching Techniques
Use spot removal to get rid of any unwanted blemishes or distractions. Selective adjustments allow you to fine-tune specific areas of your photo without affecting the whole image.
Creative Editing and Effects
Creative editing and effects are all about selling your personal style. Through creative editing, you must satisfy your customers. It’s all about applying creative effects and filters to the raw image perfectly.
1. Applying Creative Filters and Effects
Filters and effects can transform the style of your photo. Whether it’s adding a dreamy blur or a grunge texture, this is your chance to get creative and experiment.
2. Black and White Conversion Techniques
Converting your image to black and white can give it a classic, timeless feel. Focus on adjusting the contrast and playing with light to make your black-and-white images stand out.
3. Creating HDR Images and Panoramas
HDR techniques are great for scenes with high contrast. They combine multiple exposures to create one evenly lit image. Panoramas are perfect for capturing wide landscapes or cityscapes. They stitch together multiple images to create a single wide view.
Finalizing and Exporting
Once you are done with all the above steps, it’s time to finalize and export your images:
1. Resizing and Cropping for Different Uses
Resizing and cropping modify your image for its intended use. Adjust the dimensions and composition to fit perfectly, whether it’s for Instagram, a print, or a desktop wallpaper.
2. Output Settings for Web and Print
Choose the right format and resolution for your final image. High-resolution and specific formats like TIFF or PDF are best for printing, while JPEG and lower resolutions are suitable for the web.
3. Saving and Exporting Final Edits
Finally, save and export your masterpiece image after completing all the photo editing process. You should always keep a copy of your original RAW file and your edited version. A copy or backup means you can always go back and make changes if needed.
Best Practices and Tips
Following the best practices and tips in the raw photo editing process are essential to transform your images into captivating works.
So, now we will tell you what tips you should follow and what you should avoid while providing professional photo editing services. Let’s start!
Tips for Efficient RAW Photo Editing
Editing RAW photos can feel overwhelming, but it becomes a fulfilling creative process with the right techniques. Efficient editing saves time and brings out the best in your images.
Whether you’re a professional or a hobbyist, the following tips will modernize your workflow and enhance your edit quality.
i. Organize Before You Edit
Organization is key. Begin by sorting your photos into categories or themes. This step not only modernizes your workflow but also helps in identifying the best images for editing.
However, consider using software with good organizational tools, especially when dealing with large volumes typically seen in bulk photo editing services.
ii. Adjust Exposure and Contrast First
Tackling exposure and contrast at the beginning sets the tone for your image. Adjusting these can dramatically change the look and feel of your photo. So it’s crucial to get them right before moving on to more detailed edits.
iii. Be Cautious with Saturation
Vibrant colors can make your photo stand out. But, over-saturation can lead to unnatural and harsh images. Aim for a balance that enhances the photo’s natural colors without overpowering them.
iv. Learn Keyboard Shortcuts
Time is precious, especially in photo editing. Familiarizing yourself with keyboard shortcuts can drastically reduce your editing time. Professionals often employ this practice in image editing services.
v. Batch Processing
When working with a large set of images, such as in event photography, batch processing is a lifesaver. This technique, often used by bulk photo editing services, allows you to simultaneously apply the same edits to multiple photos. It ensures consistency and saves time.
Common Mistakes to Avoid
Even the most experienced photographers can fall into common editing traps. Being aware of these pitfalls is crucial for producing high-quality images.
From over-editing to neglecting basic adjustments, understanding what to avoid is just as important as knowing what to do. Let’s explore these common mistakes to ensure your photos always look their best.
i. Over-Editing
It’s easy to get carried away with the myriad editing tools at your disposal. However, less is often more in photo editing. Strive for a balance where your edits enhance rather than dominate the photo.
ii. Ignoring White Balance
White balance can change, make or break a photo. It’s crucial for maintaining the realism and mood of your images. Take the time to adjust the white balance to reflect the true colors of your scene.
iii. Forgetting to Back Up Originals
You should maintain the backup of your original file. Having a backup ensures that you have the flexibility to revisit and re-edit your photos in the future.
iv. Neglecting Image Composition
Good editing also involves enhancing the composition of your photo. Crop and align your images to follow compositional rules to create more engaging photos.
v. Overlooking Noise Reduction
Noise reduction is important. But in low-light photos, more is needed to avoid loss of detail. To maintain the quality of your images, you must strike to the right balance.
How to Develop Your Own Editing Style?
Developing a unique editing style is a journey of self-discovery in photography. It sets your work apart and makes it recognizable. This process involves experimentation, learning from others, and understanding the emotional impact of your edits.
Crafting your personal style is about finding what resonates with you and your audience. It’s also about creating a signature look that tells your story through images.
i. Experiment with Different Techniques
The best way to develop your style is through experimentation. Try different techniques to play with colors, shadows, highlights, and textures. This exploration will enable you to discover what resonates with your artistic sensibility.
ii. Seek Inspiration but Don’t Copy
It’s beneficial to draw inspiration from other photographers or editors. However, it’s crucial to use these influences to develop something that’s uniquely yours.
iii. Understand the Mood of Your Photos
Each photo tells a story. Your editing style should complement the story or mood you’re trying to convey. Whether it’s a moody landscape or a vibrant street scene, your edits should enhance the photo’s narrative.
iv. Take Feedback and Learn
Be open to constructive criticism. Feedback from peers or clients, especially if you’re an outsourcing photo editing service provider, can provide new perspectives and help you refine your style.
v. Outsourcing for Learning
Sometimes, working with an outsourcing photo editing service can offer new insights. Observing how professionals tackle editing challenges can provide you with new techniques and ideas to incorporate into your style.
Final Thought
Mastering the RAW photo editing process is about understanding the tools at your disposal. And it’s also about avoiding common pitfalls and developing a style that speaks to your artistic vision.
Whether editing a single photo or a batch for a client, the basic tips will help you enhance your skills and produce stunning results. Remember, each photo is a canvas for your creativity. So, embrace the process and let your style evolve naturally.
Meta Clipping Path – A well-known one-stop photo editing service provider company with 5+ years of experience and 25+ highly skilled professionals.
Working with 20 reputed worldwide e-commerce companies and 200+ satisfied customers.
![Read more about the article What is Clipping in Photography? [Everything You Need to Know]](https://metaclippingpath.com/wp-content/uploads/2024/06/Clipping-in-Photography-300x160.png)