![You are currently viewing What is a Clipping Mask in Illustrator? [Type, How to Create, and More]](https://metaclippingpath.com/wp-content/uploads/2024/06/What-is-a-Clipping-Mask-in-Illustrator.png)
If you’re in the e-commerce business, you’ve likely heard about the clipping path technique. It’s a popular tool for editing product images. One of the common ways to use clipping masks is with Adobe Illustrator.
So, what is a clipping mask in Illustrator? A clipping mask in Adobe Illustrator is a technique that controls the visibility of an object based on the shape of another object.
Let’s explore clipping masks further: their advantages, how to use them in Illustrator, and more.
What is a Clipping Mask in Illustrator?
A clipping mask in Adobe Illustrator is a powerful tool that lets you control the visibility of an object based on the shape of another object. However, the basics of a clipping mask are the same whether you use Photoshop or Illustrator.
It’s like using a cookie cutter to cut out a specific portion of an image. When you create a clipping mask, the clipped object is only visible where it overlaps with the clipping path. Any areas outside the path are hidden.
Types of Clipping Masking in Illustrator
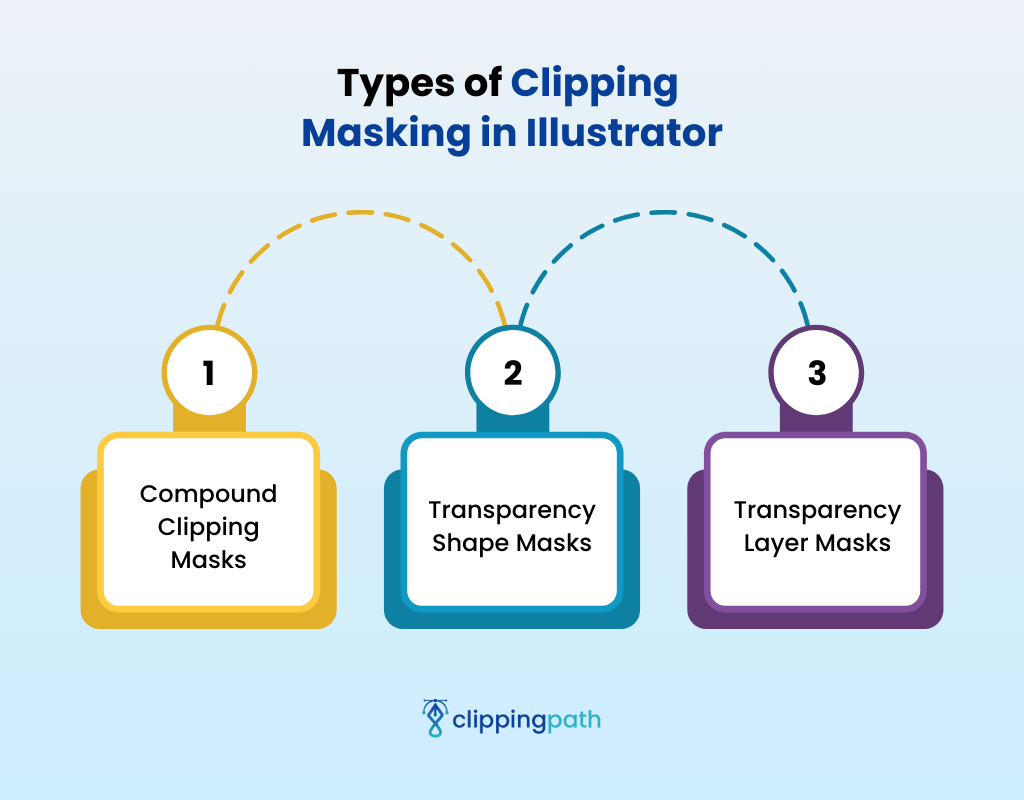
There are three main types of clipping masks you’ll see in Illustrator. Here are they:
1. Compound Clipping Masks
A compound clipping mask combines two or more clipping paths. It allows you to create intricate cutouts within your object. This is ideal for complex designs where multiple shapes define the final masked area.
2. Transparency Shape Masks
Here, a grayscale shape acts as a mask, controlling an object’s transparency. White areas remain fully visible, and black areas are completely transparent. This offers precise control over object opacity and creates subtle transitions.
3. Transparency Layer Masks
Similar to shape masks, layer masks use grayscale images to define transparency. However, they affect the entire layer, not just individual objects.
How to Create Clipping Mask in Illustrator
Here is the easiest way to create a clipping mask in Illustrator. Even if you’ve never used Illustrator, you can do this if you follow our guidelines properly.
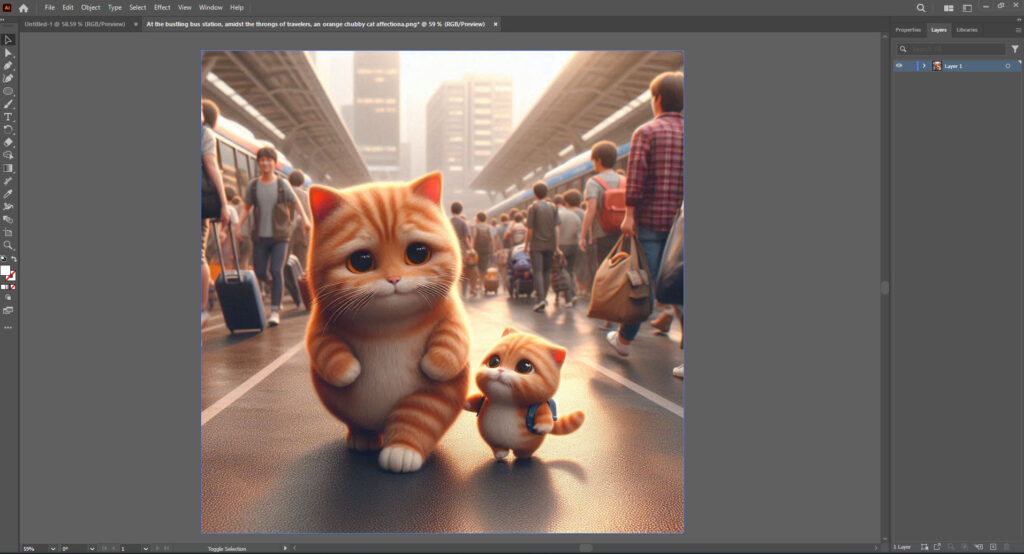
Step 01: Upload File in Illustrator
Launch Illustrator and upload the image file you want to mask. To do this, navigate the File option from the top menu bar. Then click on it, you’ll see a drop-down menu. Choose Open, then select the file you want to upload.

Before uploading, make sure both the image and shape you want to mask are in the same file.
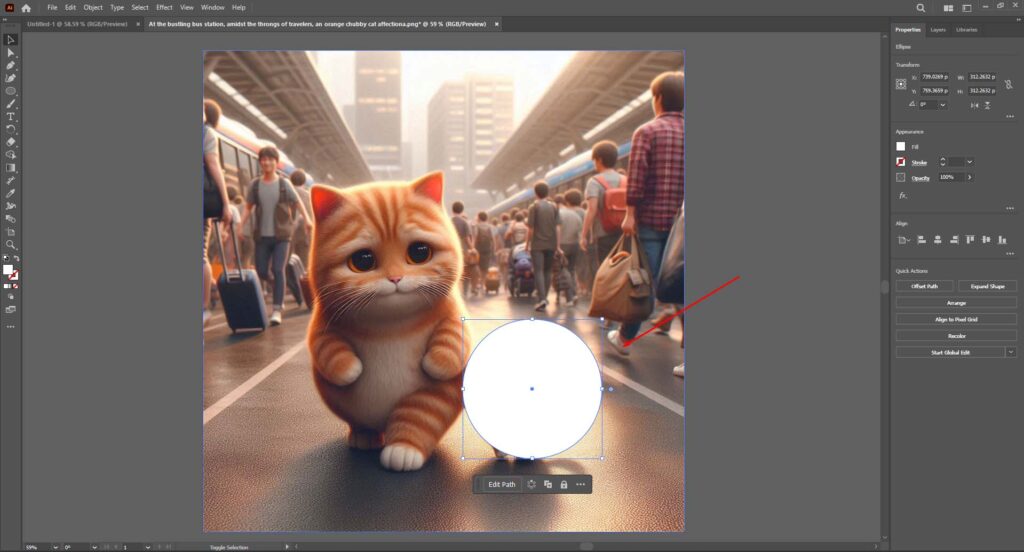
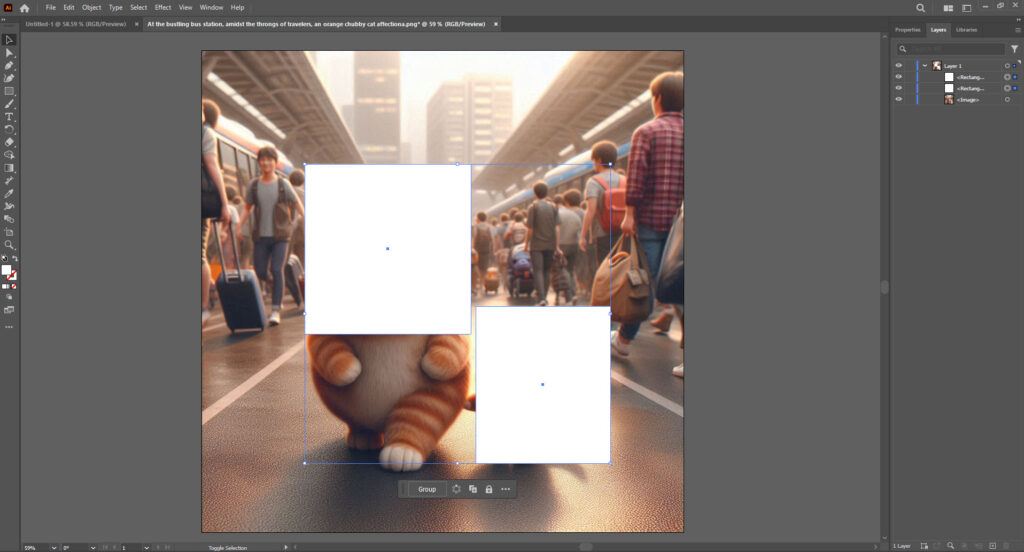
Step 02: Create the Base Shape
Now, it’s time to create the shape you want to use as the base shape. This could be a triangle, square, circle, or anything. Select Shape from the let Menubar of Illustrator. Then drag or click on the shape you like.

Step 03: Select Your Content
You’ve your base shape; it’s time to add the element you want it to frame. This could be a text, image, or any shape. Choose the content you want to show through the base shape and position it on top of it.
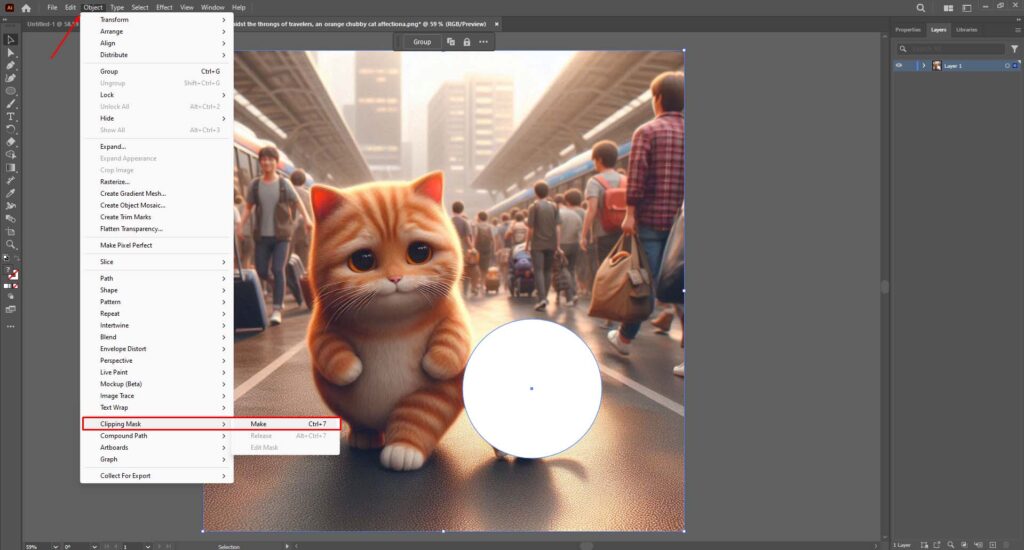
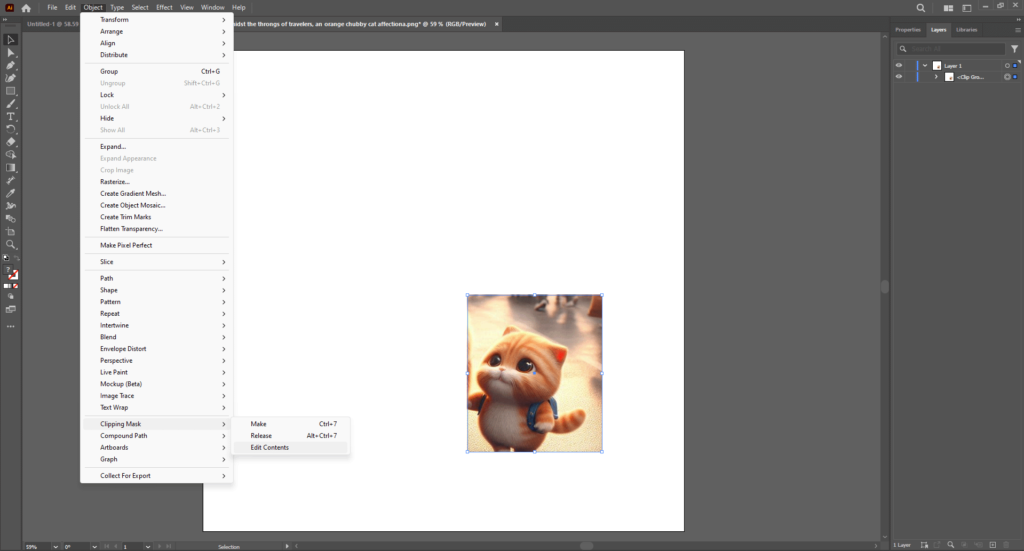
Step 04: Apply the Clipping Mask
Select both the shape and image. Press down the Shift key, then click on the image and shape. Then, from the top bar menu, select Object. Now, over the cursor on the Clipping Mask option, you’ll see drop-down menu. Click on the Make. Or press Shift+7 at the same time.
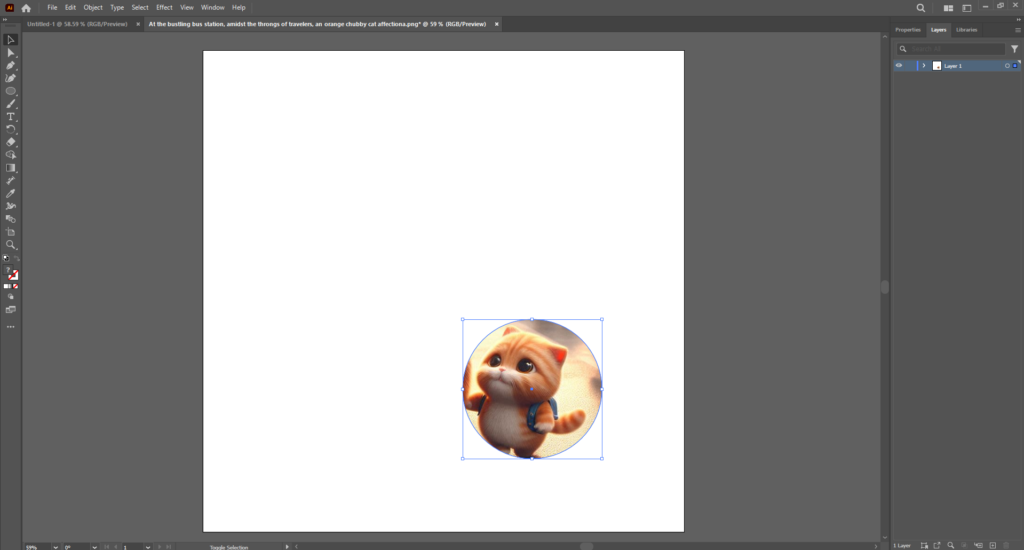
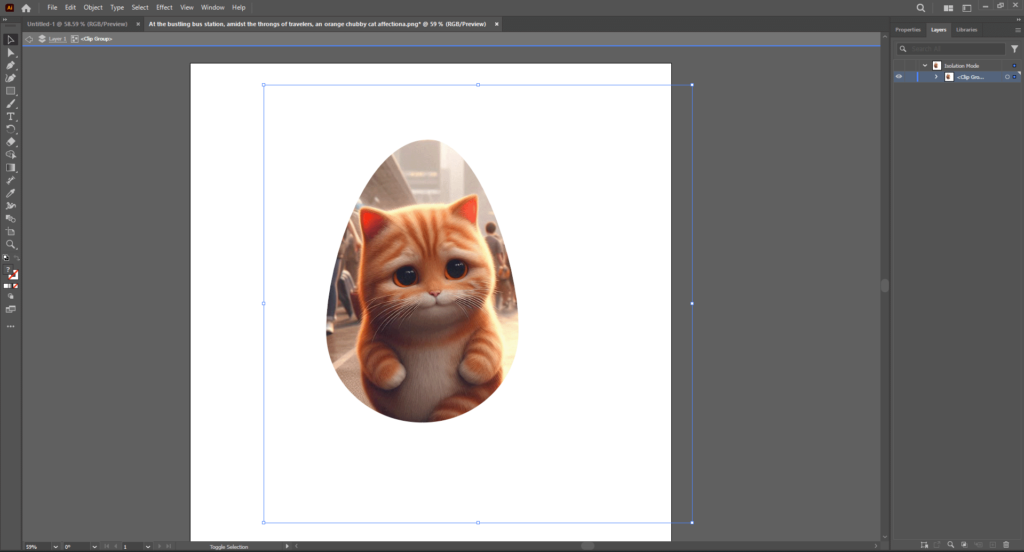
Step 05: Adjustment
Now, it’s time to edit. You can also use the selection to resize or move the mask.
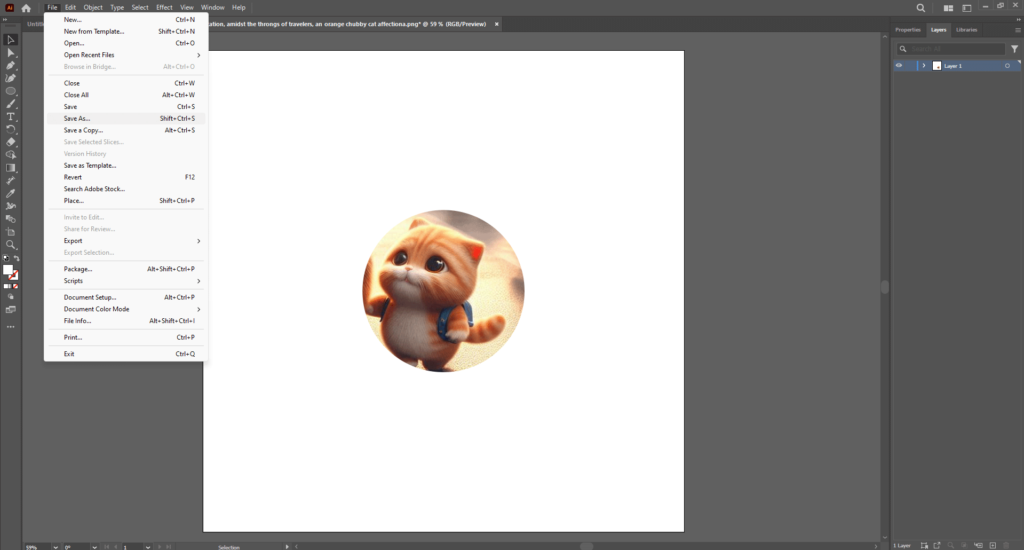
Step 06: Save Your Work
If you’re satisfied with the result, go to the File menu. Then click on Save As. Now, choose the PNG/PSD format. Next, click on OK.
How to Apply Clipping Mask to Multiple Layers in Illustrator
Illustrator allows you to create multiple-layer clipping paths. Here is how to do it:
Step 1: Launch Illustrator and select the clipping mask you wanna edit.
Step 2: From the Selection Tool, choose the shape or object. Position it above the layers panel.

Step 3: Modify the shape by using the Pen tool, Ellipse tool, or Rectangle tool.

Step 4: Now, choose all the similar shape groups or objects. To do this, press down the Shift key, then click on each object.
Step 5: Next, go to the Object Menu and select Clipping Mask. Then click on Edit Contents.
Step 6: Now,, you can modify or refine each object or shape separately, resize or move them.
Step 7: To exit isolation mode after editing your objects or groups, simply click on any empty space on the window.
How to Remove Object from Clipping Mask in Illustrator
There are two main ways to remove an object from a clipping mask in Illustrator:
Method 1: Using the “Remove From Clip” Option
Step 1: Make sure the Object tool is active in the toolbar.
Step 2: Click on the object you want to remove from the clipping mask. It should be highlighted.
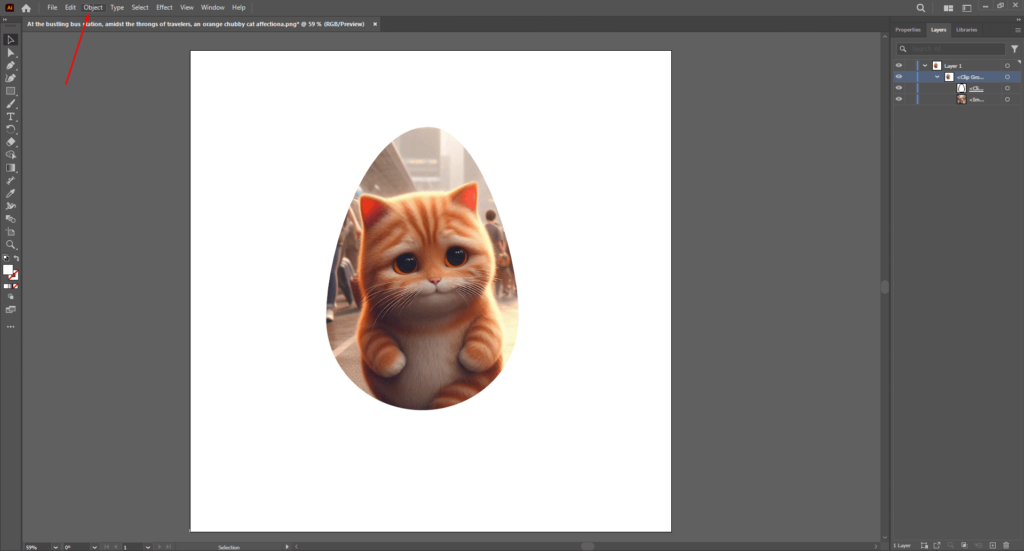
Step 3: Navigate to the “Object” menu in the top menu bar.
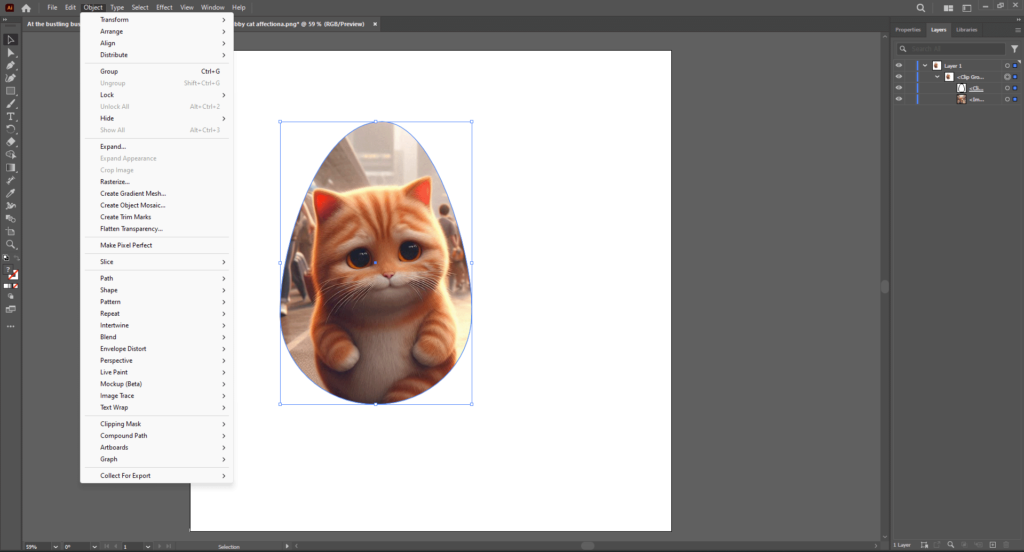
Step 4: Within the “Object” menu, select the submenu “Clipping Mask” and then choose the option “Remove From Clip.”
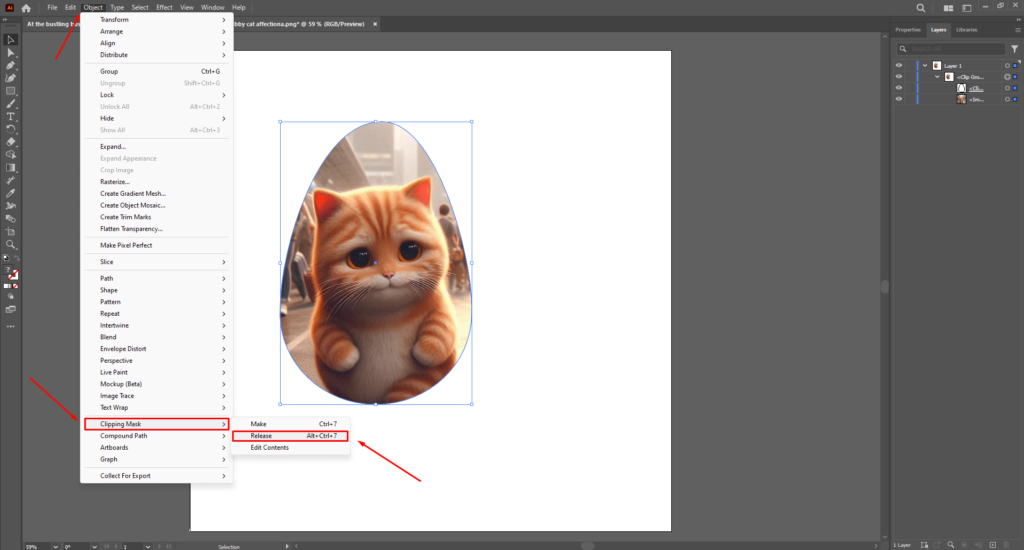
Method 2: Removing the Entire Clipping Mask
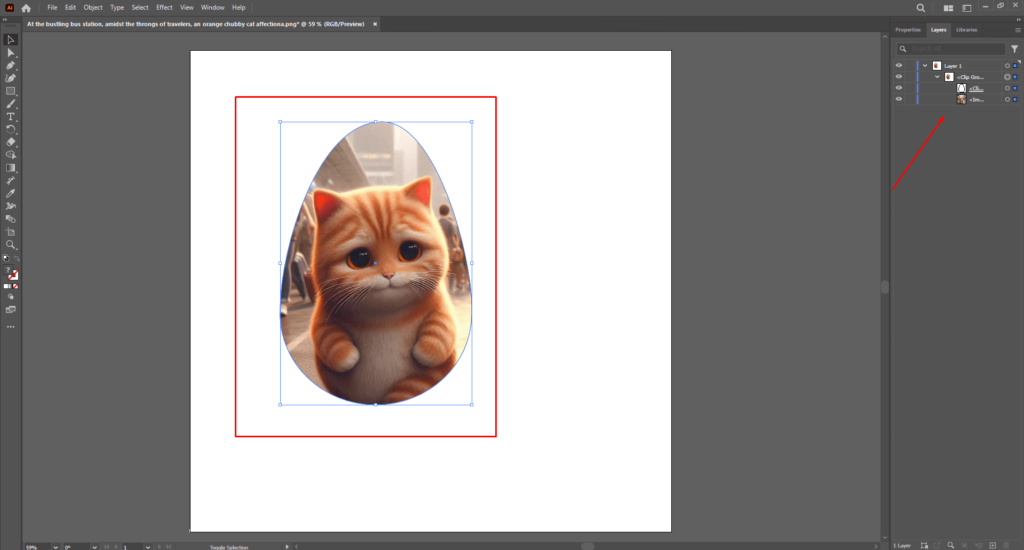
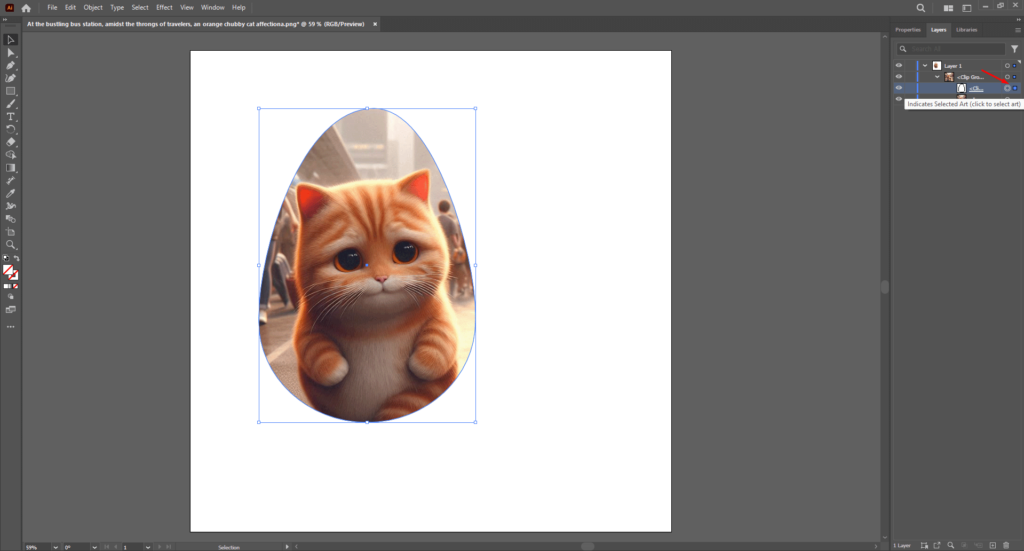
Step 1: In the Layers panel, locate the group that contains the clipping mask.
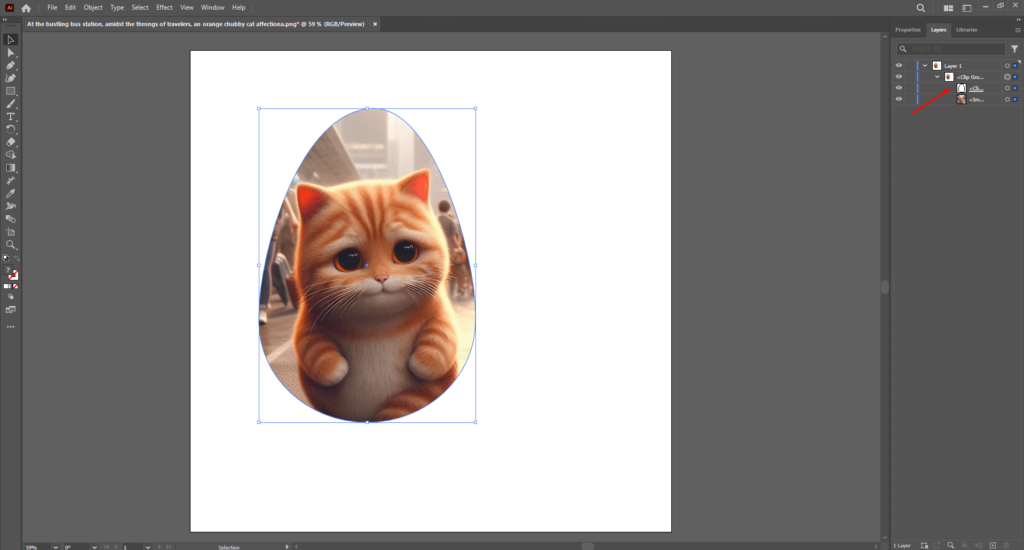
Step 2: Click on the name of the clipping mask group in the Layers panel to select it.
Step 3: At the bottom of the Layers panel, you’ll see a rectangle button with a corner sliced out.
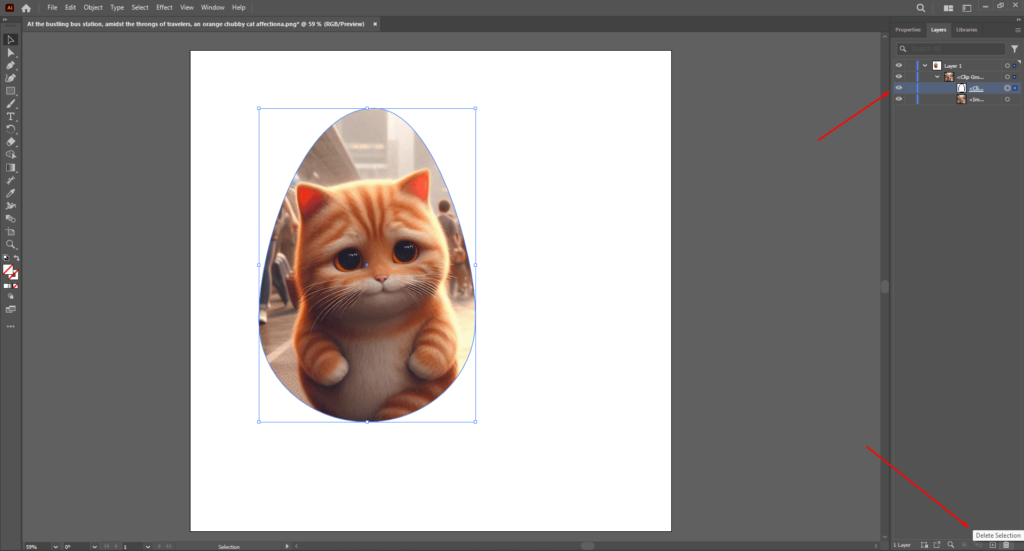
Step 4: Click this button to release the clipping mask.
Tips to Create a Perfect Clipping Path in Illustrator
Here are some tips for creating a perfect clipping path in Illustrator:
- Check the layer order. Position the clipping path above the layer you want to clip in the Layers panel.
- Use pre-defined shapes like rectangles, circles, or stars for simpler clipping paths.
- In the control panel, uncheck the “Fill” and “Stroke” options to focus solely on the path itself.
- Use the Pathfinder panel to combine or modify shapes for your clipping path.
Conclusion
To sum up, what is a clipping mask in Illustrator? a clipping mask in Illustrator is a versatile tool that acts like a stencil. It uses a specific shape to define which portions of underlying objects are visible.
This powerful tool allows you to achieve intricate designs, control object shapes, and add depth to your illustrations. We hope you can now create your one clipping path in Illustrator.
However, for a high quality clipping path service, you can check out Meta Clipping Path anytime. We’ve best both Illustrator and Photoshop experts who can create accurate and precise works.
FAQs
How do you replace an image in a clipping mask in Illustrator?
To replace the image, first select the mask. Then, Go to the file menu. Then, Choose Place. Next, select the image you want to add.
What is a clip group in Illustrator?
A clip group in Illustrator is a group of objects acting as a single unit under a clipping mask.
How do I duplicate a layer in Illustrator?
First, select the layer. Then, from the panel menu, select Duplicate layer and click on it. You can also drag the layer you want to duplicate to the New Layer option.
What do you do if the clipping path is not working?
Sometimes clipping path isn’t working in Illustrator. To fix this, double-check the Layers panel. The clipping path must be above the object you want to clip.
Meta Clipping Path – A well-known one-stop photo editing service provider company with 5+ years of experience and 25+ highly skilled professionals.
Working with 20 reputed worldwide e-commerce companies and 200+ satisfied customers.
![Read more about the article How to Convert Clipping Mask to Shape Illustrator [Expert Photo-editing Tips for You]](https://metaclippingpath.com/wp-content/uploads/2024/06/How-to-Convert-Clipping-Mask-to-Shape-Illustrator-300x160.png)

![Read more about the article How Do Clipping Masks Work? [Step-by-Step Guide]](https://metaclippingpath.com/wp-content/uploads/2024/05/How-Do-Clipping-Masks-Work-300x160.png)